
Buns
How Do You Make Sticky Buns
Jan
Cinnamon Sticky Buns
Following his sixth sticky bun from this batch, my father yelled, “I definitely ban you from cooking them again!” “Elise, I completely forbid you from making these again!” “That’s really excellent, isn’t it? I’m delighted you enjoy them, and thank you for your support “I said with a smile. We had to eventually freeze the few that were left since we didn’t want to fully ruin our appetites for the rest of the day. Lori Rice is a woman who works in the fashion industry. Because they are laden with melting brown sugar and nuts, these sticky buns are nearly impossible to resist eating them all.
The recipe has been modified from one that appeared in Oprah Magazine.
What’s the Difference Between Sticky Buns and Cinnamon Rolls?
Both will fill your house with the beautiful scent of cinnamon and baking, and both will need you to shape the dough into pinwheels, but there is a significant difference between the two recipes. Sticky buns are made with nuts (typically pecans), but cinnamon rolls are not generally made with nuts. Sticky buns are cooked in a pan with the nuts and sweeteners on the bottom, similar to a cinnamon roll. After baking, they are turned over so that the gooey bottom becomes the topping. Because of the nuts and the sugar topping, the sticky buns are a little more thick.
You may also try ourHomemade Cinnamon Rollrecipe if you want to feel less like a nut.
Using Orange Zest in Cinnamon Sticky Buns
The addition of orange zest to our sticky bun recipe gives the bun a subtle hint of citrus taste. The nuttiness of the walnuts pairs beautifully with the citrus flavour. Lemon zest can be substituted, or omitted entirely, depending on your preference.
Working with Yeast
Make no mistake: baking with yeast is nothing to be afraid of! Yeasted flour is merely another component; it is only alive because it is fermented. Activating those latent microorganisms by combining them with water and sugar allows them to consume the sugar and produce carbon dioxide, which causes the dough to rise as a result of the mixing process. Yeast like being warm, but does not want to be overheated. It is for this reason that we dissolve it in warm water. When the temperature reaches roughly 135°F, yeast begins to die.
Where Should Dough Rise?
Be assured that baking with yeast will not cause you any problems. Yeasted flour is just another ingredient; it’s only that it happens to be living. Activating those latent microorganisms by combining them with water and sugar allows them to consume the sugar and produce carbon dioxide, which causes the dough to rise as a result of the fermentation process.
However, yeast does not like being too hot, and so prefers a comfortable temperature range. In order to dissolve it properly, we need to use warm water. A temperature of 135°F will cause yeast to die. If it’s too hot for you to touch, it’s probably too hot for the yeast, too, according to this rule.
Bake Sticky Buns Fresh for the Morning
When you wake up to the fragrance of sticky buns baking in the oven, there’s nothing like it! The overnight rise in the refrigerator is required in this recipe for this reason. Continue with the recipe until Step 5, at which point the rolls should be refrigerated. After removing them from the oven first thing in the morning and allowing the dough to come to room temperature while your oven is preheating to 375°F (for around 30 to 60 minutes), your cookies will be ready. After that, bake the rolls according to the directions in Step 6 for a sumptuous breakfast!
Serving Suggestions
Sticky Buns are a delicious breakfast or brunch treat that everyone will enjoy. To make a quick breakfast or brunch, serve these Cinnamon Sticky Buns with a Parfait with Maple Yogurt, Citrus, and Pomegranate. Also delicious with a homemadeSpinach and Artichoke Quiche, a homemadeSpinach Frittata, and an old-fashionedMimosa are these Cinnamon Sticky Buns.
Swaps and Substitutions
- Make It Gluten-Free: Do you have a gluten intolerance? Make this dish for your next get-together. Gluten-Free Instead, make Cinnamon Rolls. Sugars are classified into the following categories: It is possible to substitute dark brown sugar for the light brown sugar while making the filling. The topping may be made with maple syrup or even more brown sugar if you don’t have any honey on hand, or you can use honey and more brown sugar if you don’t have any. Remove the nuts from the recipe: If you have a nut allergy, sunflower or pumpkin seeds can be used in place of the pecans in this recipe. Alternatively, exclude the nuts entirely.
More Breakfast and Brunch Ideas
- Can’t have gluten? Make it gluten-free. Preparing this dish can save you time and money! Gluten-Free In lieu of that, make cinnamon rolls. Sugars are classified into the following types: Alternatively, you may replace the light brown sugar with a dark brown sugar for the filling. The topping can be made with maple syrup or even more brown sugar if you don’t have any honey on hand, or you can use honey in place of the maple syrup if you have. Nut-free is the way to go: Sunflower or pumpkin seeds can be used in place of the pecans if you have a nut sensitivity. Remove the nuts entirely if you like.
- 1/4 cup warm water (105 to 115 degrees Fahrenheit)
- 1 (1/4-ounce) box active dry yeast
- 1/3 cup sugar, divided
- 7/3 cupmilk
- 4 tablespoons unsalted butter, at room temperature, plus more for greasing
- 3 big egg yolks
- 1 tablespoon finely gratedorange zest
- 1 1/4 teaspoonssalt
- 4 cups all-purpose flour, divided, plus more for dusting
- 7/3 cup milk
- 1/2 cup finely crushed light brown sugar
- 1 teaspoon ground cinnamon
- 4 tablespoons unsalted butter
- A 3/4 cup tightly packed light brown sugar
- 4 tablespoons unsalted butter
- 3 tablespoons honey
- 1 teaspoon light corn syrup
- 1 1/2 cups (6 ounces) finely chopped pecans
- Make the dough by combining the following ingredients: Warm water, yeast, and 1 teaspoon sugar are combined in the bowl of an electric mixer on low speed. Stir until the sugar is dissolved, then set aside for 5 minutes to froth. Combine the milk, butter, remaining sugar, egg yolks, orange zest, salt, and 3 cups flour in a large mixing bowl. Mix on a moderate speed until everything is well-combined. Alternately use a dough hook to carefully mix the remaining 1 cup of flour while continuing to work on a moderate speed. Increase the speed to medium and knead the dough for 3 to 5 minutes, or until it is smooth and slightly sticky (adding a little more flour if it is too moist). Form the dough into a ball and place it in a large mixing basin coated with butter. In a large mixing basin, turn the dough over to coat it with the butter. Wrap the bowl tightly with plastic wrap. Allow 1 hour for the dough to rise in a warm location until it has doubled in bulk (or 2 hours if not in an entirely warm place). After the dough has doubled in size, punch it down. Turn out onto a lightly floured surface and allow to rest for 20 minutes before continuing. Lori Rice is a woman who works in the fashion industry. Lori Rice
- Prepare the filling as follows: In a small mixing bowl, combine the brown sugar and cinnamon. Butter should be melted in a separate basin and kept separate
- The dough should be rolled out and sprinkled with cinnamon sugar: Roll out the dough onto a floured board into a rectangle about 12″ x 18″. Sprinkle the cinnamon-sugar mixture over the top after brushing with melted butter. Lori Rice is a woman who works in the fashion industry. Make a cylinder out of the dough and cut crosswise: Begin by rolling the dough into a cylinder from the long side of the bowl. Place seam side down on a cutting board and cut into 15 slices crosswise. Lori Rice
- Prepare the topping as follows: Brown sugar, butter, honey, and corn syrup are combined in a 1-quart pot over low heat, stirring constantly, until the sugar and butter are melted. Sprinkle pecans on top of the batter after it’s been poured into a buttered 9″ x 13″ pan. Lori Rice
- Place dough rounds, flat side down, on top of the prepared topping in the following order: Attempt to cram them together so that they touch. Refrigerate overnight after covering with plastic wrap, allowing space for the buns to rise in the middle. Lori Rice is a woman who works in the fashion industry. Bake: Using tongs, take the rolls out of the refrigerator and set them aside at room temperature for 30 to 60 minutes while the oven is preheating. Preheat the oven to 375 degrees Fahrenheit. Bake the buns for 30 to 35 minutes, or until they are golden brown. Lori Rice
- Remove from the oven and flip the following: Remove the pan from the oven and carefully flip it onto a serving tray or baking dish (be cautious not to spill the hot topping on your toes!) shortly after. Allow the buns to cool slightly before serving them warm.
| Nutrition Facts(per serving) | |
|---|---|
| 414 | Calories |
| 21g | Fat |
| 52g | Carbs |
| 7g | Protein |
Display the Complete Nutrition Label Hide the entire nutrition label
| Nutrition Facts | |
|---|---|
| Servings: 15 | |
| Amount per serving | |
| Calories | 414 |
| % Daily Value* | |
| Total Fat21g | 27% |
| Saturated Fat 8g | 40% |
| Cholesterol79mg | 26% |
| Sodium205mg | 9% |
| Total Carbohydrate52g | 19% |
| Dietary Fiber 2g | 9% |
| Total Sugars 25g | |
| Protein7g | |
| Vitamin C 1mg | 4% |
| Calcium 57mg | 4% |
| Iron 2mg | 12% |
| Potassium 148mg | 3% |
| *The % Daily Value (DV) tells you how much a nutrient in a food serving contributes to a daily diet. 2,000 calories a day is used for general nutrition advice. |
The nutritional information has been estimated using an ingredient database and should be regarded as an educated guess at best. When there are numerous ingredient alternatives mentioned, the first one listed is used to compute the nutritional value. There are no garnishes or extra ingredients listed in this recipe.
Easy Sticky Buns
Recipe for simple homemade sticky buns created with a fast, from-scratch dough for whenever you desire homemade sticky buns. Baked goods, especially sweet buns, are a huge weakness of mine. Cinnamon rolls, caramel rolls, and sticky buns are some of my favorite baked goods. This simple sticky bun recipe begins with a quick and easy homemade dough that can be prepared in around half the time it takes to prepare a typical roll dough. As a result, you can have these delectable buns available whenever the mood strikes.
How to make sticky buns
Creating cinnamon rolls is a method that is quite similar to making cinnamon rolls. Make the handmade dough as well as the sticky topping first. Then, handmade dough is rolled out and covered with filling before being wrapped up and sliced into pieces before being placed on top of a sticky coating to finish.
How are sticky buns different than cinnamon rolls?
Creating cinnamon buns is a procedure that is quite similar. Make the handmade dough as well as the sticky topping before you begin. Then, handmade dough is rolled out and loaded with filling before being folded up and sliced into pieces before being placed on top of a sticky covering to bake.
How to store sticky buns
It is better to consume them when they are still fresh and warm. If you have any leftovers, simply cover them and keep them at room temperature.
More sweet roll recipes
- Fresh and warm are the finest times to consume them. Simply cover and keep them at room temperature if you have any leftovers!
I appreciate hearing from folks who have tried my recipes and enjoyed them! If you’ve tried this quick sticky bun recipe, please let me know how it turned out in the comments section below! Follow me on FACEBOOK, INSTAGRAM, and PINTEREST for even more mouth-watering recipes, or subscribe to my recipe newsletters to receive them directly in your inbox.
DOUGH
- 13 cup milk (low-fat is OK)
- 3 tablespoons granulated sugar
- 13 cup butter
- 3 12 teaspoons instant yeast
- 34 cup warm water (105-115 degrees Fahrenheit)
- 3 cups all-purpose flour
- 12 teaspoon salt
FILLING
- 31/4 Cup Brown Sugar (packet), 14% Cup Granulated Sugar, 1 teaspooncinnamon, 14% Cup Butter (softened)
TOPPING
- 3 eggs, beaten
- 6tablespoonsbutter (melted)
- 12cup brown sugar (packed)
- 14cupgranulated sugar
- 14 cup dark corn syrup
- 14teaspoonsalt
- 2tablespoonswater
- 1cup coarse-chopped pecans (optional)
- Prepare a 9×13-inch metal baking pan with cooking spray and set it aside. In a small saucepan, combine the milk, sugar, and butter until well combined. Heat over low heat, stirring constantly, just until the butter melts and the sugar dissolves. Cool to around 100-105 degrees Fahrenheit. Fill the bowl of a stand mixer halfway with the milk mixture
- Combine the yeast and warm water
- Set aside. To the yeast mixture, add 2 cups of flour and a pinch of salt. Mix on a low speed for approximately 1 minute, using a dough hook. While the mixer is still running, gradually add the remaining flour, 12 cup at a time. For about 12 minutes, or until the dough begins to clean the sides of the basin, continue mixing. Knead the dough on a low speed for another 2 minutes, or until it is smooth and elastic to the touch – the dough will still be somewhat sticky to the touch at this point. Place the dough in an oiled mixing basin, rotating it to coat the surface with grease. Cover the dough with a clean, dry dish towel to prevent it from rising. Allow it to rise for approximately 10 minutes in a warm, draft-free environment. Preparing the topping while the dough is rising is important. In a medium-sized mixing basin, whisk together the melted butter, brown sugar, granulated sugar, corn syrup, and salt until smooth. Add the water and whisk until everything is well-combined. Pour the mixture into the pan that has been prepared. If required, tilt pan to ensure that the mixture completely covers the bottom of the pan. If using pecans, distribute them equally over the dish. Leave to rest
- Turn the dough out onto a floured board and spread it out into a rectangle measuring 12×16 inches
- Combine the filling ingredients in a small bowl and distribute over the dough. In order to make the filling adhere better to the dough, I gently push it into the dough. Roll the dough up lengthwise, squeezing the seam together to seal it. Cut into 12 pieces and arrange on top of the topping in the baking dish you’ve prepared. In order to cut the dough, I use a serrated knife. Cover the baking dish with a dish towel and let aside for approximately 15 minutes to allow the dough to rise. Meanwhile, preheat the oven to 350 degrees Fahrenheit. Preheat the oven to 200°F and bake for 20-25 minutes, until the rolls are golden brown. Tent with aluminum foil and continue to bake for an additional 10-15 minutes, or until the potatoes are completely cooked through. Allow the sticky buns to cool for 5 minutes in the pan. Invert the pan by placing a serving dish over it and carefully inverting it. Due to the fact that the topping will be hot, proceed with caution. Carefully remove the pan from the oven and replace any topping that has come off
- Allow the buns to rest for 10-15 minutes before serving.
*Nutrition values are estimations based on available information. 1 sticky bun per person Calories: 466 kilocalories (23 percent ) 66 g of carbohydrates (22 percent ) 5 g of protein (10 percent ) 21 g of fat (32 percent ) Saturated fat: 9g Saturated fat: 9g Saturated fat: 9g Saturated fat: 9g Saturated fat: 9g Saturated fat: 9g Saturated fat: 9g Saturated fat: 9g Saturated fat: 9g Saturated fat: 9g Saturated fat: 9g Saturated fat: 9g Saturated fat: 9g Saturated fat: 9g Saturated fat: 9g Saturated fat: 9g S (45 percent ) Cholesterol: 38 milligrams (13 percent ) Sodium: 297 milligrams (12 percent ) Potassium: 144 milligrams (4 percent ) 2 g of dietary fiber (8 percent ) Sugar (39 g) (43 percent ) 470 International Units of Vitamin A (9 percent ) Vitamin C: 0.1 milligrams Calcium: 51 milligrams (5 percent ) 2 milligrams of iron (11 percent ) Kate was five years old when she received her first cookbook, and she hasn’t stopped cooking since then!
Her mouth-watering dishes have appeared on Food Network, MSN, Better Homes and Gardens, Buzzfeed, The Huffington Post, and other publications. In her spare time, she enjoys spending time with her husband and their five children on their tiny farm, where she cooks and bakes.
Reader Interactions
Advertisement
Ingredients
The original recipe yields 12 servings of gnocchi. The ingredient list has been updated to reflect the number of servings specified.
Directions
- Warm water and yeast in a large mixing basin until yeast is completely dissolved. Allow for about 10 minutes, or until the mixture is creamy. Advertisement
- In a large mixing bowl, combine the yeast mixture with the buttermilk, eggs, 2 1/2 cups flour, 1/4 cup softened butter, 1/4 cup sugar, baking powder, and salt
- Whisk well to blend. Advertisement Half-cup at a time, beat vigorously after each addition, until all of the flour has been incorporated. The dough should retain its soft and somewhat sticky consistency. When the dough has come together, turn it out onto a lightly floured surface and knead it for around 8 minutes, or until it is smooth and elastic. Divide the dough in half and roll each half into a rectangle measuring 12×7 inches. Spread each half with 1 tablespoon melted butter and sprinkle with 1/4 cup sugar and 1 teaspoon cinnamon, dividing the dish in half. Begin by rolling up the broad side of the halves. Pinch the seams together to provide a good seal. Each roll should be cut into 12 pieces. Pour 1/4 cup melted butter into two 9-inch round cake pans, then coat each with 1/4 cup brown sugar, 2 teaspoons raisins, and 1/2 cup finely chopped nuts. Place 12 slices of dough in each pan, allowing a tiny gap between each slice of dough. Cover and allow to rise until doubled in size
- Bake at 375 degrees Fahrenheit (190 degrees Celsius) for 30 minutes
- Bake for approximately 30 minutes in a preheated oven. Invert the pans onto serving dishes and serve immediately.
Nutrition Facts
Per serving: 488 calories; 9 grams of protein; 70.5 grams of carbs; 19.5 grams of fat; 67.6 milligrams of cholesterol; 586.3 milligrams of sodium Nutrition in its entirety
Sticky Buns
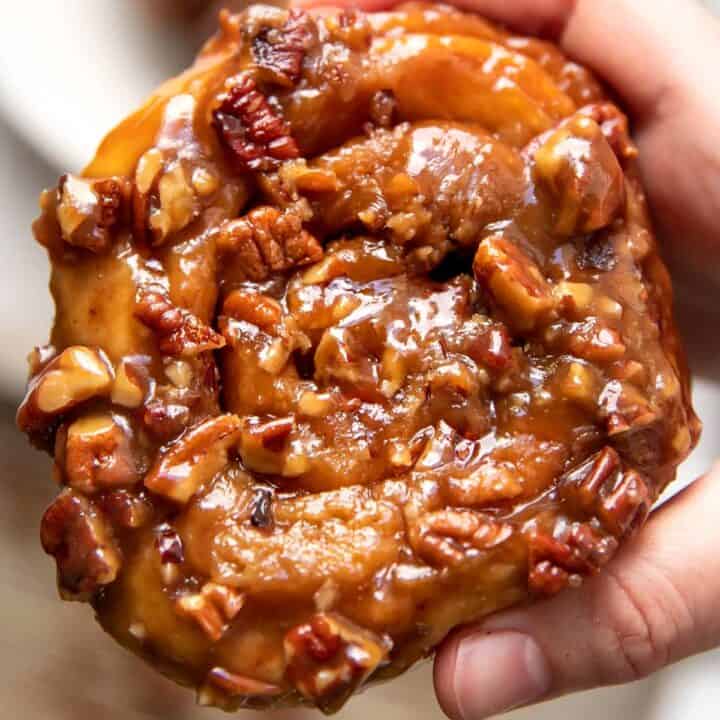
Incredible sticky buns with chopped nuts and a rich brown sugar butter caramel sauce drowned in the most delectable rich brown sugar butter caramel sauce They are the ultimate treat, and they are excellent for every occasion since they are filled with cinnamon sugar. Sticky buns are the ideal treat any time of the year, but they are especially delicious served as a Christmas breakfast or dessert over the holidays. They’re just like soft and fluffyCinnamon Rollsbut are baked in an amazing, rich, and delectable brown sugar and pecan caramel sauce.
Because the dough needs to rise, there is some waiting time needed, but other than that, they are quite simple to make.
What you’ll need to make this recipe
To prepare the dough, I use granulated white sugar; to make the caramel sauce and cinnamon filling, I use light or dark brown sugar (depending on how dark you want it). It contributes a deep caramel flavor as well as a dark brown caramel hue. Ensure that you use whole milk to achieve a rich, soft, and fluffy dough. Whole milk also provides a richer, more flavorful dough than low-fat milk, which would otherwise be lacking. Among the most essential ingredients in stick buns is cinnamon, which is responsible for their distinctive flavor.
How to make Sticky Buns
1. Warm the milk and stir in some of the sugar and yeast until it begins to froth. Cover and put aside until it becomes foamy. 2. In a large mixing basin, combine the melted butter, eggs, vanilla, and sugar. 3. In a stand mixer, combine the egg and yeast ingredients, then gradually add half of the flour until everything is well blended. In a separate bowl, combine the remaining flour and salt until a dough forms. Knead for a few minutes, or until the dough is smooth and elastic in texture. 4.
- 5.
- 6.
- 7.
- 8.
9. Form the dough into a log and then cut it into rolls as desired. Place them in the baking dish on top of the caramel-pecan sauce. Bake for 30 minutes at 350 degrees. 10. Bake for 35 minutes, or until the top is brown, then set aside to cool slightly before serving.
Pro tips for making this recipe
- The addition of orange zest to the dough provides a lovely depth of flavor. For the filling and topping, you can use either dark or light brown sugar
- However, dark brown sugar is preferred. If you don’t have any pecans on hand, walnuts will suffice. Clean borders are achieved by cutting the dough into buns using floss. Make careful to grease both the basin in which the dough will rise and the baking dish in which the buns will bake to prevent them from sticking. Making the caramel sauce while the dough is rising will save you time in the kitchen. It may also be prepared ahead of time and stored in the refrigerator. After 15 minutes of baking, cover the buns with aluminum foil to prevent them from browning excessively. Allow the buns to cool for a short period of time before serving. Alternatively, you could serve them with a dollop of whipped cream for a truly decadent treat. Serve them for breakfast, as a snack, or as a dessert
- They are delicious.
Frequently Asked Questions
These sweet treats are produced with the same cinnamon roll dough and cinnamon sugar filling as their counterparts, cinnamon buns. In contrast to the traditional cinnamon roll, which is cooked in a brown sugar and pecan caramel sauce to get its sticky goodness, sticky buns are baked in a brown sugar and pecan caramel sauce to achieve their sticky goodness.
Can they be prepared in advance?
Place the completed rolls in the refrigerator overnight (with the lid on). Bring them out of the fridge the next day and set them out on the counter to warm up while your oven is preheating to 350°F.
Should they be refrigerated?
If you are making the sticky buns ahead of time, you will need to keep them refrigerated until needed. After baking, there is no need to store them because they will stay nicely in a cold, dry area.
How long do they last?
Sticky buns may be stored in an airtight container for up to 5 days, or they can be frozen for longer storage. Freeze in freezer-safe containers or trays and allow it defrost fully before serving or reheating, if necessary. You may leave a review and tell me how you got on in the comments section below if you’ve tried this recipe for Sticky Buns. I look forward to hearing from you!
Sticky Buns
Sticky buns that are sweet and wonderful, served with a brown sugar pecan caramel sauce. Do not forget to go through my step-by-step images and instructions up top for more information! Course DessertCuisineAmerican Preparation Time: 40 minutes Preparation time: 35 minutes 2 hours of resting time Time allotted: 3 hours 15 minutes 479 calories per serving (14 buns).
Dough:
- 4 cups all-purpose flour plus more for dusting the counter (480g)
- 11/4 ounce package active dry yeast (2 + 1/2 tsp)
- 1/2 cup sugar (100g)
- 6 tablespoons unsalted butter melted plus more for the pan (85g)
- 1 egg
- 2 yolks
- 1 teaspoon salt
- 1 teaspoon vanilla (5ml)
- 4 cups warm milk 110°F (240mL)
- 6 tablespoon
Topping:
- 3/4 cup firmly packed light brown sugar (150g)
- 12 cup unsalted butter (113g)
- 14 cup lemon juice (60ml)
- 12 teaspoon salt
- 1 1/2 cups coarsely chopped pecans (6 ounces)
Filling:
- A half cup of tightly packed light brown sugar (100g)
- 2 teaspoons ground cinnamon
- 4 tablespoons unsalted butter melted (70g)
- Warm the milk to 110 degrees Fahrenheit before mixing in half of the sugar and the yeast. Leave covered for 5-7 minutes, or until the foam starts to form. While the yeast is waking up, melt the butter in a large mixing bowl and whisk in the egg, yolks, vanilla, and the remaining sugar until well combined. Set aside. Add both ingredients to the bowl of your stand mixer and whisk until well blended. Then add half of the flour and beat until well incorporated once more. Toss in the remaining flour and use a dough hook to mix on medium speed for approximately 5 minutes, or until the dough comes together. Transfer the dough to a lightly floured area and knead it until it is smooth and elastic, about 10 minutes. When you press on the dough, it should bounce back. This is a sticky dough, but you can adjust the consistency by adding a little flour if it appears too moist. Cover with plastic wrap and let aside in a warm place to rise. Place dough in a lightly greased bowl. To double in size, the dough will need around two hours. While the dough is rising, prepare the topping by mixing together the brown sugar, honey, butter and salt in a small saucepan until smooth. Over low heat, constantly stirring, until the butter and sugar have melted. Pour the mixture into a 9×13 pan that has been gently greased and sprinkle with coarsely chopped pecans before setting it aside. Preheat the oven to 375 degrees Fahrenheit. The dough should be transferred to a floured surface (I prefer to use a pastry mat for this) and carefully spread out into a rectangle shape that is approximately 12×18 inches once it has risen. Roll the dough out as required to spread and level it
- In a medium-sized mixing basin, whisk together the brown sugar and cinnamon until well combined. Brush the top with 4 tbsp melted butter and then sprinkle the cinnamon sugar on top in a uniform layer. It is possible to use your hand to smooth the sugar out into an even layer if necessary. Gently roll the dough’s long edge into a tight roll. Repeat with the other side. Cut the chicken into 12-13 even pieces and lay them in the baking dish you’ve prepared. Tips on how to cut are included in the notes. Bake for approximately 35 minutes, or until the top is brown. After 15 minutes, cover the tops with aluminum foil to prevent them from being too colored. Allow it cool for a few minutes before running a knife around the edge and inverting onto a serving plate
- Serve while still warm.
- The addition of orange zest to the dough provides a lovely depth of flavor. For the filling and topping, you can use either dark or light brown sugar
- However, dark brown sugar is preferred. If you don’t have any pecans on hand, walnuts will suffice. Clean borders are achieved by cutting the dough into buns using floss. Make careful to grease both the basin in which the dough will rise and the baking dish in which the buns will bake to prevent them from sticking. Making the caramel sauce while the dough is rising will save you time in the kitchen. It may also be prepared ahead of time and stored in the refrigerator. After 15 minutes of baking, cover the buns with aluminum foil to prevent them from browning excessively. Allow the buns to cool for a short period of time before serving. Alternatively, you could serve them with a dollop of whipped cream for a truly decadent treat. Whether for breakfast, a snack, or a dessert, they are excellent options
calorie count 479kcal|carbohydrate count 61g|protein count 6g|fat count 24g|saturated fat count 11g|cholesterol count 80mg|sodium count 299 mg|potassium count 141 mg|fiber count 2g|sugar count 33g|vitamin A 541IU|vitamin C 1mg|calcium count 62mg|iron count 2mg * Notice Regarding Nutrition
Maple Pecan Sticky Buns
Breakfast has never been more decadent as it is now! The most amazing make-ahead maple pecan sticky buns have arrived in the form of these. Even the most ardent cinnamon roll purists will be won over by this recipe for handmade sticky buns. Before you begin, make sure you have thoroughly read through all of my instructions. If you can have brown sugar, buttery, caramel-ish pecan sticky buns instead of plain cinnamon rolls, why not? There isn’t a single parallel to be made. Their flavor is unlike anything you’ve ever had before, and they rival the traditional cinnamon roll in terms of texture and flavor.
You’ll be on the side of the large buns in no time.
Cinnamon rolls with a sticky glaze.
These Maple Pecan Sticky Buns Are:
- A delectable treat with a maple flavor and a nutty finish. Packed with warm cinnamon flavor, this dish is a delight. Pure maple syrup is used in this recipe. Finished with a sticky, brown sugared, caramel-y, buttery, maple pecan topping, this dessert is sure to please. A recipe for breakfast that can be prepared ahead of time or overnight– ideal for holiday entertaining. Recipes that are easy to make and may be begun the night before (such as pumpkin French toast casserole!) A recipe for a festive Christmas breakfast or Easter brunch that is exceptionally unique
Three Parts to Pecan Sticky Buns
The maple pecan sticky buns that we’re making today are divided into three parts:
- The crust, the filling, and the maple pecan topping are all delicious.
Let’s take a short look at each of them. Dough: This is the same dependable dough that I use for my overnight cinnamon rolls and maple cinnamon rolls, among other things. This signifies that (1) it’s dependable – I’ve used this dough at least 30 times in the previous couple of years and have complete confidence in its quality. (2) It is a recipe that may be made ahead of time, but it is not required to be. You may start preparing these maple pecan sticky buns the night before, or you can finish them entirely in the morning before serving them.
- And (3) it is well-liked.
- The dough is buttery and soft–it is the softest, richest dough you will find on any of my recipes websites.
- Why?
- If you don’t have a bag of dark brown sugar on hand, light brown sugar will suffice.
- Topping:Maple and pecan, you have us all utterly weak in the knees with your presence.
Traditionally, corn syrup is used to create the gooey caramel coating, but there’s no reason why pure maple syrup couldn’t be substituted in its place. A great deal of taste would be lost if this were the case.
How to Make Maple Pecan Sticky Buns
To help you through the process, I’ve included a slew of step images, which you can see just below the written recipe. (Please continue to scroll down.) It is included since I believe working with yeast is the most intimidating aspect of the process. In addition, I don’t want you to be scared of the material. Sticky buns aren’t something to be afraid of! Let’s go through the fundamentals of preparing sticky buns:
- Prepare the sticky bun dough
- Allow the dough to rise for 30 minutes (1st rise). Transfer the dough to a floured surface and knead it for a few minutes before placing it in a lightly oiled mixing bowl. Allow the dough to rise until it has doubled in size, around 1-2 hours. Prepare the topping and then pour it into a baking pan that has been buttered. Using a rolling pin, roll the dough into a rectangle about 12 by 18 inches. Make certain that the dough is smooth and uniformly thick
- Spread the filling on top of the pastry dough. Roll the dough tightly and cut it into rolls. This should result in a log of 18 inches in length. Make 12 equal rolls out of the dough. Place them in the baking sheet on top of the topping and bake for 30 minutes. (These rolls are baked in an upside-down position! )
- Allow the rolls to rise a second time
- Bake. The rolls need to be baked for around 25 minutes. Tip: Halfway through the baking time, lightly cover the rolls with aluminum foil to prevent the tops from becoming too brown. Flip the rolls and serve them. Allow the rolls to cool for 5 minutes before serving. Invert the pan onto a large serving plate, using oven mitts to help you. Deliciously melt down the edges of the pan as the heated topping cools. Serve when still heated.
Baking with Yeast Guide
When working with baker’s yeast, have thisBaking with Yeast Guide handy for reference. I’ve included realistic responses to all of your frequently asked yeast questions.
Overnight Instructions
When working with baker’s yeast, keep this Baking with Yeast Guide close at hand. The answers to all of your frequently asked yeast inquiries are included in this chapter.
Description
When working with baker’s yeast, have this Baking with Yeast Guide handy. I’ve included realistic solutions to all of your frequently asked yeast issues.
Dough
- 1 cup (240 mL) whole milk *
- 2/3 cup (135 g) granulated sugar
- 1 and 1/2 teaspoons active dry yeast or instant yeast (two standard packets)*
- 1 and 1/2 teaspoons granulated sugar a half cup (115g) unsalted butter, softened at room temperature and sliced into four pieces
- Two large eggs, at room temperature
- 1/2 teaspoon salt
- Four and a half cups (563g) all-purpose flour (spoonleveled), plus additional flour for the work area
Topping
- 2 1/2 cups (250 g) chopped nuts
- 1/2 cup (1 stick
- 115 g) unsalted butter
- 2/3 cup (135 g) packed light or dark brown sugar
- 1/4 cup (60 mL) whole milk
- 1/4 cup (60 mL) pure maple syrup
- 1/4 teaspoon salt
Filling
- Unsalted butter, melted to room temperature (about 1/4 cup or 60 grams)
- Half-cup (100 g) packed light or dark brown sugar
- 2 tablespoons ground cinnamon
- Make the dough by combining the following ingredients: Heat the milk to around 95°F (35°C) in the microwave or on the stovetop. Pour the heated milk into the bowl of a stand electric mixer fitted with the dough hook attachment and mix on low speed until smooth (OR you can use a handheld mixer OR no mixer, but a stand mixer is ideal). Manually whisk in the sugar and yeast until well incorporated. Cover the bowl with a cloth and set aside for 5-10 minutes, or until the yeast is frothy. If the yeast does not dissolve and froth, replace it with active yeast and try once again. Reduce the speed to low and gradually include the softened butter until it is somewhat broken up. In a separate bowl, whisk together the eggs one at a time, followed by the salt. Because the butter will not be fully incorporated into the mixture, don’t be concerned if it remains in chunks. Gradually incorporate the flour into the mixture on a low speed. Once all of the ingredients have been incorporated, mix on medium speed until a soft dough is formed. Continue beating at medium-high speed for another 6 minutes, or until the dough is soft and pliable. * This stage may be done by hand, if you don’t have a stand-mixer with a hook attachment. Simply transfer the dough to a lightly floured surface and work it with your hands for 1 minute until it’s smooth and elastic. Form the dough into a ball and place it in a basin that has been lightly oiled. Cover the bowl with aluminum foil, plastic wrap, or a clean kitchen towel to keep the bacteria from growing. To rise, place the dough in a generally warm setting for 1-2 hours, or until it has about doubled in size. (I always let it sit on the counter to rise before serving.) See my response to the question Where Should Dough Rise? in myBaking with Yeast Guide for a little reduction in rise time. In the meantime, prepare the topping: Grease the bottom and sides of a 9-by-13-inch glass or metal baking dish with butter or margarine. In a shallow baking pan, spread pecans in an equal layer. Make a mental note to put it away. In a small saucepan, cook the remainder of the topping ingredients over medium heat, stirring constantly. Bring the mixture to a simmer after stirring until the butter has melted. Allow for 2 minutes of simmering time, stirring periodically. Remove from heat, stir briefly, and then pour over pecans to combine flavors. Remove from consideration
- Toss the risen dough out onto a lightly floured work surface and, using a rolling pin, roll it into a rectangle measuring 12 x 18 inches in size. Make certain that the dough is smooth and uniformly thick
- Filling should be added last: Spread the dough with softened butter all over it. Sprinkle the brown sugar and cinnamon on top in a uniform layer. Roll the dough into a log that is 18 inches long and tightly rolled. Make 12 equal rolls out of the dough. Make an arrangement of them on top of the pecan topping
- Cover the rolls with aluminum foil or plastic wrap and allow them to rise in a warm environment for 45-60 minutes more
- Preheat the oven to 375 degrees Fahrenheit (191 degrees Celsius). Bake the rolls for 25-30 minutes, or until they are golden brown on top, depending on your oven. I recommend loosely covering the rolls with aluminum foil about halfway through the baking time so that the centers can cook before the tops become too brown and burnt. Remove the baking pan from the oven and set it on a wire rack to cool. Allow to cool for 5 minutes before carefully inverting the pan onto a large serving tray using oven mitts. The heated topping will run down the edges of the dish. Serve when still heated.
Notes
- Instructions for Preparing the Rolls the Night Before: Prepare the rolls through step 5 the night before you plan to serve them. Refrigerate the rolls for 8-12 hours once they have been firmly wrapped. Remove the mixture from the refrigerator the next morning and let it to stand on the counter for 1-2 hours before proceeding with step 7
- Instructions for freezing baked rolls: Baked rolls may be stored for up to 2-3 months. To prepare, thaw overnight in the refrigerator and then reheat before serving. You may also freeze the unbaked buns in the following manner: Step 7: Bake the rolls for only approximately 10 minutes at 375°F (191°C) in the oven. Allow it cool fully before covering firmly and freezing. To prepare the rolls for serving, remove them from the freezer and place them in the refrigerator a few hours before serving. Then, just before serving, finish baking them to perfection. A few special tools (affiliate links): a KitchenAid stand mixer, a 5qt Tilt-Head Glass Measuring Bowl, glass mixing bowls, rolling pin, glass baking dish, and a Melamine Serving Platter are recommended. Milk: Whole milk or 2 percent milk are the finest options for this delicious dough and icing recipe. In 2021, the following changes will be made to the recipe: For the topping, I lowered the quantity of milk used from 3/4 cup to 1/4 cup in order to lessen the likelihood of separation difficulties. Only 1/4 cup (60mL) of milk is required today, and the topping holds together much better. Active dried yeast will result in significantly longer rise times as compared to fresh yeast. Instant yeast is something I constantly use. For answers to frequently asked questions about yeast, consult myBaking with Yeast Guide. Brown Sugar (also known as molasses): Dark brown sugar is excellent for adding taste, although light brown sugar can be substituted in a pinch if necessary.
Maple sticky buns with pecans, maple sticky buns with pecans First and foremost, prepare the dough. You’ll need yeast, warm milk, sugar, eggs, butter, flour, and salt to make this recipe come together. This is a really soft dough to work with. Cover the dough with a greased bowl and let it aside to rise until it has doubled in size, generally about 1 and 1/2 hours. Prepare the maple pecan topping while the cake is rising. The following is a list of items you’ll need, plus some whole milk. Pecans should be spread onto a prepared baking pan.
- Everything is ready for the topping.
- It should be pounded down to expel air bubbles.
- Spread the top with softened butter.
- Roll it up firmly, slice it, and then lay the slices on top of the maple pecan topping to look like cinnamon rolls.
- They’ll look like this when they’re nice and puffy: Make them in the oven.
- And, my my, does this smell amazing!
- Eat your heart out, you cretin!
Overnight Sticky Buns Recipe: so ooey-gooey good! -Baking a Moment
Sticky Buns have been on my baking list for what feels like a lifetime, and today’s recipe is no exception: Sticky Buns! I reside in what is perhaps the sticky bun capital of the world, and I’m not alone in thinking so. Sticky buns are a part of life in Pennsylvania Dutch country, where they are made almost daily. If you walk into any bakery, grocery shop, or farmers market, you will discover sticky buns that will take your breath away. Believe me when I say that the Amish and Mennonites are not to be trifled with when it comes to making delicacies like these.
Working in local bakeries throughout my adolescence and twenties provided me with all I needed to know about how to produce things like these and other baked goods.
Those tiny women, with their firm shoes and snow-white bonnets, made certain I was aware of what was going on around me.
A gooey, buttery brown sugar caramel coats the soft, buttery yeast dough that has been swirled around warm cinnamon and brown sugar.
The result is a mouthwatering combination of flavors that will make your mouth water! Nothing beats waking up to the fragrance of these delectable treats baking in the oven! Except for when you’re ripping into it with a steaming cup of coffee in hand.
WHAT ARE STICKY BUNS?
Sticky buns are quite similar to cinnamon rolls, with the extra benefit of a brown sugar coating that is baked into them while they are in the oven. As with an upside-down cake, the caramel is poured into a baking pan and cooked till golden brown on top before being flipped out onto a serving tray while the caramel is still still warm. It is at this point that the gooey glaze can be seen streaming down over the buns, covering them in all of its goodness. It’s OK to top with chopped nuts and/or raisins if desired, but you may also leave them simple and in their natural state, as God intended.
Click here for a recipe for an upside-down cake that will blow your socks off: Pineapple Upside-Down Cake.
HOW TO MAKE HOMEMADE STICKY BUNS
The components of this baking project are diverse, so if you’re seeking for a creative way to spend an afternoon, you’ve come to the perfect spot!
THE DOUGH
We should begin with the dough because it is the most time-consuming. It’s not difficult, but it does take some time to rise, so it’s preferable to start with this step before moving on. You may use the time to work on the topping and filling while you’re waiting. To begin, dissolve sugar in a cup of warm water. The water should be lukewarm at all times. If you have a thermometer, aim for a temperature of 105 degrees Fahrenheit. If not, that’s OK; simply adjust the temperature to that of a baby’s bath.
- Allow the dry active yeast to dissolve on the surface of the sweetened water by sprinkling it all over the surface of the water.
- If your yeast does not bubble up, it is most likely dead, and you should start over with a fresh batch.
- If it foams, you should be able to proceed to the following stage without any problems.
- It’s time to start incorporating the flour.
- It is sufficient to work the dough into the bowl, a small amount at a time, until the dough becomes no longer sticky and forms itself into a ball that pulls neatly away from the edges of the bowl.
- Now you want to give it a nice long knead to truly develop the glutens and give the bread that stretchy, elastic quality that is so delicious.
- Giving your dough the windowpane test will allow you to determine whether or not your glutens have fully grown (more on that below).
In a warm location, let the dough to rise until it has doubled in size. This normally takes about an hour in my kitchen, but every environment is different, and yours may require more or less time than mine.
THE TOPPING
During the time it takes for the dough to rise, you may prepare the topping. They used to refer to this substance as “goo” when I worked in a bakery back in the day. Lol! Even though it’s a fairly true description, I believe the words “caramel,” “butterscotch,” or even “brown sugar glaze” seem a bit more tasty! Using a small microwave-safe bowl and gradually heating the ingredients in it until the butter has melted, you can make this treat in no time at all. All you have to do now is stir everything together and you’ve got yourself some goo.
Chopped walnuts are a particular favorite of mine, but pecans are also a fantastic addition.
My husband and children would certainly crucify me if I created ours in this manner, which I find appealing.
THE FILLING
In addition, you’ll need to whip up a little cinnamon and brown sugar magic to use as a filling for the cinnamon rolls. Simply mix everything together with a fork to ensure that the cinnamon is distributed evenly throughout the dish.
HOW TO SHAPE THE ROLLS
As soon as the dough has doubled in size, punch it down and begin shaping the rolls. To begin, flatten out the dough into a large rectangle. The thickness of the rectangle is more essential than the dimensions of the rectangle. The thinner you roll the dough, the greater the amount of surface area available for spreading the delicious cinnamon brown sugar mixture. After that, you’ll have a lot of stuffing swirling throughout the dish. As soon as you’ve gotten it nice and thin (about 1/8-inch thick), spread softened butter all over the surface of the cake.
After that, simply roll everything into a tight log.
These will have to be raised for a second time.
HOW TO BAKE THEM
You have two options: either let them their second rise and bake them immediately, or create overnight sticky buns (see below). If you wish to make the sticky buns ahead of time, just wrap them in plastic wrap and store them in the refrigerator for up to 48 hours or freeze them for up to 2 weeks. To prepare them for baking, first let them come to room temperature before allowing them to rise until they have doubled in size. And then you can just put them in the oven and leave them to do their thing.
When they are placed in the middle, you will know they are finished.
To serve, let them in the pan for around 20 to 30 minutes to cool before flipping them out onto a serving tray while they’re still somewhat warm. So that the glaze is still a little melted, it will coat the sticky buns in the most delectable way possible!
TROUBLESHOOTING
Anything that involves yeast will almost certainly be more difficult to make, so don’t be too harsh on yourself if things don’t turn out perfectly the first time. But please don’t let it put you off by being intimidated. I’ve included the most typical bread-making difficulties below, so if you keep an eye out for these things, you should be able to bake these sticky buns with no issue!
WHY DOUGH SOMETIMES DOESN’T RISE
There are two primary reasons why dough may fail to rise on occasion:
- The yeast has succumbed to its fate. If the yeast is unable to survive in your kitchen, it is because of poor environmental conditions.
Yeast can be dead immediately out of the packaging in some cases. Perhaps it was kept in a heated warehouse for an excessive amount of time before arriving on your grocery shelf. It’s possible that it’s just past its expiration date. Occasionally, we mistakenly destroy our yeast by dissolving it in water that is too hot for it to survive. This is a rather typical situation! Make sure your yeast dissolves at a temperature that is warm enough for a baby’s bath. It should only be lukewarm, or approximately 105 degrees Fahrenheit, at most.
If possible, choose a warm spot to prove your dough, such as near a heat vent or close to the refrigerator, or on a sunny ledge.
WHY YEAST BREADS SOMETIMES COME OUT CRUMBLY
This might be attributable to the fact that the dough was not sufficiently kneaded. When we knead dough, glutens in the wheat are developed, resulting in the elastic texture that is so delicious and gratifying. In the event that you don’t devote enough time to this phase, you will wind up with crumbly rather than stretchy results. A wonderful technique to tell whether your dough has been kneaded long enough is to look at the following: Pinch out a small piece of dough and, using your fingertips, gently stretch it outward from the center to the edges of the bowl.
It should be thin enough that you can see the light going through it, similar to a windowpane.
The more you know, the better!
HOW LONG WILL STICKY BUNS KEEP?
For best results, let the sticky buns out at room temperature for about a day or two. Keeping them well covered will help to prevent them from becoming dried out or stale around the edges. If you have any leftovers after that, simply store them in the refrigerator. They’ll be there for another 5 to 7 days at the very least.
CAN YOU FREEZE STICKY BUNS?
Sticky buns keep well in the freezer! Wrap them tightly in plastic wrap and they will keep for a couple of months in the freezer. Allow them to thaw at room temperature or in the refrigerator.
HOW TO REHEAT STICKY BUNS
Nothing beats a warm sticky bun on a chilly day! These may be reheated in the microwave for approximately 30 seconds, or you can cover them loosely in aluminum foil and bake them at 170 degrees Fahrenheit until they are well cooked through.
You may alternatively slice them horizontally, butter the cut sides, and toast them in a pan over medium-high heat until they are crisp and golden brown. This is referred to as a “grilled bun” in my neighborhood, and it is really delicious!
A FEW MORE OF MY FAVORITEBREAKFAST TREATS:
- Irish Scones, Apple Coffee Cake, French Toast Casserole, and a Homemade Waffle Recipe are some of the dishes you may make.
When you make a qualified purchase through Amazon, I get a commission. These handmade sticky buns are very delicious! This recipe is so gooeyand delicious, and you can make it the day before and bake it fresh in the morning! Breakfast and Brunch are on the menu. Cuisine:American KEYWORDS: how to create sticky buns, sticky buns with pecans, sticky buns recipe, sticky buns how to make Servings:12 Calories:456kcal To finish it off, here’s what you’ll need:
- Because I am an Amazon Associate, I receive money from qualifying purchases made by my customers. It’s impossible not to like these handmade sticky buns! This recipe is so gooey-sweet, and you can make it the day before and bake it fresh in the morning! Breakfast and Brunch are included in the price of the package. Cuisine:American KEYWORDS: how to make sticky buns, sticky buns with pecans, sticky buns recipe, sticky buns Servings:12 Calories:456kcal To finish it off, here’s what you need to do:
To Make the Dough, follow these steps:
- To make the sugar syrup, place the warm water in a large mixing basin and whisk well. Sprinkle the yeast over the water and let it to dissolve and turn frothy, then strain the mixture. Stir in the oil, buttermilk, egg, and salt until everything is well blended. Mix in approximately 2/3 of the flour until everything is well-combined. Pour in the remaining flour, a little at a time, while mixing, until the dough is able to pull away cleanly from the sides of the basin and form a ball
- Knead the dough for roughly 10 to 15 minutes, or until it passes the windowpane test**. Using nonstick spray, lightly coat the bowl, return the dough to it, cover it with plastic wrap, and allow it to prove until it has doubled in volume (about 1 hour).
To Make the Topping, follow these steps:
- In a medium-sized mixing bowl, combine the brown sugar, honey, butter, and salt
- Microwave on high for 30 seconds at a time, stirring after each, until the butter is melted and the mixture is smooth
- Using a 9×13 baking dish, pour the glaze onto the bottom, then sprinkle the nuts and/or raisins on top (if using)
To fill and shape the buns, do the following:
- Once you’ve kneaded the dough a few times, roll it out into a huge rectangle that is about 1/8-inch thick
- To finish, spread the softened butter over the dough’s surface all over. In a small mixing dish, combine the brown sugar and cinnamon
- Spread the mixture over the greased dough in an equal layer
- Repeat. Start by rolling the dough into a tight log starting with one of the shorter edges of the rectangle
- Slice each half of the log in half, then into quarters, and then cut each quarter into three equal rolls. Prepare a baking dish by placing the rolls (cut side up) in it and covering with plastic wrap and refrigerating or freezing for up to 2 weeks (optional
- Skip to step 8 if preferred)
- Remove the unbaked sticky buns from the refrigerator and allow them to come to room temperature (about 45 minutes) before baking them. Allow the sticky buns to proof for approximately 1 hour, or until they have doubled in size. 350 degrees Fahrenheit is the temperature for the oven. Toss out the plastic wrap and continue baking the sticky buns for around 30 to 35 minutes, or until they are puffed and golden brown around the edges and set in the centre. Allow the sticky buns to cool in the pan for 20 minutes before transferring them to a serving tray and allowing them to cool fully
*Instant yeast can be used in place of the dry yeast. It is possible that the wake-up time will need to be lowered by 10 to 15 minutes. When your dough has doubled in bulk, you can tell it has finished rising. * Pinch out a small piece of dough and, using your fingertips, gently stretch it outward from the center to the edges of the bowl. You should be able to pull it as thin as tissue paper without it ripping. Just like a windowpane, it should be made of a thin material that allows light to travel through it.
Amount Per Serving (in grams) Calories456 Calories from fat account for 117 percent of the daily recommended intake.
80g27 percent fiber 2g8 percent sugar 43g48 percent protein6g 80g27 percent fiber Nutritional Supplements 12 percent Vitamin A264IU5 percent Calcium50mg Iron3mg17 percent * 5 percent Iron3mg17 percent A 2000-calorie diet is used to calculate the percent Daily Values (%DV).
Homemade Sticky Buns
When using instant yeast, you may omit this step completely. A 10 to 15 minute reduction in wake-up time is possible. When the dough has doubled in size, you can tell it is finished rising. * Pinch off a small piece of dough and, using your fingertips, gently stretch it outward from the center to the edges of the dough. Tissue-thin should allow you to pull it without breaking the paper. Just like a windowpane, it should be made of a thin material that allows light to pass through. Dietary Guidelines Sticky Buns are a type of bun that is sticky on the inside and outside.
80g27 percent fiber 2g8 percent sugar 43g48 percent protein 6g g 12 percent Vitamin A264IU5 percent Calcium50mg 12 percent Calcium *5 percent Iron3mg17 percent *5 percent Iron3mg17 percent A 2000-calorie diet is used to calculate the percent daily values.
A TASTY BREAKFAST ROLL
Even though I enjoy savory breakfasts, I will never say no to a baked sticky bun if the opportunity presents itself. With a delectable sweet core and a caramel pecan coating, it’s hard to imagine anything more decadent than these cookies. You can’t go wrong with a moist and delicate sticky bun that is bursting with delicious flavor.
I guarantee you that they are significantly less difficult to produce than you would expect. If you’re looking for a special handmade breakfast (or even dessert! ), I highly recommend that you try this recipe for Homemade Sticky Buns.
FREQUENTLY ASKED QUESTIONS:
What exactly does “proofing” yeast imply? Proofing yeast (also known as blooming yeast) is the process of rehydrating the yeast in warm water before using it. Typically, sugar is added to provide something for the yeast to “feed” on, as yeast enjoys the sweet items to feed on. It is also an excellent method of ensuring that the yeast is alive and active. If the yeast does not get frothy or “bloom,” it means that it is no longer alive and active and should not be used in the recipe. Do I need to prove the instant yeast before using it?
- Although I frequently use instant active yeast from a huge jar that I keep on hand, I always check to see whether the instant yeast is still active before using it in a recipe.
- I don’t care for pecans; may I substitute anything else?
- Alternatively, if you are not a fan of nuts in general, you may totally exclude them from the recipe altogether.
- No way, not at all!
- It only takes a bowl, a wooden spoon, and some serious arm power to completely replace the mixer in your kitchen.
- In a stand mixer, knead the dough until it begins to pull away from the edges of the bowl.
- To achieve this, you’ll want the dough to be smooth, elastic, and devoid of lumps.
A warm, draft-free environment is the ideal environment for dough to rise.
Contrary to popular belief, the light emits exactly enough heat to for the bread to rise precisely.
Yes, without a doubt.
What is the best way to keep leftovers?
These sticky buns keep well in the freezer as well.
Alternatively, you may wrap the buns separately and keep them in a freezer bag.
Allow for defrosting to take place at room temperature.
INGREDIENTS NEEDED: (FULL RECIPE AT THE BOTTOM OF THE POST)
- Instant yeast, warm water, granulated sugar, sour cream, all-purpose flour, salt, butter, eggs, brown sugar, nuts, and cinnamon are all used in this recipe.
HOW TO MAKE HOMEMADE STICKY BUNS:
In a small mixing dish, combine the yeast, warm water, and 1 teaspoon sugar. Set aside for 5-10 minutes to allow flavors to blend. Sugar, salt, and butter should be combined with the sour cream. Add the eggs and mix until everything is well-combined. Add 1 ½ cups flour, and with a dough hook, mix with liquid mixture. Mix until a dough is formed and the sides of the bowl begin to pull away from the sides of the bowl. Pour the yeast mixture into the bowl. Make a thorough mix. Add remaining flour and mix until dough is soft and smooth.
- Put all of the ingredients in a lightly oiled mixing basin and cover with a clean tea towel.
- For this stage, please refer to my previous comments on how to operate your oven.
- Cook over medium heat, stirring regularly, until there are no more sugar granules.
- Using a spatula, spread the mixture into the bottom of a 9×13 inch baking dish.
- Make a mental note to put it away.
- Roll out the dough into a rectangle on a lightly floured board until it is 14 inches thick after it has doubled in size.
- Spread the filling ingredients on top of the butter in a uniform layer.
- Cut the meat into 8-10 pieces that are 1 12 inches thick.
- Preheat the oven to 350 degrees Fahrenheit (180 degrees Celsius).
- Allow for 5-10 minutes of cooling time.
Don’t let it cool entirely before using it. Turning the baking dish upside down will let you carefully transfer the buns to a serving plate. Allow it a few minutes to allow for all of the topping to fall onto the buns. Sticky Buns should be removed from the pan. Enjoy!
WANT MORE DELICIOUS RECIPES? YOU MUST TRY THESE!
- 2 14 teaspoon instant yeast
- 12 cup warm water
- 1 teaspoon granulated sugar
- 12 cups sour cream
- 3 13 cups all-purpose flourdivided usage
- 12 teaspoon salt
- 14 cup granulated sugar
- 14 cup unsalted buttersoftened
- 2 eggs
Topping:
- 4 tablespoons brown sugar
- 3 tablespoons unsalted butter
- 12 tablespoons chopped pecans
Filling:
- 3.4 cup brown sugar
- 1 teaspoon cinnamon
- 14 – 11.3 cup chopped pecans (optional)
- 1.3 cup unsalted butter (softened)
- 3.4 cup brown sugar
- 1 teaspoon cinnamon
- 14 – 13.3 cup chopped nuts (optional)
- 1.3 cup unsalted butter (softened)
- The use of pecans in the filling is entirely optional. In addition, the pecans make a wonderful topping, but if you don’t care for them, you may substitute chopped walnuts or eliminate the nuts altogether
- These can be frozen (see my previous suggestions)
- This recipe does not necessitate the use of a stand mixer
- Instead, a wooden spoon and a bowl can be used.
The following are the calories: 617 kcal|73 g carbohydrate | 8 g protein | 34 g fat | 18 g saturated fat | 3 g polyunsaturated fat | 11 g monounsaturated fat | 1 g trans fat | 104 mg cholesterol | 153 mg sodium | 187 mg potassium | 3 g fiber | 38 gram sugar | 882 IU vitamin A| 1 mg vitamin C| 74 mg calcium| 3 g iron Notice Regarding Nutrition Like the majority of you, I’m an ordinary home chef who does all in my power to put a decent meal on the table for my family. I like to refer to the recipes on this site as “recipes for the time-pressed chef” (you know who you are).
I hope you’ll find plenty of dishes that you’ll enjoy and that will become family favorites as a result of your visit.
Reader Interactions
The following are the calories: 617 kcal|73 g carbohydrate | 8 g protein | 34 g fat | 18 g saturated fat | 3 g polyunsaturated fat | 11 g monounsaturated fat | 1 g trans fat | 104 mg cholesterol | 153 mg sodium | 187 mg potassium | 3 g fiber | 38 gram sugar | 882 IU vitamin A| 1 mg vitamin C| 74 g calcium| 3 g iron The following are the nutrients Disclaimer Regarding Nutrition Just like the vast majority of you, I’m a typical home chef who does all in her power to put a decent meal on the table for her family.
However, you may still get a satisfying supper on the table by taking advantage of a few shortcuts.