
Buns
How Long To Steam Pork Buns
Jan
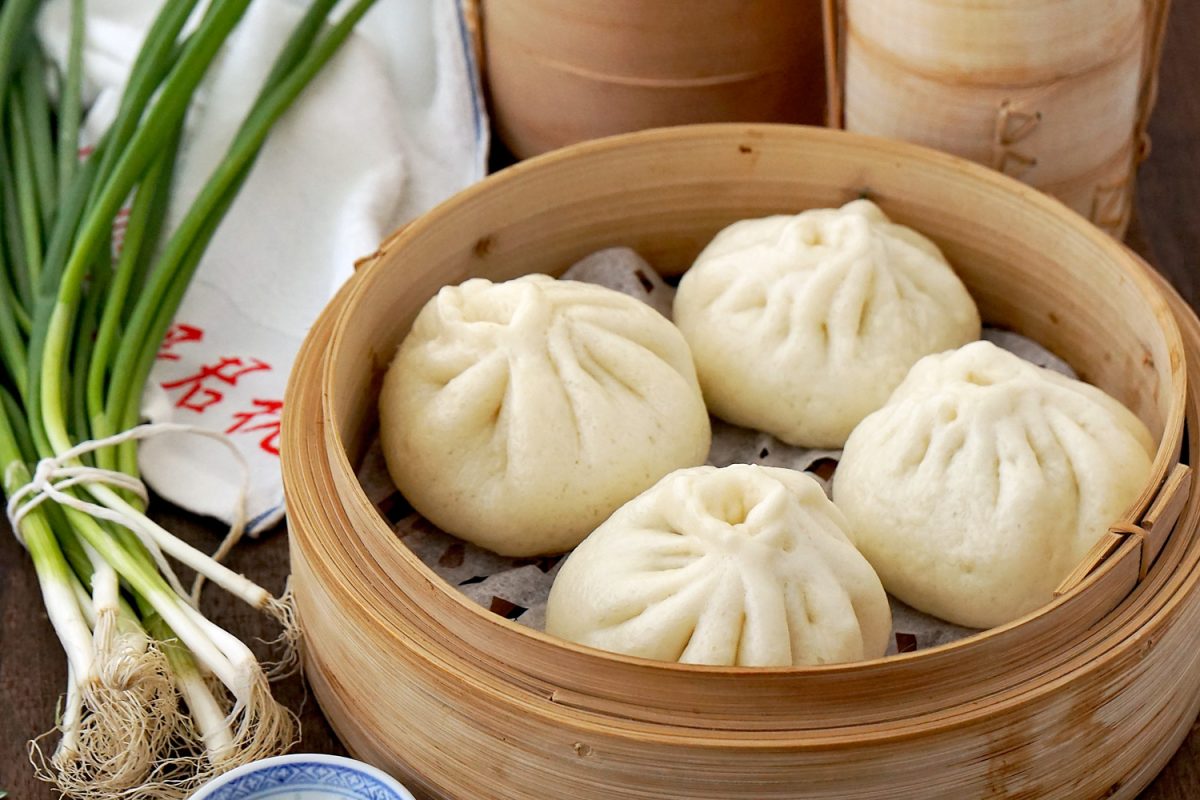
Chinese Steamed Pork Buns
Steamed buns that are pillowy soft and stuffed with a sweet and delicious saucy pork filling. Chinese Pork Buns cooked from scratch taste just like the ones you get from the dim lunch carts. These are going to blow your head! Yum Cha on Sunday mornings in Sydney is nearly a religious rite for many people. From the middle of the morning, large groups of people swarm into big eateries, their steaming carts loaded high with dumplings and buns clanging about the room. The familiar sound of bowls being slammed onto tables, the limitless Chinese tea, and the fast, borderline nasty service are all there and correct.
Yum Cha’s courteous service is almost scary in its formality.
The etiquette for pursuing trolleys varies from restaurant to restaurant, but I’m not afraid to break the rules.
I’ll stalk trolley after trolley till I locate what I’m looking for when I’m in need of pork buns!
Plus, if you’re a pork bun fanatic like I am, you’ll save a bundle because making them at home is probably 70 to 80 percent less expensive than buying them.
When you microwave frozen pork buns for 1 minute, they’ll look and taste like they just came out of a bamboo steamer.
HOW TO MAKE PORK BUNS
Steamed buns packed with a sweet and savoury saucy pork filling that are pillowy soft and pillowy delicious. Made from scratch, Chinese Pork Buns are very identical to the ones you get from dim sum carts. Your mind will be blown away by them. The consumption of Yum Cha on Sunday mornings in Sydney is nearly ritualistic. As early as midday, large groups of people pour into big eateries, bringing hot carts packed high with dumplings and buns and rattling around the room like a carnival ride. We’re used to the sound of bowls being slammed onto tables, as well as limitless Chinese tea and prompt, borderline harsh service.
- Yum Cha’s kind service is almost uncanny in its sincerity and professionalism.
- Restaurants have different trolley-chasing protocols, and I’m not afraid to break them.
- I’ll stalk trolley after trolley until I get what I’m looking for when I need pork buns.
- Aside from that, if you’re a pork bun fanatic like I am, you’ll save a bundle because making them at home is likely to be 70 to 80 percent less expensive.
Furthermore, they are the best freezer back-up option. When you microwave frozen pork buns for 1 minute, they’ll look like they’ve just come out of a bamboo steamer.
1. THE FILLING
A simple sweet and savoury sauce is used to cover the chopped Chinese Barbecue Pork (Char Siu), which is then grilled. Use either store-bought or home-made Char Siu for this recipe. When making a full-blown homemade Char Siu, allow at least 24 hours for marinating. If time is of the essence, check out our Quick Homemade Char Siu recipe in the recipe notes.
2. DOUGH FOR PORK BUNS
If you have a stand mixer, creating the dough is as simple and straightforward as making any other yeast bread or rolls. Unlike other doughs, this one is soft and elastic, making it very easy to work with. The recipe video is useful in seeing the consistency of the dough.
3. STUFF ‘EM!
No doubt, this is the portion that will take some time and practice, and I’m no Pork Bun Goddess, but I’ll try my best! However, it makes no difference. Regardless of whether you just bundle it up like a money bag and lock the filling inside, it will still taste just as nice! Although watching the recipe video is the most effective method to learn how to wrap pork buns, the following is a quick step-by-step description:
- To avoid ending up with a giant thick wad of dough while pinching the dough together, roll out very thin circles, making the edges even thinner. Placing it on your hand and sprinkling it with Filling Pinch the dough along the edges (see 6 below) to create pleats – approximately 8 times
- Gather the pleats together as you move around the edge, pulling them together so that you finish up closing the bun at the top (7 and 8 below)
- Pinch the ends together and twist them together (9)
Voila! You’ve mastered the art of the pork bun!
4. Steam!
In a wok, I use a bamboo steamer set over simmering water to cook my vegetables. Any steamer will suffice, but if you want to have the most real pork bun experience possible, a bamboo steamer is recommended since it lends a delicate scent to the buns during the cooking process. They aren’t prohibitively costly, and you can purchase them at almost any Asian grocery shop. Steamed Chinese Dumplings,Shumai – Japanese Steamed Dumplings, and Chinese Steamed Fish are all delicious options! How to build a paper liner for the bamboo steamer, which is a useful tip.
Next, cut little diamonds along the edge (2), unfold (3), and place it in your steamer.
ALL CREDIT TO WOKS OF LIFE
I want to be absolutely clear about who should be given credit for this recipe because it is not one that I created myself. Cooks of Life owners Judy and Bill developed this Steamed BBQ Pork Buns dish after conducting extensive study and developing it from scratch. Outstanding individuals, outstanding taste and culinary skill in addition to a very high degree of quality. I have great faith in their recipes. Judy and Bill, you have earned our respect! It’s well worth the time and work you put it.
Let’s be honest about this.
– Nagi x Nagi x Nagi x
MORE GREAT DUMPLINGS OF THE WORLD
-
- Potstickers (Chinese pan-fried dumplings)
- Gyoza (Japanese dumplings)
- Shumai (Japanese steamed dumplings on my mother’s website, RecipeTin Japan! )
- And a variety of other dishes. Wontons
- A look through the Yum Cha recipe
WATCH HOW TO MAKE IT
Subscribe to my email and follow me on social media platforms such as Facebook, Pinterest, and Instagram to stay up to speed on the newest news. Servings12Hover over the image to see the scaleRecipe video above.
These are authentically similar to what you would receive at Yum Cha / Dim Sum. Soft, fluffy white buns filled with a rich sweet and savoury filling are baked to perfection. Perfect freezer staple – just microwave them from frozen and they’ll taste like like they just came out of the bamboo steamer!
Yeast Activation:
- 1 teaspoon active dry yeast powder
- 1/4 cup / 65 mL warm water
- 1 tablespoon white sugar
- 1 teaspoon salt
Dough:
- A half cup of warm water, 4 tablespoons of sugar, 70 grams of white sugar, 2 cups of plain flour (all purpose), 1 cup of cornflour / cornstarch, 1/4 cup of vegetable oil, and 2 1/2 teaspoons of baking powder
Pork Filling:
- 1 tablespoon vegetable oil
- 1/3 cup finely chopped escalot or white onion (Note 1)
- 1 tablespoon sugar
- 1 1/2 tablespoons soy sauce, regular or light (not dark)
- 1 1/2 tablespoons oyster sauce (can substitute Hoisin)
- 1 tablespoon sesame oil
- 1/2 cup water
- 1 tablespoon cornflour dissolved in 1 tablespoon water
- 1 1/2 cups Chinese Barbecue Pork, diced (Note 2)
- 1 tablespoon sesame seeds
- 1 tablespoon ses
Dough:
- Activating the yeast: In a small mixing basin, combine the yeast, sugar, and water. Mix well, then put aside for 10 minutes, or until it begins to froth. In the bowl of a stand mixer fitted with a dough hook, combine the flour, cornflour, and sugar. Add the yeast mixture, oil, and water and stir briskly to blend. On a low speed, mix for 3 minutes, or until a smooth ball of dough comes together. It should be supple and elastic, not sticky to the point where it becomes plastered all over your fingers and palms. If necessary, add a pinch of flour or a splash of water to get the desired dough consistency. Wrap it in cling wrap and set it aside in a warm, dry location for 2 hours, or until it has doubled in size. (See also Note 3) In the meantime, prepare the Filling. Remove the cling film and sprinkle the baking powder on top. Return to the stand mixer and blend on low speed for 2 minutes until smooth. Turn the dough out onto a floured work area and press it down. Lightly knead the dough to produce a smooth circular disc
Making Buns (watch video):
- Cut the dough into four equal pieces. Take one piece and roll it into an even log, then cut it into three pieces (for a total of 12 pieces)
- Take one piece of dough and wrap the rest in cling film or a tea towel
- Set aside. Roll the dough into a circular 4.5″/11 cm in diameter, making the edges thinner as you roll. Place the dough in your palm and place 1 1/2 tablespoons of the Filling in the center
- Make 8 pleats all the way around the edges. Then, one by one, bring the pleats together to form the bun’s seal. Twist the top of the twist using your fingers
- Repeat the process with the remaining dough to produce a total of 12 cookies. Wrap the buns in cling wrap and set them aside in a warm location for 15 minutes.
Steaming:
- Note 4: Prepare a big bamboo steamer (or other steamer) by lining it with parchment paper that has been perforated with holes. Place 6 to 8 buns on a piece of parchment paper and cover with the steamer lid. Pour about 4 cm / 1 1/2 inches of water into a wok / pot (the steamer should not come into contact with the water) and bring to a quick simmer over medium high heat
- Place the steamer in the pan and cook for 12 minutes on high heat. Halfway through, check the water level and replenish it up if necessary. Buns are done when they bounce back when touched, and the buns have created a smooth skin on the outside. Remove the steamer from the pan and serve while still hot.
Filling:
- In a saucepan, heat the oil over medium heat until shimmering. Cook for 2 minutes after adding the eschalots. Combine the sugar, soy sauce, oyster sauce, sesame oil, and water in a mixing bowl. Slowly add in the cornflour mixture while stirring constantly. until the mixture is smooth
- Add the meat and mix well. Cook for 1 1/2 to 2 minutes, or until the sauce has thickened (see video for consistency). Remove from heat and allow to cool (it thickens as it cools).
1. Eschalots are little onions that are much finer in texture than regular onions. 2. You may use whatever type of onion you like here, including brown onions and the white part of shallots, scallions, and green onions. 2. Use Chinese Barbecue Pork, either store-bought or prepared from scratch (Char Siu). Chinese BBQ Pork in a Hurry: Pork steaks should be marinated for 20 minutes in store-bought Char Siu Sauce (or a small quantity of the marinade from Homemade Char Siu). Then pan fry on medium heat or bake for 15 – 20 minutes at 180C/350F, basting often with the marinade that was set aside.
- 3.
- Run the empty dryer for 1 minute before putting the dish inside.
- Paper steamer liners are available in Asian markets, but I have never purchased any.
- Line up the end of the steamer with the center of the steamer and cut it off.
- Place the folded paper in the steamer.
- Recipe derived from thisSteamed Pork Bunsfrom Woks of Life, which has been slightly tweaked.
- 6.
Here are a few suggestions: Chinese BBQ duck, chicken, or hog meat, or even leftover steak are all good options.
Sauteed mushrooms and veggies are good vegetarian alternatives.
Preparation and storage: Cook first, then chill or freeze.
Freeze – microwave for 1 to 1 1/2 minutes at high power, covered with a moist paper towel, from frozen until boiling hot.
8.
Dim Sum, Pork Buns, and Yum Cha are some of the terms used to describe this dish.
LIFE OF DOZER
MOVE! I’m unable to change the channel.
Steamed Pork Buns (Char Siu Bao) Recipe
Advertisement
Directions
- The first step in preparing the filling is to rub five-spice powder evenly over the pork shoulder. Preheat a grill pan over medium-high heat until very hot. Cooking spray should be used to coat the pan. Cook the pork for 18 minutes, or until a thermometer reads 155°, flipping the meat once or twice throughout cooking. Remove the pork from the pan and set it aside for 15 minutes. Advertisement
- Step 2: Slice the pork crosswise into thin slices, then cut the sections into strips. Pork should be placed in a medium-sized mixing basin. Stir in the onions and the next 7 ingredients (through 1/4 teaspoon salt) until everything is well-combined. Refrigerate after covering with plastic wrap. 3. To prepare the dough, in a large mixing basin, add 1 cup warm water, the sugar, and the yeast
- Let aside for 5 minutes. In the fourth step, lightly scoop flour into dry measuring cups, and level with a knife. To the yeast mixture, add the flour, oil, and 1/4 teaspoon salt and stir until a soft dough is formed. Turn the dough out onto a lightly floured surface and press it down. Knead until the dough is smooth and elastic (about 10 minutes). Toss the dough in a large mixing basin sprayed with cooking spray, stirring to cover the whole surface. Cover and let aside in a warm (85°) area that is free of drafts for 1 hour, or until the dough has doubled in size. (Apply gentle pressure to the dough with two fingers.) If the indentation is still there, the dough has risen sufficiently.) Step 5: Punch the dough down and let it sit for 5 minutes. Make a clean area for the dough to rest on and knead in the baking powder. After allowing dough to rest for 5 minutes, proceed to Step 6 and divide it into 10 equal sections, rolling each into a ball. Make 5-inch circles out of each dough ball, working with one at a time (covering the remaining dough balls to prevent them from drying out). 1/4 cup filling should be placed in the center of the dough circle. Bring the edges up to cover the filling and bring them together at the top. Twist the end of the pinch to seal it shut. To make more dough balls and filling, follow the same technique as described above. 7. Arrange 5 buns, seam side down, 1 inch apart, on each layer of a 2-tiered bamboo steamer, one bun in each tier of the steamer. Stack the layers and cover with the lid. Then fill a big pan half-full with water until the water is one inch deep
- Bring to a boil over medium high heat. Place the steamer in the pan and steam for 15 minutes, or until the puff and set is achieved. Allow for 10 minutes of cooling time before serving.
Chef’s Notes
Red chili peppers, cilantro, or jalapenos can be used to increase the spiciness of the dish. Cucumbers, cut into small cubes, add a refreshing crunch to this traditional Asian dish. Hint: The beauty of this recipe is that you don’t have to limit yourself to only using pork products. Make a vegetable, bean, or even seafood bun to go with it.
Nutrition Facts
Per serving: 259 calories; calories from fat 21 percent; fat 6.1 grams; saturated fat 0.9 grams; mono fat 3.2 grams; poly fat 1.5 grams; protein 14.3 grams; carbs 35.7 grams; fiber 1.6 grams; cholesterol 27 milligrams; iron 2.9 milligrams; sodium 343 milligrams; calcium 54 milligrams;
Nikuman (Steamed Pork Buns) 肉まん
It is possible that this content contains affiliate links. For more information, please see my disclosure policy. As an Amazon Associate, I receive money when people make qualifying purchases via my links. The recipe I’m sharing today is for Nikuman, Japanese steamed buns stuffed with tasty pork, shiitake mushrooms, cabbage, and green onions, which I’ll show you how to prepare in the following video. It’s the greatest type of savory snack to have on hand. Do you have a favorite dish that brings back a specific memory from your past?
Nikuman(), commonly known as Japanese-style Steamed Pork Bun, was not only my favorite winter food, but it was also a nostalgic flavor of my childhood.
By the way, convenience stores in Japan not only sell snacks and beverages, but also a bewildering selection of other things, much like a little supermarket.
Watch How To Make Nikuman (Steamed Pork Buns)
Learn how to cook Nikuman (Japanese Steamed Pork Buns) at home with this instructional video! Served in delicate fluffy buns, this dish is stuffed with tender juicy pork, shiitake mushrooms, cabbage, and scallions.
What isNikuman(肉まん)?
It is also known asChka Man in Japan. Nikuman is the Japanese name for the Chinese dish baozi (,), which is also known asChka Man in Japanese. Traditionally, steamed buns are constructed of a flour dough that is then filled with meat and other ingredients. These individuals are referred to as Buta Man () in western Japan, which includes Osaka. The savory buns are normally steamed inside a bamboo steamer, and they are at their finest when they are served fresh and fluffy immediately from the steamer.
A variety of hot steamed chka man are available in convenience shops around Japan throughout the winter months, including Nikuman, Kare–man (curry taste), An–man (with red bean paste), and Pizza–man (pizza flavor).
As a tiny child, I recall my mother saying something similar.
Homemade Nikuman
My mother used to buy pre-packaged steamed buns from the grocery store, and they were, as far as I recall, rather tasty. My high school friend’s house for lunch years ago convinced me that this dish was something we could all create at home. I had no idea it was possible! She prepared handmade nikuman for us, and I was particularly struck by the fact that she cooked the pig buns herself. To my amazement, she informed me that they are quite simple to prepare. Because they were freshly baked, the buns were really delicious, and everyone enjoyed them.
Considering that you can buy pre-packaged steamed buns at the grocery store, you might ask if it’s really worth your time to cook them yourself. However, allow me to explain why you will enjoy the handmade buns:
Why Make Nikuman at Home:
- Healthier– Prepackaged steamed buns are more likely to have additions or substances that are less than desirable. It’s a whole different experience when you prepare the buns from scratch. Customization– Don’t eat pork? No problem. Then for the fillings, you may use any ingredients you choose. Vegetarian or vegan options are available. These steamed buns are made specifically for you! I prefer to make them in two sizes: large ones for adults and little ones (such as the one featured in today’s recipe) for children. An accessible recipe– I was overjoyed when I found how simple it was to create my own steamed buns from scratch. Watch my video and then follow the step-by-step directions to complete the project. When you try the recipe, you’ll realize how simple and uncomplicated it is. Enjoy a delectable and refreshing taste– There is nothing better than eating food that has been freshly prepared in your own home. Steamed buns are without a doubt one of those foods. These nikuman have a wonderful, fresh flavor and are really filling. Freezer-friendly– Leftovers may be stored in the freezer and warmed quickly for subsequent use.
Making these steamed buns does present a few minor difficulties, but nothing too difficult to deter anybody from giving the dish a shot!
The Challenges:
- This recipe takes some time since you have to let the dough to rest, which is required for nice steamed buns. Technique for wrapping and folding steamed buns– Getting the steamed buns to appear presentable will take some effort. But don’t be concerned. As part of the recipe (Step 18) and my video instruction, I’ll demonstrate an EASYMETHOD to ensure that you can follow along with confidence
Mastering The FoldingPleating for Steamed Pork Buns
This is the section that most people are intimidated about. Since I first published my recipe, I’ve folded the dough using the SIMPLE METHOD I described in the post (Step 18). My Nikuman was delicious, but the appearance might be improved. When my friend Maggie ofOminivore’s Cookbook released her Kimchi Pork Steamed Bunrecipe on YouTube, she demonstrated her mother’s folding and pleating method in the process. Since then, I’ve continued to wrap my nikuman in the same manner. I still have a lot of work to do to better my abilities, but the strategy has made a significant difference.
- In either case, the nikuman is delicious.
- PS: If you liked these steamed pork buns, I recommend that you try outShumaiandManjutoo as well!
- Would you want to learn more about Japanese cuisine?
- You can also keep up with my latest activities onFacebook, Pinterest, YouTube, andInstagram.
Nikuman (Steamed Pork Buns)
- It is a traditional Japanese dish that consists of steamed buns that are filled with delectable savoury pork, shiitake mushrooms, cabbage, and scallion. Make this popular snack at home with these simple instructions! Preparation time: 1 hour Cooking Time: 10 minutes 1 hour of resting time Time allotted: 2 hours and 10 minutes
For the dough
- It is a traditional Japanese dish that consists of steamed buns that are stuffed with delectable savoury pork, shiitake mushrooms, cabbage, and scallions. Make this popular snack at home with these easy instructions! 1 hour for preparation Approximately ten minutes to prepare 1 hour of resting 2 hours and 10 minutes in total
For alternatives for Japanese condiments and ingredients, go to this page. For more information on Japanese ingredients, see this page.
- Assemble all of the materials
- In a large mixing bowl, combine 10.6 ounces flour, 2 tablespoons sugar, 12 teaspoon salt, 1 teaspoon baking powder, 1 teaspoon quick dry yeast, and 1 tablespoon oil. Mixing with chopsticks or a wooden spoon, slowly add 160-170 ml water into the mixture and mixing until it is fully integrated. To avoid the dough from clinging to your hands too much, lightly sprinkle them with flour before working with it. Knead the dough with your hand, pushing it down and reshaping it as necessary. Form it into a ball, then sprinkle flour on the work area to prevent sticking. Transfer the dough to a clean work area and begin kneading it. This is how I knead the dough. To begin, press the top half of the dough into the bottom half, pressing it slightly forward. Then, using the heel of your palm, press it forward twice more before pulling it back and folding it in half again. Then, turning the dough gently, repeat the procedure for another 10-15 minutes, or until the dough is smooth and silky in appearance. Sprinkle a little amount of flour over the dough at a time to help it become less sticky
- Form the dough into a smooth, round shape, carefully tucking any loose ends beneath. Place the dough in a large mixing basin and coat the bottom of the bowl with oil. Cover it with plastic wrap and set it aside in a warm location for 30-60 minutes, or until the dough has doubled in size. While you’re waiting for the dough to rise, prepare the filling ingredients. To begin, soak the dried shiitake mushrooms in 12 cup water for 30 minutes. Place something heavy on top of the shiitake so that the entire mushroom is immersed. Place in the refrigerator for 10-15 minutes while you thinly slice the scallion. The cabbage should be chopped into 1″ (2.5 cm) pieces after the rough core has been removed. 1 teaspoon salt should be sprinkled over the chopped cabbage to take out extra water. Once the shiitake mushrooms have been soaked, wring out the excess liquid, cut away the stiff stem, and mince the mushroom tops. Combine the ground pork, scallions, and shiitake mushrooms in a large mixing basin. Make a mess of the cabbage by squeezing it with your hands and throwing it into the basin
- 1 teaspoon sugar, 1 tablespoon sake, 1 tablespoon soy sauce, 1 tablespoon sesame oil, 1 tablespoon potato/corn starch, and freshly ground black pepper
- 1 teaspoon sugar, 1 tablespoon sake, 1 tablespoon soy sauce, 1 tablespoon sesame oil, 1 tablespoon potato/corn starch, and freshly ground black pepper Knead the ingredients thoroughly until it is properly blended and appears pale and sticky in appearance. Wait until the dough is done before setting it aside (or covering it with plastic wrap and placing it in the refrigerator). Once the dough has doubled in size, flour the work area and split the dough in half, then roll each half of the dough into a log. Repeat the process with the remaining dough. Then, cut each log into five equal pieces, and then cut each piece in half again. You can use fewer pieces of dough to make larger buns if you want them to be bigger. Because holding a large amount of dough and filling in one hand is difficult, it’s also better to work with smaller amounts of dough to create attractive pleats as you wrap. Form each piece of dough into a ball, then sprinkle the dough balls with flour to prevent them from adhering to one another during the baking process. Allow enough space between each ball and cover loosely with a moist dish cloth to prevent them from drying out. Allow them to rest for 10 minutes before rolling out a ball of dough and pressing it flat with your palm. Then, using a rolling pin, flatten it into a circular sheet of paper. Here’s how I roll the dough out for the cookies. Right hand: Hold the dough’s surface in place with the left hand while using a rolling pin to roll the dough out with the right hand All that is required is that you roll the dough up and down on the bottom half of it. After rolling the dough a couple of times, use your left hand to rotate it roughly 30 degrees. It is necessary to repeat this procedure until the dough becomes thin. The middle of the dough should be somewhat thicker than the outside of the dough. Filling: Scoop 1 12 tbsp of filling (I use a 1 12 tbsp cookie scoop) and lay it in the center of the dough. Holding the dough in the left hand and sealing the bun with the index finger and thumb of the right hand To begin, take a corner of the dough with your right index finger and thumb and squeeze it together with your other two fingers (left picture). Make a tight pinching motion with your thumb while turning the dough clockwise with your left hand (see right image). Repeat this procedure around 10-12 times (= 10-12 pleats) until you have sealed the last portion of the dough by pinching it securely (see right picture). Here are a few pointers: Your left thumb should be used to hold down the filling while your left fingers are used to flip the wrapper around. Make use of your left index finger to assist with the pleating. Additionally, while making the next pleat, raise up the pinched pleats a little bit to ensure that the filling remains inside the dough. Once you’ve finished sealing the last portion of the dough, twist the pleats even tighter using your right index finger and thumb to ensure a secure seal is maintained. If you’re left-handed, you’ll want to follow the guidelines in the other direction. Easy An alternative method is to wrap the filling by pulling the dough up around the meat to the top, producing tiny pleats with the excess dough, then slightly twisting the dough to seal it and pinching it tightly to connect the sides. Prepare a sheet of parchment paper that is large enough to accommodate the bun (for a small size, 3″ x 3″). Continue to cover the completed buns with plastic wrap and continue the process with the remaining dough until all of the dough has been used. Allow the buns to rest for 20 minutes before serving. Bring a pot of water to a boil and prepare a steamer. The buns and parchment paper should be placed in a steamer tray with approximately 2″ between each bun after the water has reached a boil (buns will get larger while being steamed). Close the cover and steam for 10 minutes on a high heat setting (10 for small buns, 13 for medium, 15 for big). For a standard saucepan, wrap the lid tightly with a kitchen cloth to avoid the condensation (which forms on the lid) from pouring into the buns while steaming them. Take pleasure in the moment
To Store
- After steaming, the buns stay well in the refrigerator until the next day and freeze well after that. They should be wrapped in plastic wrap and then placed in freezer bags (I suggest to consume in 1 week). To reheat frozen buns, steam them for a couple of minutes at a time.
calories: 125kcal; carbohydrates: 14g; protein: 5g; fat: 5g; saturated fat:2g; cholesterol:12 mg; sodium: 138 mg; potassium: 93 mg; fiber: 1g; sugar: 2 g; vitamins: 16IU; vitamin C: 4mg; calcium: 23 mg; iron: 1 mg Courses include an appetizer, a main course, and a snack. Cuisine:Japanese JustOneCookbook.com has a recipe for pork buns and steam buns. The content and photos are protected by intellectual property rights. We invite you to share this dish with your friends and family. It is completely banned to copy and/or paste whole recipes into any website or social media platform.
If you make this dish, take a picture and tag it with the hashtag justonecookbook!
Similar Savory and Sweet Treats You’ll Enjoy:
- In addition to Shumai (Steamed Pork Dumplings), there are Manju, Black Sesame Cookies, and Anpan (Sweet Red Bean Bun).
Note from the editor: This piece was first published on March 16, 2015, and has been updated. It has been revised and will be released again in April 2020. Now is the time to subscribe!
5 Secrets to Japanese Cooking: Simple MealsAuthentic Flavors!
Submit your email address to get our FREE email series on Japanese culinary ideas, as well as our monthly newsletter.
Chinese Steamed Pork Buns (包子 – Baozi)
Everyone has a few go-to items in their freezer, such as a pint of ice cream, a box of waffles, or a bag of frozen peas, among other things. The freezer mainstays that I can’t live without are frozen rice, frozen man-tou, frozen dumplings, and finally, some form of savory bun, such as these steamed pork buns (baozi, which is Chinese for “steamed buns”).
They are my go-to option for emergency meals! With these ingredients on hand, I’m never more than 30 minutes away from a filling supper that’s also quick and easy to prepare. Making my own steamed buns is one of my favorite activities since it allows me to experiment with different fillings.
Pleating Buns: Not Actually Required!
We all have freezer mainstays in our homes–a pint of ice cream here, a box of waffles there, or a bag of frozen peas here and there. The freezer mainstays that I can’t live without are frozen rice, frozen man-tou, frozen dumplings, and lastly, some form of savory bun, such as these steamed pork buns (baozi, which is Chinese for “steamed pork buns”) Their emergency food supply is invaluable to me. With these ingredients on hand, I’m never more than 30 minutes away from a filling supper that’s also convenient to take with me.
An Important Tip for Sealing Steamed Buns
You should make sure your hands are fully dry before beginning to create the buns, and avoid getting any liquids from the filling on your hands or the exterior of the dough near where the buns are going to be closed. It will be nearly hard to seal the buns as a result of this.
Something to Consider: Grinding Meat for the Filling
Ground beef is called for in this dish. While you could absolutely purchase ground pork from your local grocery store, I have discovered the key to making a great steamed bun from scratch. It is imperative that you take the time to hand-chop the meat using a cutting board, cleaver (or other heavy knife), and our particular method demonstrated in the video below to get the best texture and flavor. I know, I know, I’m also guilty of being a slacker and occasionally purchasing pre-ground pork from the grocery.
You should give it a shot if you’re feeling up to it.
Steamed Pork Buns (Baozi): Recipe Instructions
To make the dough, combine the yeast and sugar in a large mixing basin or a stand mixer fitted with a dough hook attachment and whisk until thoroughly dissolved. Allow about 10-15 minutes for the yeast to get active and bubble up before using. Knead the dough for about 15 minutes, adding in the flour 12 cup at a time. Make the necessary adjustments to the final 12 cup of flour. A soft dough should be used, not one that is sticky nor one that is overly stiff. Form the dough into a ball once it has been evened out and smoothed down.
(If you’re kneading the dough by hand, keep going until it’s as smooth as a baby’s butt!) Make the filling while the dough is rising.
Make the filling:
Stir 3 tablespoons water into the ground beef in a large mixing basin until it is well mixed. Preheat the wok or a cast iron pan until it begins to softly smoke, about 30 seconds. Combine 3 tablespoons oil with the minced ginger and chopped onion in a large mixing bowl. Cook over medium heat, stirring occasionally, until the onions are tender. Stir in the ground pork until it is well cooked, breaking up any big lumps that may have formed. No need to brown or crisp the meat; simply cook until all of the pork is pale and opaque throughout the flesh.
Stir everything together until everything is well-combined while the heat is turned up to high.
To cook out any residual liquid, continue cooking for a few of minutes after that.
Stir in the cornstarch and water combination, allowing the mixture to boil for 30 seconds to a minute before removing from the heat. Remove the filling from the heat and set it aside to cool completely. After the filling has cooled, fold in the scallions, which have been finely chopped.
Assemble the baozi (buns):
Following the completion of the proving process, the dough should have the following appearance: Turn it out onto a clean surface that has been lightly coated with flour. Knead for 2 minutes to remove any air pockets that may have formed. Using a scale, weigh and divide the dough into 20 equal portions (each should weigh about 48g-50g). Make a series of little dough balls and roll them with a rolling pin from the perimeter into the center, without rolling the middle of the dough at all. With the dough flattened into a circular circle with a thinner perimeter and a thicker core, the final product should look like this: The ratio of thickness differences should be around 1:2.
- Initially, you can use a lower quantity of filler until you get the hang of the folding and pleating technique.
- During the folding process, your aim is to make it all the way around the circle, until you’ve sealed it at the top.
- Check out our Carrot Ginger Pork Buns recipe and then scroll down to see a video of me folding a bun like this in action so you can get a feel for how it’s done in real time.
- Continue until all of the pieces are put together.
- If you don’t want to pleat the buns at all, simply pinch the corners of the dough together around the filling and pinch to seal the buns together.
- Check out our steamed custard bun post for a more in-depth demonstration (as well as a video) on how to do this.
To steam:
I used a bamboo steamer with three levels of steaming. You can use any steaming appliance that you are accustomed to using (refer to our post onhow to steam foodwith a bamboo steamer, metal steamer or even without special equipment). Just keep in mind that boiling water should never come into direct contact with the buns while they are steaming. Avoid sticking by spreading oil over the steaming surface or by using a nonstick surface such as napa cabbage leaves or parchment paper to prevent the surface from adhering.
The surface on which the buns are placed should be porous rather than solid (like a plate).
There should be some sort of aeration taking place.
Start with cold water and crank the heat up to medium while the buns are still in the steaming basket.
Set a timer for 15 minutes to begin. After 15 minutes, remove the pan from the heat but leave the lid on. Allow the buns to “rest” for 5 minutes before removing them from the pan. In the event that you forget to do this step, the buns will collapse.
To store (if you have any leftovers):
Using an airtight container, store the steaming pork buns when they have totally cooled to room temperature. They can be stored in the refrigerator or frozen. Of course, the best way to enjoy steamed pork buns is to eat them immediately!
To reheat:
Simply microwave the buns for 1-2 minutes after they have been removed from the refrigerator. Alternatively, re-steam them for 5 minutes until they are hot. While it is not necessary to defrost frozen buns, it is recommended that you do so before reheating them. Simply steam them for 8 minutes on a medium heat. Prep:3hours Cook:20minutes Total:3hours20minutes
For the dough:
- 4 1/2 teaspoons active dry yeast, or more exactly 1.6 teaspoons (it’s recommended to use weight measures rather than volume measurements)
- 5 g active dry yeast 8 g granulated sugar (approximately 2 tablespoons)
- 1 1/2 cups lukewarm water (355 mL)
- 580gallon all-purpose flour (about 5 cups, with extra for kneading and rolling)
- 1 1/2 cups lukewarm water (355 mL)
For the filling:
- 700gground pork (about 1 1/2 pounds
- Can substitute ground chicken or beef)
- 3tablespoonswater(45 ml)
- 3tablespoonsvegetable oil(45 ml)
- 2tablespoonsginger(about 20g, minced)
- 1large onion(about 200g, minced)
- 2tablespoonsShaoxing wine(30 ml
- Can substitute any other Chinese rice wine or dry cooking sherry)
- 1tablespoonsweet bean sauce(can substitute hois
To make the dough:
- To make the dough, combine the yeast and sugar in a large mixing basin or a stand mixer fitted with a dough hook attachment and whisk until thoroughly dissolved. Wait 10-15 minutes for the yeast to get active and begin to froth up before using. Knead the dough for about 15 minutes, adding in the flour 12 cup at a time. Make the necessary adjustments to the final 12 cup of flour. A soft dough should be used, not one that is sticky nor one that is overly stiff. Form the dough into a ball once it has been evened out and smoothed down. In a warm spot, cover it with a moist kitchen towel and allow it to proof for one hour before using. (If you’re kneading the dough by hand, keep going until it’s as smooth as a baby’s butt!) Make the filling while the dough is rising.
To make the filling:
- Stir 3 tablespoons water into the ground beef in a large mixing bowl until well combined
- Now heat a wok or a cast iron skillet over medium heat until it begins to smoke slightly. Combine 3 tablespoons oil with the minced ginger and chopped onion in a large mixing bowl. Cook over medium heat, stirring occasionally, until the onions are tender. Stir in the ground pork until it is well cooked, breaking up any big lumps that may have formed. Cook until all of the pork is pale and opaque-there is no need to brown or crisp the meat at this point. To make the sauce, combine the wine, dark soy sauce, sweet bean sauce, ground bean sauce, oyster sauce, sugar, white pepper, and sesame oil in a large mixing bowl. Stir everything together until everything is well-combined while the heat is turned up to high. Taste the filling and make any necessary adjustments to the seasoning. To cook out any residual liquid, continue cooking for a few of minutes after that. Stir in the cornstarch and water combination, allowing the mixture to boil for 30 seconds to a minute before removing from the heat. Remove the filling from the heat and set it aside to cool completely. After the filling has cooled, fold in the scallions, which have been chopped.
To assemble the baozi (buns):
- After the dough has done proving, turn it out onto a floured surface that has been sprinkled with a light layer of flour. Knead for 2 minutes to remove any air pockets that may have formed. Weigh the dough and divide it into 20 equal pieces (each piece should weigh around 48g-50g)
- Make a series of little dough balls and roll them with a rolling pin from the perimeter into the center, without rolling the middle of the dough at all. With the dough flattened into a circular circle with a thinner perimeter and a thicker core, the final product should look like this: The ratio of thickness differences should be around 1:2. Fill the middle of the triangle with some filling
- You may start with a lesser quantity of filling until you get the hang of the folding/pleating technique. Fold the buns with one hand holding the skin and filling while the other pleats the edges of the dough disk, creating the appearance of an accordion. During the folding process, your aim is to make it all the way around the circle, until you’ve sealed it at the top. You’ll be folding around 10-15 times. Placing the buns on a tiny piece of parchment paper and placing it immediately on your steaming rack can help them steam more evenly. Continue until all of the pieces are put together. Allow the buns to prove (covered) for a further 15 minutes before steaming. If you choose not to pleat the buns, just squeeze the corners of the dough around the filling and pinch to seal the edges securely. Then just turn the buns seam side down, cover them, and let them to proof for 15 minutes
- To finish
To steam:
- Start with cold water and crank the heat up to medium while the buns are still in the steaming basket. Set a timer for 15 minutes
- After 15 minutes, turn off the heat but leave the lid on the pan. Allow the buns to “rest” for 5 minutes before removing them from the pan. In the event that this step is skipped, the buns will collapse
To store leftovers and reheat:
- Once the buns have been steamed and allowed to cool fully, they should be stored in an airtight container. They may be stored in the refrigerator or frozen
- To reheat the buns after they have been removed from the refrigerator, simply microwave them for 1-2 minutes. Alternatively, re-steam them for 5 minutes until they are hot. Reheating frozen buns eliminates the need to defrost the buns before cooking them. Simply steam them for 8 minutes on high heat.
This recipe yields 20 buns. The nutritional information is for one bun. I used a bamboo steamer with two levels for this recipe. You can use any steaming appliance that you are accustomed to using (refer to our post onhow to steam foodwith a bamboo steamer, metal steamer or even without special equipment). Just keep in mind that boiling water should never come into direct contact with the buns while they are steaming. Avoid sticking by spreading oil over the steaming surface or by using a nonstick surface such as napa cabbage leaves or parchment paper to prevent the surface from adhering.
The surface on which the buns are placed should be porous rather than solid (like a plate).
There should be some sort of aeration taking place.
Calories: 232 kilocalories (12 percent ) 24 g of carbohydrate (8 percent ) 9 g of protein (18 percent ) 10 g of fat (15 percent ) 5 g of saturated fat (25 percent ) 25 milligrams of cholesterol (8 percent ) Sodium: 179 milligrams (7 percent ) Potassium: 152 milligrams (4 percent ) 1 gram of dietary fiber (4 percent ) 1 gram of sugar (1 percent ) Vitamin A (i.u.): 18 IU 1 milligram of vitamin C (1 percent ) Calcium: 12 milligrams (1 percent ) 2 milligrams of iron (11 percent )
nutritional info disclaimer
TheWoksofLife.com is written and created only for the purpose of providing information. While we make every effort to give nutritional information to our readers as a general guideline, we are not professional nutritionists, and the figures supplied should be regarded as educated guesses. The nutritional information in any dish will vary depending on a variety of factors such as the brand of food purchased, natural variances in fresh ingredients, and so on. In addition, different online calculators produce varying answers based on their data sources.
Steamed Pork Buns – Recipe
Colin Clark is a British actor and director.
16 buns are produced from this recipe. Steamed pork buns are a dim sum favorite that are authentically Chinese. Eileen’s step-by-step instruction of how to create the dough, the filling, and how to form the buns can be found in the video below.
Ingredients
- 1/2 cup low-sodium chicken broth
- 2 tablespoons oyster sauce
- 2 tablespoons ketchup
- 5 teaspoons granulated sugar
- 4 teaspoons cornstarch
- 1 tablespoon dark soy sauce
- Kosher salt and freshly ground white pepper
- 1 recipe Chinese Barbecued Roast Pork
- 2 tbsp. peanut oil
- 1 small yellow onion, sliced into 1/4-inch dice (1/2 cup)
- 1 tbsp. Shaoxing (Chinese rice wine)
- 1-1/2 tsp. Asian sesame oil
For the dough
- 2 & 1/8 cup bleached all-purpose flour, preferably Gold Medal
- More flour if necessary. 6 tablespoons whole milk, at room temperature
- 2 tablespoons melted lard or peanut oil
- 1/2 cup granulated sugar
- 3-1/2 teaspoons baking powder.
- 270 calories
- 60 calories from fat
- 7 grams of fat
- 2 grams of saturated fat
- 1.5 grams of polyunsaturated fat
- 3 grams of monounsaturated fat
- 40 milligrams of cholesterol
- 700 milligrams of sodium
- 36 grams of carbohydrates
- 1 gram of fiber
- 15 grams of protein
Preparation
- Stir or whisk together the broth, oyster sauce, ketchup, sugar, cornstarch, soy sauce, 1/2 teaspoon salt, and a sprinkle of pepper in a medium-sized mixing bowl. Finely dice enough of the grilled roast pork to make 1-1/2 cups of the finished product (about 6 oz.). For 30 seconds, heat a wok over high heat until hot. Swirl in the peanut oil to evenly coat the pan. Add the onion when a puff of white smoke forms, which should take around 30 seconds. Reduce the heat to medium-low and continue to simmer, turning often, until the potatoes are golden brown, about 6 minutes. Increase the heat to high and stir-fry for 2 to 3 minutes, or until everything is well-combined. Pour the wine into the pork mixture from the side of the pan, stirring constantly. Reduce the heat to a moderate setting. The sauce should be poured into a well created in the center of the mixture. Stir constantly for about 3 minutes, or until the mixture thickens. Mix in the sesame oil until fully incorporated. Refrigerate until completely cold.
Make the dough
- On a clean work surface, combine the flour, sugar, and baking powder and form a well in the center of the mixture. When the milk has been carefully poured into the well, use your fingers to draw the flour mixture into the milk in a circular motion until it has been completely absorbed. Make another well, add 3 tablespoons room-temperature water, and continue to massage the dough with your fingertips until it is smooth and elastic. Toss in the lard or peanut oil and mix the dough completely with your fingertips and either a dough scraper or a bench knife until everything is well-combined. With one hand, gather the dough together with the dough scraper and begin kneading it with the other. Tentatively knead the dough for 10 to 12 minutes, or until it is smooth, elastic, and slightly tacky to the touch. Spreading a little flour on the work area and your hands while kneading the dough can help to prevent it from becoming overly sticky. You can lightly wash your hands with water and continue to knead the dough if it appears to be too dry. Using your hands, form the dough into a ball, cover it with a little moist towel, and let it aside at room temperature for approximately 1 hour. “(The dough must be baked and used within 2 hours of its preparation.” It is not possible to freeze it.)
Portion the dough
- A well in the center of a clean work area should be made by mixing the flour, sugar, and baking powder together. In a circular motion, while gently pouring the milk into the well, use your fingers to draw the flour mixture into the milk until it is completely dissolved. Create a new well and add 3 tablespoons room-temperature water, continuing to massage the dough with your fingers. Toss in the lard or peanut oil and mix the dough completely with your fingers and either a dough scraper or a bench knife until everything is well incorporated. With one hand, gather the dough together with the dough scraper, and with the other, begin kneading. Tentatively knead the dough for 10 to 12 minutes, or until it is smooth, malleable, elastic, and slightly tacky when touched. Spreading a little flour on the work area and your hands while kneading the dough can help to keep it from becoming too sticky. You can lightly wash your hands with water and continue to knead the dough if it seems to be getting too dry. When the dough is smooth and elastic, form it into a ball and let it aside at room temperature for about 1 hour. (The dough must be utilized within 2 hours of the time it was prepared. It is not possible to freeze it.
Make the buns
- Working with a single piece of dough at a time, form a dough ball into a cup that is approximately 1-1/2 inches deep and approximately 3 inches across. If the edges of the dough cup are thin, so should the bottom be as well. Holding the dough cup in one hand, spoon approximately 1 tablespoon of the pork filling into the center of the cup. To assemble the dough, gather the edges and draw them up and over the filling, pressing the filling down with your thumb as you pleat the dough with your fingers to cover the filling. Although it may appear to be a tight fit at first, the dough will stretch as you draw it around the filling and seal the edges. Twist the top of the bun to seal it, and pinch off any extra dough if necessary. Place the bun on a piece of parchment paper, knot side up, and put it aside. As your confidence grows, you may increase the amount of filling you use in succeeding buns to 1-1/2 tablespoons. Repeat the process until 16 buns have been created, wiping your thumb clean with a moist towel after each bun is created. Make an even distribution of the buns (which should still be on their parchment squares) between two bamboo steamers, placing them at least 2 inches apart. Stack the steamers on top of one another and cover with a kitchen towel. 6 cups of water should be brought to a boil in a wok over high heat. Place the stacked steamers over a pot of boiling water and steam the buns for 15 to 20 minutes, or until they are fluffy and their tops have opened like flowers, revealing a little of the filling underneath. Discard the steamers and place them on serving plates, then serve the buns right away, fresh from the steamers.
Preparation Suggestions Make the filling up to 1 day ahead of time and store it in the refrigerator; do not freeze. In an airtight container, cooked buns will keep for 3 to 4 days in the refrigerator or 4 to 6 weeks in the freezer if stored at room temperature. To reheat, let the buns to defrost and come to room temperature if they were frozen; if they were refrigerated, allow them to come to room temperature. Then steam the buns in bamboo steamers for 5 to 7 minutes, or until they are very hot.
Reviews (9 reviews)
- User-3238474| January 23rd, 2021 I’ve been making this dish for years, and I make sure to follow the directions to the letter. We keep going back to it since it has become a favorite of the children’s for special birthday meals and celebrations. It will take the better part of the day, but if you enjoy being in the kitchen, give it a shot. I’ve found that the dough recipe produces excellent results, so I’m not sure what to make of the one negative comment concerning the dough. Mastohcheffpp| January 3, 2015 This is some fantastic dough! It was easy to use already cooked pork shoulder, which I just added to the sauce before stuffing into the buns. This is just fantastic. I’d been wanting to do this for a long time and am pleased I finally got around to it
- Donutsmakemeegonuts| March 13, 2014 Okay, so I prepared these and discovered that something is certainly wrong with this recipe. I tried twice, followed the guidelines to the letter, and it didn’t work. The dough is not malleable in any way. The stuffing, on the other hand, is very excellent. Also, after giving up, I cooked the dough and it turned out to be delicious biscuits, which were excellent for strawberry shortcake. HAHAHAHAHAHAHAHAHAHAHAHAHAHAHAHAHAHAHAHAHAHAHAHAHAHAHAHAHAHAHAHAHAHAHAHAHAHAHAHAHAHAHAHAHAHAHAHAHAHAHAHAHAHAHAHAHAHAHAHAHAHAHAHAHAHAHAHAHAHAHAHAHAHAHAHAHAHAHAHAHAHAHAHAHAHAHAHAHAHAHAHAHAHAHAHAHAHAHAHAHAHAHAHAHAHAHAHAHAHAHAHA This was a really frustrating experience.
Chinese Steamed Buns
This recipe provided me with the smooth, fluffy texture that I was seeking. As a substitution for 1/2 cup warm water, I used 1/2 cup warm milk, which I believe helped to make the dough even lighter and fluffier than it already was. Because the dough was extremely sticky and difficult to work with, I had to add an additional 1/4 cup of flour to the recipe. It was only after the 3 hours for the first rising that I realized that the dough had a little sour flavor, similar to that of sourdough bread, which became more obvious after steaming the buns (I steamed a golf ball sized amount of dough to test for texture and taste before I rolled and steamed the rest of the dough).
To stuff the bread, I utilized a homemade beef filling recipe that I developed.
UPDATE: *Tip* I’ve successfully doubled the recipe without encountering any difficulties – use the same amount of yeast as in the original recipe (1 TB or around 1 envelope dry yeast), but double all of the other ingredients to achieve the desired result.
Most helpful critical review
Because I was making this recipe for the first time and didn’t want to wind up with an excessive amount of rolls if I didn’t enjoy them, I scaled it down to make 6 rolls instead of 24. While I’m not sure if this was due to the fact that I used allrecipes.com or the recipe itself, I found that I needed to add a LOT more flour than the recipe asked for in order to avoid turning the dough into a watery mush, which threw off the balance of the yeast, baking soda, and sugar. I basically ended up with chewy dinner rolls as a result of my efforts.
- There are 111 5star ratings, 57 4star ratings, 11 3star ratings, 7 2- and 1-star ratings, and 4 1-star ratings.
This recipe provided me with the smooth, fluffy texture that I was seeking. As a substitution for 1/2 cup warm water, I used 1/2 cup warm milk, which I believe helped to make the dough even lighter and fluffier than it already was. Because the dough was extremely sticky and difficult to work with, I had to add an additional 1/4 cup of flour to the recipe. It was only after the 3 hours for the first rising that I realized that the dough had a little sour flavor, similar to that of sourdough bread, which became more obvious after steaming the buns (I steamed a golf ball sized amount of dough to test for texture and taste before I rolled and steamed the rest of the dough).
To stuff the bread, I utilized a homemade beef filling recipe that I developed.
UPDATE: *Tip* I’ve successfully doubled the recipe without encountering any difficulties – use the same amount of yeast as in the original recipe (1 TB or around 1 envelope dry yeast), but double all of the other ingredients to achieve the desired result.
When you’re ready to consume them, simply place them in the refrigerator to defrost for at least overnight before steaming them for 10-15 minutes.
DO NOT allow the buns to come into contact with the water.
I stuffed it with red bean paste, similar to what I used to eat at home in Singapore, and it turned out to be far better than I remembered.
I made sure to follow the instructions to the letter.
However, measurements taken in cups are seldom very exact in any case.
Because I didn’t have a bamboo steamer (although it would have been better in a bamboo steamer because of the scent from the bamboo), I used Alton Brown’s excellent suggestion of putting holes in my disposable pie plate and placed it on top of a metal cookie cutter in a wok to steam the vegetables.
- At the very least, it isn’t enough to disturb me.
- Overall, we are quite pleased with it.
- Thank you so much for taking the time to share.
- All of the ones I’ve tried have failed to deliver the same level of flavor and light texture as this one.
- The dough is quite sticky.
- Due of the extended rise time, I added 1/2 tablespoon of baking soda to the dough to mitigate the “sour” taste that resulted.
- This allowed the dough to quadruple in size in little over an hour and a half (instead of 3.) I packed my buns with a meat/veggie combination and let the buns rise for a further 25 minutes before steaming them in a big steamer.
I think I ate four buns in a single sitting.
These buns didn’t turn out to be particularly white (like in stores.) But it was simply handmade buns, so it didn’t bother me at all!
Also, add little baking powder to your dough to make it more rise.
This is an opportunity to make some extra white buns!
TRY IT OUT AND SEE WHAT YOU THINK!
Everything turned out well, and everyone enjoyed themselves.
- The suggestions made by user Mukinsvivi ROCK made it possible for me to make steamed buns that were really delicious.
- You can punch it down in the manner specified in the directions.
- Obviously, I didn’t use the whole 3/4 cup, but I came very close.
- In order to prevent me from overdoing it, the extra flour was introduced gradually.
- As a result, my buns turned out very white.
- My steamed buns turned out to be rather huge, yielding around 12.
- Because my steaming pot is tiny, it took a long time to steam all of the buns, which were a little reluctant to cling on the steaming plate.
This allows the bottoms of the buns to dry thoroughly.
When I make these again, I might try stuffing them with fruit, just to see how they turn out.
They have a slight chewy texture and are quite light, almost “airy.” I used half of the dough to make 12 buns (as directed by the recipe), and the other half was used to make 6 medium-sized buns (see photo).
The little buns were more difficult to fill with meat filling and were far too fragile to handle.
When assembling the buns, keep in mind that the sides should be thinner than the middle.
I will continue to search for the “ideal” bun recipe, but I will have this one on hand as well.
If you create more than you intend to consume and store it in the refrigerator, remember that when food is not fresh, it becomes unpalatable.
Whether it was the fault of allrecipes.com or the recipe itself, I found that I needed to add far more flour than the recipe asked for in order to avoid turning the mixture into a watery mush.
I basically ended up with chewy dinner rolls as a result of my efforts.