
Buns
How To Do Buns With Short Hair
Jan
As a girl with bob-length hair, I understand the frustration of waking up late and wanting nothing more than to toss your hair up in a messy bun, only to find yourself unable to do so because you don’t have enough hair to do so. Please do not misunderstand me. I really enjoy having short hair. However, the messy-bun existence is one that I occasionally yearn for. There is some bad news, though, in that buns with short hair aren’t nearly as straightforward as they are for people who have 12 inches of hair to play around with.
In fact, it’s more than probable that this will happen.
For all of my short-haired sisters out there, this one is for you.
On the days when you don’t feel like pulling out your curling iron or straightening iron, simply refer to this list for inspiration.
Braided Topknot
Getty 1.Distribute a dry texture spray, such as Obrie’sDry Texturizing Spray($22), evenly throughout hair to provide more grip. 2.Pull your hair into a super-high ponytail and tie it with an elastic band. Don’t be concerned about making things seem nice! 3.Pull the ponytail all the way down and secure it with a clear elastic band at the bottom. Using a bobby pin, bind the braid around itself, starting at the base and working your way up the length. 5.After the braid has been coiled all the way up into a bun, fasten it with a couple more bobby pins to finish it off.
7.Spray your hair with a flexible-hold hairspray.
8.
Sporty Space Buns
Getty In order to add more grip, evenly distribute a dry texture spray, such as Obrie’sDry Texturizing Spray ($22), throughout hair. 2.Put your hair into a super-high ponytail and bind it with an elastic band. Make no attempt to make things seem nice. Create a ponytail that is braided all the way down and secure it with a clear elastic. 4.Begin at the base and coil the braid over itself, stopping every few inches to fasten it with a bobby pin. 5. When the braid has been coiled all the way into a bun, fasten it with a couple of bobby pins at the very end.
7. Using a flexible-hold hair spray, mist the ends of your hair. Hairspray ($26) from Drybar,Money Maker Flexible Hold, completes the package. 8. Put on an acute knotted head wrap and get ready to receive comments all day long!
Boho Double Knot
Image courtesy of Getty1. A dry shampoo, such as Living Proof’sPerfect Hair Day (PhD) Dry Shampoo ($25), or a greattexture spray is the key to this casual summer style. Spray evenly from the middle of the shaft to the ends. 2.Split your hair into four equal portions, two on either side of the front and two on either side of the back, and pin them up in a high ponytail. 3.Take a portion from the rear of the bun and coil it around the base to form a bun shape. Bobby pins can be used to keep the hair in place.
You should be left with two areas that have not been touched up front.
Roll the tail of the front piece over the rear bun and secure it with a safety pin.
Take a few face-framing items and you’re ready to go!
Bedhead Bun
Image courtesy of Getty1. A dry shampoo, such as Living Proof’sPerfect Hair Day (PhD) Dry Shampoo ($25), or a greattexture spray are essential for this casual summer style. From the midshaft to the ends, spray evenly. 2.Separate your hair into four equal portions, two on either side of the front and two on either side of the back, and pin them up in a high bun. 3.Select a portion of hair from the back and coil it around the base to form a bun using. Blow dry and pin in place. 4.Repeat the procedure with the opposite rear section.
In the beginning, you should have two unfinished parts.
Tie a knot in the tail of that front part and secure it with a hairpin.
To finish it off, take remove a few face-framing elements.
Messy Half-Knot
Getty1.For short-haired girls, this is the ultimate bun to achieve. Begin with strands that have not been washed. It doesn’t matter how filthy the environment is. Using your hair, create two sections on either side of your crown. Keep the components as straight as possible because they will be apparent in the final product. 3.Make a high ponytail out of the hair between the two pieces and place it exactly on top of your head. Make sure not to drag the ponytail through the elastic on the final loop; otherwise, you’ll end up with a loose bun.
Instead of leaving the ends sticking out the bottom of the bun, just wrap them around the base of the bun and pin them in place!
Modern Milkmaid Bun
Getty1. Although this is more of an updo than a classic bun, it still serves the purpose of keeping your hair out of your face in a stylish manner. Begin by splitting your hair down the center and dividing it into two equal parts with your fingers. To give your hair near the crown of your head a little additional volume, back-comb it a few times. 3) Create a French braid on one side of your head, starting near to your face and working your way out to form a braided pigtail. 4. Clear elastic is used to keep it in place.
Using a bobby pin, pin the end of the first French braid behind your head to keep it in place.
7.Spray the braid with a medium-hold hair spray, such as L’Oréal Tecni, to keep it in place. Art Infinium 3 Medium Hold Working Spray ($17) is a medium hold working spray.
Classic Ballet Bun
This laidback variation on the traditional ballerina bun is polished and easy, as shown in the image above by Getty1. In order to begin, pull your hair back into a ponytail at the very top of your head. In the event that you have shorter pieces that fall out, pin them up at the back of your head with a bobby pin. Secondly, open the elastic and draw the hair up halfway through to form a loop to give the topknot a larger appearance. 3.Take the excess length that was left over from the loop and coil it around the base of the loop to conceal the elastic band.
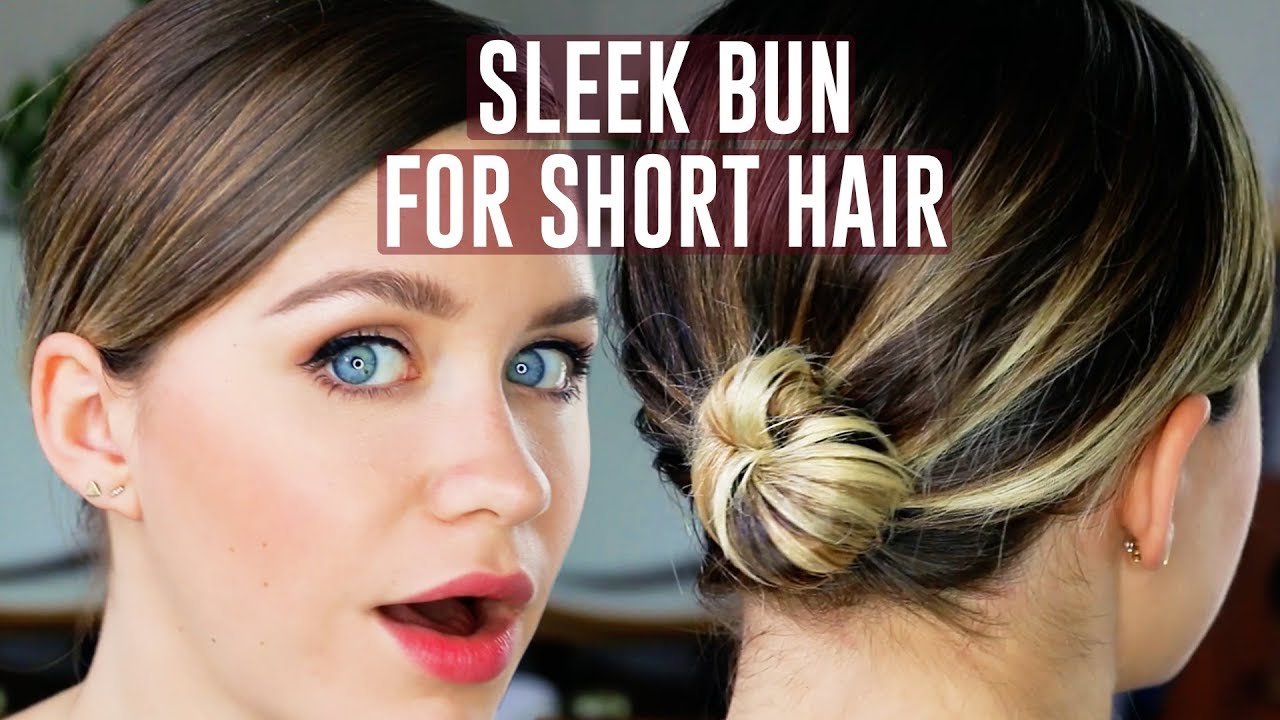
Sleek Low Bun
Getty1.A slicked-back hairstyle that screams “cool chick” will have you looking as effortlessly elegant as Rihanna. This is one of the few occasions in which Rihanna wore her natural, blown-out hair without the use of extensions. Before you begin, smooth your hair back into a bun with a boar bristle brush, such as the DenmanBoar Bristle Ceramic Brush ($26). Secondly, let some of your flyaways and sideburns to dangle loosely. Don’t be concerned with everything being in exactly the right position.
3.Pull your hair back into a ponytail with the help of an elastic.
Take a second elastic band and wrap it around your topknot to secure it.
Embellished Top Knot
Getty1. Hair ornaments are timeless and will never go out of style. Furthermore, they quickly transform any bun from plain to badass. Take inspiration from Issa Rae’s Black Panthermoviepremiere performance. Begin by parting your hair into three sections in the center of your head with a rattail comb, such as Krest’sPintail Combs ($5). 2.After that, braid three little cornrows and tie them together at the crown of your head or wherever you want your bun to end up. 3.Put your hair and the ends of your three braids into a ponytail and secure it with an elastic band.
Using circular motions, wrap your braid around the rest of your hair to form a braided topknot.
6.
Install gold cuffs throughout your braid to give it a little extra flair.
Backwards Braided Bun
Getty1.If you have piecey bangs and want to style them in a lob or bob, this is the style for you. Allow your bangs to hang loosely in the front and frame your face in the back. Begin by dividing your hair into three medium-sized portions at the back of your head. 2.In the back of your head, braid three medium-sized cornrows, halting at the crown of your head and braiding in the direction of your ponytail. 3.After that, pull your hair into a ponytail. Using a rubber band or a hair tie, pull your braids into a ponytail once you’ve completed braiding them.
Don’t be concerned about further flyaways. Keep in mind that the objective here is a sloppy bun. spray of Sexy HairSmooth Sexy Hair SmoothSeal Anti-FrizzShine ($20) to add a modest sheen to your style and to give it a polished finish.
How to Make a Bun for Short Hair
Documentation Download Documentation Download Documentation Basically, if you have enough hair to draw back into a ponytail, you have enough hair to put into a bun. By pinning back your hair instead of twisting it like you would if your hair were longer, you might give the appearance of having more volume than you actually have. If you want a fashionable hairstyle that never goes out of style, arrange your hair in a high ballerino bun, a low messy bun, or a sleek tomboy bun.
- Read More About ItRead More About It Basically, if you have enough hair to draw back into a ponytail, you have enough hair to tie into a bun. By pinning back your hair instead of twisting it like you would if your hair were longer, you might give the appearance of having more volume than you actually do. If you want a fashionable hairstyle that never goes out of style, arrange your hair in a high ballerino bun, a low sloppy bun, or a sleek tomgirl bun.
- If your hair is long enough to be fastened at the top of your head, you may want to add some bobby pins or hair spray to hold it in place. You may also choose for a low bun or a side bun in case your hair is too short.
- You could want to use some bobby pins or hair spray to hold your hair in place at the top of your head
- This works best if your hair is long enough to be held in place at the top of your head. You may also go for a low bun or a side bun in case your hair is too short
- Because it is less harmful to hair, a fine-toothed comb should be used instead of a brush. In order to get a sleek, glossy bun, skip this step. Your bun will be smaller and have less volume as a result of skipping it.
- Because it is less harmful to hair, a fine-toothed comb should be used instead of a brush
- In order to get a smooth, glossy bun, omit this step. Your bun will be smaller and have less volume as a result.
- Use a fine-toothed comb instead of a brush to detangle your hair since it is less harmful to your hair. If you like a smooth, glossy bun, you can omit this step
- However, your bun will be smaller and have less volume.
- 5 Twist the other portion up and secure the ends with safety pins. Twist the remaining part up and over the ponytail, burying the ends and pinning them down with multiple bobby pins to keep them in place. As a result, you have completed the second half of your bun.
- Instead of twisting your bun too hard that it may fall out of position, use a delicate twist this time
- Observe the ends in the mirror to ensure that they are securely fastened and out of sight
- 6 Tuck any loose ends into the bun and spritz it with hairspray. If there are any loose patches that need to be tucked in, check the back of your hair in the mirror and add extra bobby pins if required to secure the hair in place. Finish the look with lots of hairspray to ensure that it doesn’t fall out.
- Use your fingers to poof out the bun a little to give it extra volume if you want a fuller appearance. Pulling out a few pieces of hair toward the front of your hair to frame your face is a lovely look.
- Gather your hair at the base of your neck and pin it back. To keep it in place, use a ponytail holder to tighten it up. This form of bun works well with even the shortest of hairstyles, as long as you can gather it all into a ponytail holder
- Nevertheless, it is not recommended for very short hairstyles.
- Gather your hair at the base of your neck and pin it up. To keep it in place, use a ponytail holder to tighten it. It’s possible to pull off this sort of bun with even the shortest of hairstyles if you can gather it all into a ponytail holder
- Nevertheless, it’s not recommended.
- 2 Using a comb, tease your ponytail a little. Holding your ponytail out in front of you, tease it with a comb by backcombing it section by section with the comb. In addition to adding volume to your bun, this will give it a traditional “messy” aspect.
- 2 Use a comb to tease your ponytail. To tease your ponytail using a comb, hold your ponytail out in front of you and backcomb sections of it backward. A traditional “messy” appearance will be created by using this technique to add volume to your bun
- 3 Secure your hair around the ponytail holder with bobby pins. Use your fingers to curl a tiny portion of hair under, and then pin the ends of the curls just close to your ponytail holder with bobby pins. Make sure to pin under pieces of hair until all of your hair has been tucked under and the ends are securely fastened.
- If you want the appearance to be a little messier, leave a few strands free. Divide the ponytail into two equal portions, twist each section, and tuck the ends under to give it a more streamlined appearance. This will result in a low bun in the manner of a ballerina.
- 4To hold your hair in place, spritz it with hairspray. Spritz it all over your bun and the rest of your hair to ensure that your low bun stays in place
- First, apply gel or mousse to your hair and style as desired. Applying gel or mousse to your hair will give it a somewhat damp, glossy appearance while also assisting it in staying in place longer. Make use of a dime-sized amount of gel or mousse between your palms and work it into your hair from the roots to the tips, ensuring that it’s equally dispersed.
- In the event that you desire a matte finish, you can omit this step.
- 2Pull your hair back and to the side of your head. To get a sleek appearance, comb your hair back tightly with a comb. 3 Pull your hair back into a ponytail, either at the nape of your neck or a little higher up, depending on where you want your bun to sit. Cinch your ponytail and use a second ponytail holder to keep it in place. Continue to hold your ponytail straight, and then fold it in half, cinching the ends together so that it creates a little loop-shaped bun. A second ponytail should be used to secure the bun. Close to the nape of the neck, you’ll be able to see the ends of your bun. Hairspray should be used to keep the style in place. In order to prevent your bun from falling out of position, thoroughly spray it as well as the rest of your hair.
Create a new question
- QuestionHow can I make a high bun with bangs that isn’t too tight? Using hair gel, you smooth back your bangs and pin them in place once you have completed your bun as usual. Question Why is it that my hair does not work when it is sleek? Sleek hair might be more difficult to manage since it has a greater tendency to fall out of position. You can attempt to tease it a little
- Question What should I do if I don’t have hairspray or pins to build a bun for short hair? Alternatively, you might use hair elastics, which is what I use and it works really well. You might also inquire with a friend or family member to see if they have any pins that you could use
- Question What is the best way to curl medium-layered hair with bangs? Using a curling iron, split your hair into 4-5 pieces, just as you would with straight hair. Then curl each portion on its own, one by one. Question It’s difficult for me to arrange my hair in a bun since it’s so thick. Alternately, instead of dividing the ponytail into two parts, consider dividing it into numerous additional sections. You should experiment to find out what works best for you based on the thickness of your hair. Question What is the best way to get my ballerina bun out? You would just take off the bobby pins and elastic and allow your hair to fall naturally
- Question What should I do if I don’t have any hair spray to construct a bun for short hair? You may use gel or simply water in a spray bottle, however the latter will not hold up as well as the former. Question What is the best way to achieve a sloppy bun without using hair spray or pins? Either elastics or rubber bands might be used
- Experiment to determine whatever works best for you. Question Where can I find out more about buns for shoulder-length hair and how to make them? Look for hairstyles for that length of hair on the internet. Question What should I do if I don’t have a hair tie on hand? Make use of a scrunchie or a ribbon. Alternatively, you could visit a mall or store and purchase a hair tie, or you might ask a friend if they could lend you one.
How can I style my hair in a high bun with bangs? Question Using hair gel, you smooth back your bangs and pin them in place once you’ve completed your bun as usual Question My hair does not function when it is smooth, so what am I doing wrong? Because it is more likely to fall out of position, sleek hair might be more difficult to manage. You can attempt to tease it a little bit. Question In the absence of hairspray or pins, how can I create a bun for short hair? Alternatively, you may use hair elastics, which is what I use and it works really well.
- Question When I have medium-layered hair with bangs, what should I do to curl it.
- Afterwards, curl each portion one at a time.
- Breaking the ponytail into two sections isn’t always the best option, so consider splitting it into numerous more pieces.
- What should I do?
- Water in a spray bottle will work just as well as gel; however, the results will not be as lasting.
- Either elastics or rubber bands might be used; experiment to find whatever works best for you.
- For that length of hair, you should look online for ways.
- Use a scrunchie or a ribbon to hold your hair back.
Video
- QuestionHow can I style my hair in a high bun with bangs? Do your bun as usual, but then use hair gel to smooth your bangs back and pin them in place
- Question Why is it that my hair doesn’t work when it is sleek? Because it is more likely to fall out of position, sleek hair can be difficult to manage. You can attempt to tease it a little. Question I don’t have any hairspray or pins, so how can I construct a bun with short hair? Simply use hair elastics instead, as I do, and it will work just fine. You might also inquire with a friend or family member to see if they have any pins that you could use. Question How can I curl medium-layered hair with bangs that is medium in length? Using a curling iron, split your hair into 4-5 pieces, just like you would with straight hair. Then curl each part on its own. Question I have thick hair, so how am I expected to put it in a bun? Rather of dividing the ponytail into two pieces, consider dividing it into numerous additional sections. You should experiment to determine what works best for you depending on how thick your hair is. Question What is the best way to get my ballerina bun out of my hair? You would just take off the bobby pins and elastic and allow your hair to naturally fall
- Question In the event that I do not have hair spray, how can I create a bun for short hair? You may use gel or just water in a spray bottle, however the results will be less effective. Question How can I style my hair in a sloppy bun without using hair spray or pins? Either elastics or rubber bands can be used
- Experiment to determine whatever works best for you. Question Where can I find out more information on buns for shoulder-length hair? Look for solutions for that length of hair on the internet. Question What should I do if I don’t have a hair tie? Make use of a ribbon or a scrunchie to hold your hair back. Alternatively, you could go to the mall or a store and purchase a hair tie, or you might ask a friend if they could lend you one.
Thank you for submitting a suggestion for consideration!
About This Article
Your suggestion has been received and will be considered.
Did this article help you?
Thank you for submitting a tip for consideration!
Ballerina Bun
I’ve always noticed that the dirtier my hair gets, the messier (and more fantastic) my bun seems.
That does not imply that you must participate in a CrossFit class and then style your hair in a messy bun. Simply use dry shampoo instead of shampooing your hair, and try to style it into a bun to save time. Believe me when I say that it will cooperate far more than it does with clean hair.
Step 2: Gather The Hair
Turning my head over and tying it all up in a ponytail in my hands will ensure that I get every last strand of hair out of the way is essential. It’s possible that a few bits will fall out in the rear, but we’ll deal with that later.
Step 3: Twist It
After I’ve gathered all of my hair into a ponytail, I’ll twist the hair in this manner all the way up to my awful split ends, and then style it as desired.
Step 4: Twist Into A Bun
Following the twisting of my hair over my head, I’ll wrap my hair around itself and pull it back into a bun for a ballerina look. A few bits may fall out of position, but this, in my opinion, contributes to the “messiness” of the bun and gives a new twist to the super-perfectly round bun. Put a thin hair tie around the circle of this bun and twist huge loose strands into the ponytail to complete the look. It’s critical to twist the strands of hair before drawing them into the hair tie, rather than just pulling them into the hair tie.
Additionally, if the bun is “too flawless,” I’ll pull out a few strands of hair from the bun as well as a few strands from the hair coming up to the bun.
Step 5: Address The Loose Hair Situation
As I said in step two, it is possible that a few strands of hair will come out from the back throughout the course of this endeavor. Never fear, there is a wonderfully adorable method to cope with the situation. In this section, I prefer to have fun with it rather of simply flinging the stands up and bobby-pinning them into my collected hair. I’ll either twist or braid those stray strands to throw whomever is following me off guard a little bit. It could just give that other man you run into at the coffee shop another reason to take a second look at you.
Additionally, attempt to tuck the bobby pin into your hair so that just the tips of your hair are visible.
Step 6: Admire The Finished Product
As I said in step two, it is possible that a few strands of hair will fall out of the back of my head throughout the course of this undertaking. Never fear, there is a wonderfully adorable solution to this problem. In this section, I prefer to have fun with it rather of simply flinging the stands up and bobby-pinning them to my collected hair. In order to throw anyone who is following me off the scent, I’ll either twist or braid those loose strands. Possibly, it will give that other man in the coffee shop another reason to take notice of you.
Try to tuck your hair behind your ears so that just the points of your bobby pin are visible.
To Create a Messy Bun.
The presence of dirt in one’s hair makes a genuine messy bun, well, genuinely sloppy.
I believe this is more appropriate for a sloppy bun than than a ballerina bun. And the collect step is the same as well – gather your hair into a ponytail style with your hands holding it together, but do not twist it.
Step 2: Tie a Ponytail Into a Noodle Bun
Pull your hair through a thin ponytail once, but don’t pull it all the way through the ponytail. As a result, a little bun with a little room in the centre will be formed. There is no rhyme or reason for this, yet this particular kind of ponytail is referred known as the “noodle.”
Step 3: Gather All Hair Into a Bun
This is one area where we may have an advantage over others who have lengthy locks. Following the noodle bun, I simply gather all of my hair in the palms of my hands, twist the stray strands around the circle of the bun, and secure the knot with a hair tie. Warning: It will not be ideal at this time. I apologize in advance.
Step 4: Fix Loose Ends
Following the bun, I saw that there was a significant amount of gap between the hair tie and my real hair. In addition, enormous clumps of hair had fallen out or had never made it into the hair tie in the first place. All of this is easily remedied. I pulled strands of hair together, then tucked them into the hair tie, in a similar manner to step four of the ballerina bun tutorial. I also did this with portions of hair that were already tucked into the hair tie, but had enormous chunks of folded hair jutting out from under the hair tie.
Step 5: Just Bobby Pin
Normally, when I wear a sloppy bun, I don’t do anything special with the loose hair. Instead, I’ll simply pull it all up into a single huge chunk and tuck the bobby pins below.
Step 6: Create a Loose Texture
My fingers will be running through my hair to create a loose texture when I am satisfied with how the bun looks and all of the hair is safely pinned back. Instead of going through a six-step process, the final outcome seems as if I just woke up and placed my hair on top of my head.
Step 7: Admire The Finished Product. Again
Netflix, I’m prepared to receive your arrival. I don’t care whether my hair is short. Photographs courtesy of Heather Hartmann
40 Quick and Easy Short Hair Buns to Try
It may appear that folks with short hair are not afforded the same style alternatives as those who are gifted with healthy longer locks on a regular basis. Ponytails, braids, and buns are all popular hairstyles for long-haired girls, and there are a variety of options available. How can you style your hair if you have short hair and want to flaunt one of those fashionable looks? You’ll find the solution in the images below. Hopefully.
Pros of Short Hair Buns
It may appear that folks with short hair are not afforded the same style alternatives as those with healthier longer locks on a regular basis. Ponytails, braids, and buns are all popular hairstyles for long-haired women, and there are a variety of options available. How can you sport one of those trendy styles if you have short hair, on the other hand? To find out, have a look at the images below.
1: Wispy Bun-Like Updo
This wispy hair bun is incredibly charming, and it adds a welcome touch of sophisticated romanticism to your look. The wisps of hair that emerge from either side provide a touch of drama and a sensual vibe to the look. With the right tools, this low updo can be completed in a matter of minutes by an experienced stylist.
2: Curly Bun with Hair Flowers
It’s rather amazing what a difference the correct hair item can make to a certain haircut.
Small white flower accessories provide a touch of elegance to buns with short hair, and a single white floral accessory is the perfect complement to a bun.
3: Small Low Bun with a Bouffant
Cute, refined, and sweet are the thoughts that come to mind while thinking about this little bun with short hair. With a huge crown and a tucked-twisted bun, this is the neatest hairstyle you’ll find.
4: Swirl Bun
Getting creative with the actual styling of your short hair buns is a great approach to differentiate yourself from the competition. It’s possible that you should experiment with this swirl design, which, because of its complexity, is sure to generate some interest.
5: Fancy Twisted Updo
Make your short hair buns stand out from the crowd by becoming creative with the actual styling of your hair buns. It’s possible that you should experiment with this swirl design, which, because of its complexity, is sure to generate some talk.
6: Gathered Loose Bun
Using your imagination to style your short hair buns is a great method to distinguish yourself from the crowd. Perhaps you might experiment with this swirl design, which, because of its complexity, is sure to elicit a lot of interest.
7: Short Updo
However, while some hair types will mold more easily into the bun form, length is no longer a consideration when it comes to pulling off a stunning updo. Hair pins are used to secure this short and easy bun, which is created by pulling hair straight back and rolling it into a roll.
8: Ice Princess Bun
However, while some hair types will mold more easily into the bun form, length is no longer a consideration when it comes to pulling off a stunning updo with ease. Hair pins are used to secure this short and basic bun, which is created by pulling hair straight back and rolling it into a bun.
9: Volumized Short Hair Bun
Teasing the underlayer of hair while letting a curled tendril or two to hang loose can give the appearance that your hair is longer than it actually is. When it comes to hair buns, if you like the appearance but aren’t sure how to get it, give this style a try.
10: Short Showcase of Color
One of the many advantages of having short hair is that your hair coloring visits become significantly more economical as time goes on. A side bun and braid combination, on the other hand, will let you to show off your lovely, unique color while yet keeping it simple.
11: Bun with Bangs
Due to the fact that so many short hairstyles rely on bangs to keep the face from seeming too rigid, this updo is the ideal solution. Instead of using a comb, gather the hair up with your hands and secure it with an elastic to create a fun, casual untidy style like the one seen.
12: Formal Short Hair Bun
If your hair is longer than your shoulders, you should be able to pull off this look. Very short hair will not work for this style. Bun hair doesn’t always have to be just for the gym or a hot summer day — this glam take on the conventional chignon is ideal for a night on the town with your girlfriends.
13: Short Hair Bun Accessorizing
Even the most straight of strands may be gathered back into a simple low bun that can be dressed up a little with a hair ornament or two. The best part is that while you’re accessorizing, you’re also assisting in keeping flyaways under control.
14: Wedding Day Bun
Cute bun hairstyles may be worn for a variety of situations, including the most important day of the year.
You should try this style out at the salon before your wedding day if you want your short hair to seem longer and more feminine than it already is.
15: Short Swoops and Curls
With its waves and charming appearance, this short hair bun is given a boost by some correctly applied style product and a teased under layer. Make a mid-height ponytail out of your hair and curl the pieces with a small to medium-sized barrel iron to make the bun itself. Finally, pin the ends of your hair together.
16: Rainbow Bun
This short hair bun is wavy and gorgeous, thanks to the addition of some correctly applied style cream and a teased under layer. Make a mid-height ponytail out of your hair and curl the pieces with a small to medium-sized barrel iron to form the bun itself! Secure with hair pins, and you’re finished!
17: Quick Short Hair Bun
When it comes to this style, there’s no need to be concerned about being flawless. Easy buns are a nice addition to a hectic morning routine, and the hair still looks fantastic when it leaves the house afterward.
18: Queen of the Bun
Look both royal and contemporary at the same time with this design, which reigns supreme above all other buns for short hair. A splash of color that is both joyful and inventive can help to make the appearance even more imaginative and Alice-inspired.
19: The Lowest Short Hair Bun Ever
The tiniest of buns is reserved for those with the shortest of hair. With its delicate simplicity and ability to hold its shape despite flyaway strands, this is the winner of the cutest bun competition.
20: Bold Colored Bun
With this one-of-a-kind style, you may be inspired by the brilliant greens of the rainforest. If you’re looking for bun ideas that are a little out of the ordinary, a colorful color scheme is your best bet for finding inspiration.
21: Bun with Braids
Braids may be incorporated into your look if your hair is still short enough to handle the drama of a few rebellious strands. It is applied at the end of two smooth, tight tiny French braids to give it a polished look. This might very well be the most popular of the adorable bun styles out there.
22: Short and Wise
Granny hair is really fashionable right now, so your age is no longer a factor in deciding what color to dye your hair. You may get the full-on granny style with a modern twist if you want a bun that is both fashionable and wise in appearance. Add some long bangs to the look to make it more feminine.
23: Sheared Nape and Bun
With an underlayer of hair that has been shaved, you may be more creative. When the long hair is put into a bun, you may choose for an undercut that has some carved lines that stand out wonderfully against the nape of the neck. If you know how to construct a bun with short hair but want something a little more eye-catching, this edgier option is a good option to experiment with.
24: Braid and Bun
You get something like this when you combine a bun, a braid, and some very bright color. A sloppy bun for short hair that is both innovative and ultra-feminine is perfect for any occasion. What’s more, your hair color will be so captivating that it won’t matter how well your braid and bun are executed. This lighthearted look is appropriate for both informal and formal settings.
25: Romantic Braid Bun Crown
If you find that buns are becoming too monotonous, but you still value their utility, consider dressing up your bun with a traditionally romantic braid crown.
To get a tighter and more pulled together crown, you can either let your strands flow free or draw them together tightly. If you have shorter hair, around shoulder length, this style will work best for you — it can be a little too demanding for shorter cuts.
26: Messy Bun with a Side Braid
You may dress up your bun with a traditionally romantic braid crown if you find that buns are becoming too monotonous but you still enjoy its practicalities. To get a tighter and more pulled together crown, you can either let your strands fly or pin them back. In order to get this look, you need have hair that is approximately shoulder length or shorter; shorter hair may be a little too demanding.
27: Voluminous Bun with Teased Bang
As seen by this adorable and feisty bun, a little teasing can go a long way. Despite the fact that there are several methods to style buns for short hair, the beautifully teased bangs on this look are exceptional.
28: Iridescent Half Bun
What should a girl do when she can’t decide whether to wear her hair in a full bun or a half bun? She, of course, experiments with a trendy half-and-half look to see how it works. Get yourself some unicorn tresses the next time you go to the salon because this half bun is the ideal combination of color and texture.
29: Tight Casual Bun
Because a bun for short hair has less hair to deal with than a bun for long hair, one of the most difficult aspects is making sure it remains set. It is owing to the chopsticks attachment, which is threaded through the centre of the bun, that this tight bun seems sleek and stable.
30: Sleek Side Bun
Sure, the most popular bun hairstyles are those that lay at the nape of the neck, but the side bun is almost as beautiful, especially for short hair. This one is polished, making it an excellent choice for the workplace.
31: Triple Bun Updo
What could possibly be better than a bun? Short hair may be styled into several buns! The hair is teased at the top and three small buns are inserted in the rear at a little slant in this imaginative design.
32: Low Bun with Face Framing Locks
If you are looking for a formal and sophisticated hairstyle, we propose that you take this one into consideration. Slight volume in the crown area, a clean low bun, and loose strands that properly frame the face are all elements of this look. What more could a bride, a bridesmaid, or a recent graduate want for?
33: Messy Twisted Bun
Choosing a messy bun hairstyle is the best option if you want to give your bun hairstyle a little edge. Throughout this look, the crown is teased, and the ends of the hair are twisted and fastened at the nape of the neck, with a few strands pulled out to stick out carelessly here and there.
34: Side Twist and Bun
Make a lovely ballerina bun and add a side twist to it. The only components you’ll need to get this appearance are one loosely twisted side and one precisely made bun. Allow it to be a little undone.
35: Loose French Knot
If you combine polished and untidy elements, the outcome is this elegant messy bun for short hair. However, while the main knot is clean and properly constructed, the messiness comes in the shape of long sections of hair that are gracefully escaping at the sides.
36: Double Flower and Sleek Chignon
A single flower in your hair is great, but wearing two flowers at the same time is much more beautiful. A chignon for short hair that’s almost too gorgeous to be true is shown here.
37: Interlocking Braids, Compact Bun and Undercut
Braided hairstyles are a complex approach to transform your drab locks into a show-stopping masterpiece.
The interlocking braids featured on this bun for short hair provide depth and character to the overall edgy style by creating many layers of braids.
38: Turquoise Buns for Shorter Hair
A little hair color may go a long way, especially if it’s in an extreme colour like the vibrant turquoise shown here. The Minnie Mouse buns in this photo appear to be very effortless, and they are further enhanced by the remarkable blue-green hair color, which is guaranteed to turn attention.
39: Simple DIY Bun
This sleek, tight, and effortless bun is a gorgeous and simple way to style your short strands in an updo that is both simple and effective. Using this approach, the hair ornament is positioned directly in the midst of the bun, which is guaranteed to attract the viewer’s attention.
40: Bun Updo with Braided Back
In order to keep it appearing sophisticated, this somewhat disheveled casual bun for short hair incorporates a few touches. With a braided back and a top knot tied into a bandana, you can create an easy and creative casual updo that has a playful spin on the traditional. You should have discovered the solution to the question “how to construct a bun with short hair” after going through these innovative and inspiring photographs. Whether you use twists, ordinary braids, a French braid, a chignon, or a sock to hold your bun in place, there are a plethora of various methods to create short hair buns that are both fun and original.
How to make a bun for short hair and hold it tight
Have you ever found yourself picking up a fashion magazine and flipping through the pages, only to come to a halt when you came upon a particularly attractive hairstyle? Moreover, have you ever questioned if you could ever style your hair in such a manner at your own home? What if you have a short hairstyle or cut? Is it still feasible to do so? We’ll walk you through the steps of how to style a bun for short hair in this tutorial. Updos with buns are a wonderful look, and just because you have short hair doesn’t mean you have to skip out on sporting a lovely bun!
The fact that we frequently encounter heated temperatures and use several styling products indicates that we are committed to looking fabulous on a daily basis.
Because of this, bun styles are an excellent hairstyle to integrate into your daily beauty regimen.
Buns for Short Hair Made Easy
In this section, we will demonstrate how to create the following buns: Messy Bun with a Low Bun High Bun in the Ballerina Style Tomboy Bun with a Sleek Look So go ahead and get yourself a cup of tea or coffee and relax.
Low Messy Bun
Using the instructions below, you can create the perfect low messy bun for your short hair. First and foremost, collect all of your hair at the nape of your neck and lock it in a low ponytail by tying it securely and tightly around your neck. No matter how short your hair is, this will absolutely work as long as your hair can be collected at the nape and pulled into a ponytail. For a little more flair, or if you’re building your bun for an important event, you may select whether to collect your hair on the left or right side.
Use a comb to gently tease your ponytail while holding it out if you want to go for the unkempt appearance.
3.
Using a bobby pin, secure the ends that won’t stay in place.
After that, double-check that all of the ends are securely fastened. 4. Keep it in Place: Spritz some hairspray over your new bun and spritz the remainder of your hair to keep your hair in place while you’re out and about.
High Ballerina-Style Bun
The instructions outlined here will show you how to style your short hair into a high Ballerina-Style bun with ease. 1. Create a high ponytail by pulling your hair over your head with a comb. 2. Style your hair using a comb. Do a high ponytail if your hair is long enough to accommodate it; if it is not, go for something a bit more modest in height. When you have gathered your hair, securely hold it with a hair tie to ensure that your hair does not fall out throughout the process. 2. Tease the Ponytail: After that, teasing your ponytail slightly with a comb will add some volume and texture to your bun.
- Continue to tease your ponytail until the whole length of it has been teased.
- Divide the Ponytail:Divide your ponytail into two equal portions by separating it with a brush.
- 4.
- Using multiple bobby pins, tuck the ends of the hair under.
- Twist the second portion of hair up and over the ponytail, tucking the ends in at the back of the head.
- 5.
- If you discover that you need to use additional bobby pins, go ahead and do so.
Sleek Tomboy Bun
You may learn how to make a Sleek Tomboy Bun by following the tutorial below. 1. Prep Your Hair: Applying a mousse or gel to your hair will make it moist and shiny, and it will also assist to keep your hair all in place. Applying the gel or mousse from the roots to the ends of your hair will ensure that it is evenly dispersed throughout your hair. 2. Gather Your Hair: Lightly comb your hair to provide the appearance of smoothness. Depending on where you want your bun to be, you can gather your hair just below the nape of your neck or a bit higher.
Hold and secure: Holding your ponytail up straight, fold it in half and squeeze it together to make a little looped bun with your fingers.
The ends of your bun will protrude near to the nape of your neck as a result of this technique.
Bonus: Wear a Fake Bun
Wearing a synthetic bun is a quick and simple alternative to creating your own buns from scratch. If you don’t have much time on your hands, or if your own hair is simply too short, a false bun is a simple option. If you’re looking for a fake hair bun, here’s an elegant human hair bun and a fun synthetic hair bun you should absolutely check out if you’re thinking about it. So, we hope you like our list of the best easy bun hairstyles for short hair that are not only fashionable but also functional.
Consequently, don’t let the beauty of buns pass you by simply because your hair is too long. Also, if you have short hair and are unable to create a bun, have a look at these adorable artificial hair buns for inspiration.
More Posts about Hair Bun Styles:
How to Choose the Perfect Hairstyle for Your Wedding Dress How to Choose the Perfect Hairstyle for Your Wedding Dress 5 HAIR BUN HAIRSTYLES -THINNING HAIR TOOLHIGH FASHION FESTIVAL HAIRSTYLES THIS SUMMER
25 Stunning Messy Buns for Short Hair
How to Choose the Perfect Hairstyle for Your Wedding Dress How to Choose the Perfect Hairstyle for Your Wedding Dress 5 HAIR BUN HAIRSTYLES -THINNING HAIR TOOLHIGH FASHION FESTIVAL HAIRSTYLES This Summer
How to Make a Messy Bun for Short Hair
Learning how to arrange your short hair in a messy bun will allow you to have a unique hairdo on every day of the week. Here are a few simple steps to creating a stunning bun.
i) Curl Your Locks
If you already have curly or wavy hair, you’re in luck, and you can move forward to the following stage. Adding texture to your hair is essential to creating a sloppy bun. It is for this reason that you must use a curling iron. Most enjoyable about this phase is that you are not required to generate clean and visually beautiful waves. Make whatever you can out of what you have. It shouldn’t take more than 5 minutes to complete.
ii) Brush Your Hair
Make a delicate brushing motion through your hair, not to split the strands, but to make the hair a little more voluminous. Make careful you apply the paint using a brush. A comb will produce the polar opposite of what you want.
iii) Tease Your Locks
Take the top strands and gently raise them off the ground. Holding the strand aloft, use a fine-toothed comb to comb through the hair from roots to ends while holding the strand up. Make teasing movements to add extra volume to your hair. Repeat the process with the remaining top strands.
iv) Make A Ponytail
Make a low ponytail out of your hair. Keep the hair pulled together as closely as possible when you’re styling it. A little lump of hair will emerge on your head as a result of this method. Don’t be concerned if your ponytail is too short. Just make certain that you can fold it in half. Creating a high ponytail is necessary if you have a hairdo that has more hair on top than it does on the bottom.
v) Finish the Bun
Insert the end of the ponytail into the elastic band at the base of the ponytail. It is possible to use bobby pins to bind the free strands if the hair is too short for this. In order to achieve a messy bun hairstyle with long hair, follow the steps in the following tutorial:
Best Short Messy Bun Hairstyles
Messy buns with short hair may transform your appearance no matter what the occasion is. A messy bun may help you make a statement, whether you’re having a poor hair day or attending a wedding. If you know how to build a bun and maintain it in place, you will be prepared for any hair difficulties. These hairstyles are perfect for those occasions when you don’t have time to wash your hair or whenever you want to project a wild image. Businesswomen, on the other hand, are partial to untidy buns.
1. High and Messy
Creating a messy bun for short hair is quite simple and doesn’t need much work on your part.
All you have to do is gather some of the top strands together and twist them into a bun around an elastic band to complete the look. It is possible to tie the bun with a single strand of hair if your locks are thick enough.
2. Short Bob Bun
If you want to make your messy bun stand out, you’ll need to gently brush all of your hair upwards and pin the top section in place with bobby pins. In order to produce a full-size bun with the hair that is too short and thin, you would need to draw an outline of a bun. You may also have a look at these women’s bun hairstyles.
3. Smart braiding
In order to make this messy bun stand out, you’ll need to gently brush all of your hair upwards and pin the top section in place using bobby pins towards the back of your head. In order to construct a full-size bun with the hair that is too short and thin, you would need to draw an outline of one. Women’s bun hairstyles are also available, which you can see here.
4. Pinned coils
Bobby pins can assist you in creating a messy bun for short hair that cannot be secured into a ponytail. Brush the hair to give it additional texture, and then use the pins to arrange the bottom locks into a false bun to complete the look. Pretty Braided Bun Hairstyles for Women
5. Small and fun
It’s time to put your flawless and voluminous bun on hold, especially if you have short locks. Instead, embrace the modest and playful little buns that you can whip up without too much effort instead. Then secure the hair with an elastic band, and you’re done!
6. Double trouble
Why not create two buns if you’re already capable of making one? On short hair, two buns will appear to be the same size as one bun. They do, however, give your image greater volume as well as a delightful Minnie Mouse aspect. Make yourself appear younger and more confident!
7. Be loose
Make a bun out of the strands on top of your head by using them as an elastic band. Any female with short hair will appreciate the enormous volume that can be achieved by wrapping one section of hair around another. Pins should be used to keep the masterpiece together.
8. High hair
Don’t forget to tease your hair well before putting it in the bun. Because a messy bun on short hair might appear quite little, you’ll need to focus on the rest of your hair to make up for the lack of volume in the messy bun. Although it’s not always a good idea to have high hair, it’s always a good idea to have it. Hairstyles for Chignons and Buns
9. Go wild
This is a fantastic solution for women who have pixies in their hair. You’re probably wondering how you’re going to put your hair up in a lovely bun even if you don’t appear to have enough hair for it. All that is required is that you utilize your imagination and take pleasure in the outcome.
10. Pin it up
Using simple pins to secure your hair into a bun is an easy method to get started. Organize your hair into a loose ponytail and pin the ends up for a playful appearance. You may get this look with any short, a-line, or asymmetrical bob hairstyle.
11. Mini ponytail
What you see is exactly what you get. A very little ponytail that is tucked into the elastic band to give the look of a lovely bun. This hairstyle may be created without the use of a mirror or a hairbrush. One of the most convenient hair styling solutions available!
12. Low braiding
When you have short, thin hair, a low braiding technique may make your untidy bun seem fantastic.
Grab as much hair as you can from wherever it is available and braid it. After that, form a tiny bun at the bottom of the cake. Braids and buns look fantastic when worn together.
13. Hair extensions
If you want a high and attractive messy bun but you just have a pixie, don’t panic, hair extensions can help you achieve your goal! Making the extensions part of the ponytail is as simple as 1-2-3! You can have the most gorgeous bun in the world in only a few short minutes.
14.Wedding hairstyles with long hair
In the event that you have a big occasion coming up, a messy bun for short hair may be a superb choice of hairstyle for you. Even the smallest bob may be transformed into a masterpiece by a trained stylist. Put your confidence in the hands of a spiritual guide.
15. Quick and stylish
Creating a quick and easy bun at the very top of your head is ideal if you have more hair on top than you have at the bottom of your head. This amusing tiny bun is no longer the preserve of housewives; even the most fashionable of women are donning them on a daily basis.
16. Closed eyes
Do you realize how many different hairstyles you can make simply by closing your eyes? This is an example of one of them. Thank goodness, unkempt hairstyles are getting increasingly popular. You won’t have to spend any more time in front of the mirror than necessary.
17. Loose strands
Tieing loose strands together to give the look of a messy bun on short hair is an old method that never goes out of style. Simply curl each strand of hair tightly to give the appearance of thicker hair before pinning them up.
18. Diamond bun
Making a sloppy bun out of stray strands on short hair is an old tip that hasn’t lost its appeal over the years. Simply curl each strand of hair tightly to give the appearance of thicker hair before pinning it up.
19. Up and away
In case you have adequate hair, aim to make your bun as tall as you can can. This manner, the unkempt appearance of your hair seems very voluminous. The world is being conquered by high buns. Allow them to enter your home.
20. Donut Bun
Take advantage of the fact that you have enough hair for a little donut bun to create a nice bun out of your unruly hair. This is a fantastic tip for those with short tresses. The appearance of a little and tidy bun on teased manes is always pleasing. Long, angled bob hairstyles are the best.
21. Low Messy Bun for Short Hair
Short hair styles up wonderfully in this adorable little bun that is tied above the nape of the neck, with a small part of hair left loose on one side of the head for a more natural look. A tee and shorts look effortlessly stylish when dressed up, and a dress makes this 2-minute look even more elegant.
22. Half Up Messy Bun for Short Hair
You may also pull the top part of your short hair up into a bun or ponytail as an alternative method to style it. Use a curling iron to add volume to the bottom half of your hair, or leave it as it is naturally curly.
23. Messy Short Space Buns
Making a bun or a ponytail out of your short hair is another stylish option to wear your short locks. Use a curling iron to add volume to the bottom part of your hair, or leave it as it is for natural curls.
24. Messy Short Curly Bun
On certain days, all you want to do is collect your curly hair into a fashionable updo and call it a day. This top bun with a few scattered lumps or bumps takes about a minute to do and is perfect for all-day use.
25. Top Bun for Short Straight Hair
The top bun is a popular hairstyle for ladies because it exudes an air of easy coolness. Short straight hair should be gathered into a tiny bun, with little portions of hair left to frame the face or tuck behind the ears when the bun is finished.
After reading this article, you should have a better understanding of how to create the most spectacular messy bun on short hair. Bun lovers no longer have to worry about their hair being too short. Try one of these recipes out for yourself!
10 Hair Buns For Short Hair With Styling Tips
Being able to dress for any occasion is not simply a perk reserved for individuals with long tresses. Women with short hair can also rock just about any style, including buns, with relative ease. An excellent general rule of thumb is that, if you have hair that is long enough to be put into a ponytail, you can create a bun with that hair. Coiling and twisting techniques that are often used for long hair may not be effective for short hair. However, regardless of whether your hair is smooth, untidy, or voluminous, you can design a bun with whatever hair you have and sport it with panache!
Take a look at them by scrolling down.
Bedazzling Buns For Short Hair
- High Low Bun
- Messy Top Bun
- Quirky Faux Bun
- Messy Side Bun With A Headband
- Elegant Side Braided Bun
- Loose Side Bun
- Playful Ballerina Bun
- Simple Top Bun
- Low Rolled Bun
- Retro Twist Mini Bun
- Low Voluminous Bun
1. Low Voluminous Bun
Jaguar provided the image. PS / Image courtesy of Shutterstock.com The lack of volume in short hair buns is one of the most common complaints. It is possible to produce magic with a nice volumizing product and a little bit of teasing, though. Products That Were Utilized
- Blow dryer
- Teasing comb
- Hair brush
- Strong-hold hairspray
- Volumizing serum
- Heat protectant spray
Volumizing serum, heat protectant spray, blow dryer, teasing comb, hair brush, and strong-hold hairspray;
- Apply a volumizing product of your choice to damp hair, paying particular attention to the roots of the hair. Apply a heat-protectant spray to your hair and blow dry it on a low heat setting
- Make a little asymmetrical part in your hair
- Using a hair tie, pull as much of your hair as you can into a low ponytail at the nape of your neck. Divide the ponytail into three portions and tease each section to give it more volume
- Take a portion of hair and wrap it around the base of the ponytail, holding it in place with bobby pins to maintain it in place. Repeat the process for the remaining two portions. Hairspray with a firm grip is sprayed onto a hair brush and brushed through to prevent stray strands. Apply medium- to strong-hold hairspray to secure your hair and prevent it from slipping out of your ponytail
Is This the Right Fit for You? This is most effective on those who have an oval or heart-shaped face. Return to the top of the page
2. Messy Top Bun
Photograph courtesy of magicinfoto / Shutterstock.com. The sloppy bun is quite adaptable and may be worn in a casual or formal setting depending on your preferences. It is simple to make and can be used for almost any event, making it a great choice. Products That Were Utilized How To Dress Properly
- Scrunch your hair slightly after spraying it with a texturizing spray
- Make a comb through your hair and pull as much of it as you can into a ponytail at the head with your fingers. Make sure you don’t use a brush or a comb on your hair since the less structured your hair seems, the better it will look overall. If the hair tie is unable to hold up all of your hair, that is perfectly OK. The loose tendrils of this haircut work to its advantage. Use a teasing comb to give volume to each portion of the ponytail once it has been divided into two halves. By smoothing out the top layer, you may conceal the teased area. Wrap one portion around the base of the ponytail and pin it in place using bobby pins. Repeat with the other section. Then, using the other portion, wrap it around the first in the other direction and pin it in place. Before you use bobby pins to fix your bun, spray them with hairspray to prevent them from coming out.
Scrunch your hair slightly after spraying it with a texturizing spray. Hairstyle: Comb as much of it into a ponytail at the head with your fingers while running them through it. Don’t use a brush or a comb to style your hair since the less structured your hair seems, the better it will look. This does not mean that the hair tie cannot hold up all of your hair. The loose tendrils of this haircut work in its favor. Use a teasing comb to give volume to the ponytail’s two pieces, which have been divided.
Then use bobby pins to bind one portion of hair at the base of your ponytail to keep it in place.
Hairspray should be used before you use bobby pins to hold your bun in order to prevent them from slipping out.
3. Quirky Faux Bun
Scrunch your hair lightly after spraying it with a texturizing spray ; Make a comb through your hair and pull as much of it as you can into a ponytail at the top of your head. Don’t use a brush or a comb to style your hair since the less structured your hair seems, the better. If the hair tie is unable to retain all of your hair, that is perfectly OK. The loose tendrils of this hairdo work in its favor; Divide the ponytail into two pieces and add volume to each portion with a teasing comb. By smoothing out the top layer, you may conceal the teased part.
Afterwards, wrap the other portion around the first in the opposite way and pin it in place. Before using bobby pins to fix your bun, spray them with hairspray to prevent them from coming out.
How To Dress Properly
- To begin, add a volumizing product to your hair
- Then style as desired. Gather your hair on one side, near to your temple, and pin it back. Put your hair in a ponytail and hold it down with bobby pins around the outside to keep the shorter strands in place
- This hairdo necessitates the use of pomade. So, spritz some water on your ponytail to ensure that it is equally distributed throughout your hair
- Next, take a tiny quantity of pomade between your fingers and distribute it along the length of the ponytail. Conceal the base of the ponytail with your fingers, so that the resulting shape is similar to the shape of a bun. Apply a bit extra pomade to the remainder of your hair to smooth it out. Allow the pomade to dry completely before removing the hair tie.
Is This the Right Fit for You? Those with lengthy faces will benefit the most from this. Return to the top of the page
4. Messy Side Bun With A Headband
Credit: s bukley / Shutterstock.com for the image Headbands are no longer considered to be the exclusive possession of tiny girls. Headbands of the current generation are available in a variety of styles, ranging from fashionable to classic. Wearing one with this side bun will make an already gorgeous hairdo even more adorable, so go ahead and try it. Products That Were Utilized
- Serum for smoothing
- Heat protectant spray
- A medium barrel curler
- A headband
How To Dress Properly
- Apply a smoothening serum to your hair to make it more manageable. Hair should be sprayed with a heat protectant spray
- One side of your hair should be parted. Curl your hair away from your face, starting with the larger area of your hair, using a medium barrel curler. gently brush through each curled portion to soften the look and make it a bit less rigid Three parts should be created in the hair. All of the strands from the center area to the side of the bigger section are gathered and twisted together to form a low bun. To hold the bun in place, use bobby pins. Make a loose braid with your hair starting from the smaller area and weaving in strands as you go along. Pull the braid through the bun
- And Pull back the hair from the larger area of the head, wrap it around the base of the bun, and secure it with a hair tie or pin. Given that the overall look is more casual, it is OK if a few tendrils fall out here and there. Place a headband at the top of your head to complete the appearance
Is This the Right Fit for You? This haircut is very flattering for people who have an oval or heart-shaped face. Return to the top of the page
5. Elegant Side Braided Bun
The image is courtesy of the Everett Collection / Shutterstock.com. It may be difficult to believe, but this sleek haircut can be achieved with no heat and with a few items. Products That Were Utilized How To Dress Properly
- Form an asymmetrical part in your hair and add a texturizing mousse to it
- Begin braiding your hair at the smallest area, just over the ear, and work your way up. As you go, include more and more components into your design. The braid should be placed at the nape of the neck. As you approach the side of the bigger section, incorporate strands from the top of the braid into the braid. Braid the remainder of your hair into a tight bun and fasten with an elastic band. Hairspray should be sprayed into the braid to prevent the shorter strands from falling out
- The braid should be rolled into itself to form a bun that is secured with bobby pins.
Is This the Right Fit for You? This haircut is most flattering on people who have a long facial shape. Return to the top of the page
6. Loose Side Bun
Featureflash and Shutterstock.com are both credited with this image. This loose side bun is both fashionable and gorgeous, yet it couldn’t be much simpler to do. Products Used
- Product that increases the amount of air in the air
- Spray with heat protection
- Iron with a flat surface
- Comb for teasing
- Hairspray
How To Dress Properly
- Use a volumizing product to add volume to your hair. Before styling, spray your hair with a heat protectant. Use a flat iron to smooth and polish the top of your hair, which should be smooth and polished. Straighten your hair from the roots all the way up to the point above your ear. Continue to style loose curls with the same flat iron from that point forward
- Hair should be pulled back into a low side ponytail, with the front half left out
- Backcomb the pony with a teasing comb to create volume, then tuck the end of the pony into the elastic at the base of the ponytail holder. Using bobby pins, secure the style and set it with hairspray
Is This the Right Fit for You? This hairdo is suitable for all occasions. Return to the top of the page
7. Playful Ballerina Bun
Featureflash and Shutterstock.com are both credited with this image. Fans of the messy appearance will like this version of the traditional ballerina bun, which is softer and more wearable than its original iteration. Products That Were Utilized
- Featureflash and Shutterstock.com are both credited for this photograph. Fans of the messy appearance will like this version of the traditional ballerina bun, which is softer and more wearable than its original version. Substances Employed
How To Dress Properly
- Begin by spraying your roots with a texturizing spray to give them a more natural appearance. Apply a conditioning serum to the remainder of your hair to give it a glossy appearance. Finger-comb your hair to prevent tangles. Make sure you do not use a comb or a brush on your hair. An elastic band should be used to gather your hair on the top of your head and keep it in place. It is important that the ponytail is not overly tight. The pony is to be divided into three pieces. A portion of hair should be taken and carefully twisted before being secured with bobby pins near to the base of the ponytail. Repeat the process for the remaining portions. Using a flexible-hold hairspray, secure the bun in place.
Is This the Right Fit for You? It is recommended that you use this bun for short hair on people who have an oval or heart shaped face. Return to the top of the page
8. Simple Top Bun
MatteoChinellato / Shutterstock.com is credited with this image. This is the great technique to elevate an average bun to a higher degree of sophistication while keeping it simple. Products That Were Utilized How To Dress Properly
- Apply a volumizing product to wet hair and style as usual. Twist and blow dry the top of your head to give your hair extra volume. Make a high ponytail out of your hair and bind it with an elastic band. Using your fingers, separate the ponytail into two parts. After that, backcomb both parts to give them more volume. It’s important to keep the parts airy when smoothing them out. Wrap the initial piece of the pony’s tail around the base of it. Then, in the same way as the first portion, wrap the second section around it. Using bobby pins, secure the bun in place and spritz it with hairspray
Wet hair should be treated with a volumizing product. To add extra volume to your hair, flip it upside-down and blow dry. Make a high ponytail out of your hair and bind it with an elastic band: The ponytail should be divided into two pieces. After that, backcomb both parts to give them more body and thickness. It’s important to keep it fluffy while smoothing out the portions. Using the first portion, wrap it around the pony’s base. Then, in the same way as the first portion, wrap the second section around the first.
9. Low Rolled Bun
Credit: s bukley / Shutterstock.com for the image Elegance does not have to be difficult or time-consuming to achieve, as demonstrated by this bun, which can be prepared in less than five minutes. Products That Were Utilized How To Dress Properly
- To smooth out your hair, apply a smoothening serum and brush it out
- Using a comb, separate your hair into two portions. Twist each segment together and secure with an elastic band to form a ponytail
- The ponytail should be folded in half and wrapped around the elastic to form a bun
- The bun should be secured with bobby pins, and the hairspray should have medium hold.
Is This the Right Fit for You? This is applicable to all facial shapes. Return to the top of the page
10. Retro Twist Mini Bun
Image courtesy of Shutterstock Image courtesy of Shutterstock This haircut finds the right mix between the retro-chic flare and the sophisticated refinement of the present day. Products That Were Utilized
- Conditioning serum, heat protectant spray, medium barrel curler, and medium-hold hairspray are some of the essentials.
How To Dress Properly
- Smoothness and shine may be achieved by using a conditioning serum on your hair. Make a sweeping side part with your hair. Apply a heat-resistant spray. Begin curling your hair with a medium-sized barrel curling iron. Begin with the bigger portion of your hair and curl it away from your face. Separate the curls in your hair by running your fingers through it. Begin braiding a loose rope braid from the place above your ear, working your way down. Continue to include more and more parts into your design as time goes on
- Put your hair in a tiny bun at the nape of your neck and tuck one side of the braid into it
- Using bobby pins, secure the braid and the bun in place and spritz with a medium-hold hairspray
Is This the Right Fit for You? This retro-inspired haircut is suitable for many occasions. Return to the top of the page These are some of the most simple bun hairstyles for short hair that are both stylish and functional. During the hot summer days, they help to keep your hair out of your eyes and mouth. They also make you appear classy, and they match wonderfully with your little black dress. Do not allow the length of your hair prevent you from donning this timeless classic style! Please leave a comment below to tell us about your experience with these short hair buns.
Recommended Articles:
- Best Messy Bun Hairstyles – Our Picks for the Best
- Chignon Buns: 10 Recipes You Can Make Right Now
- Hairstyles with a twist for short hair that are just stunning
- Hairstyles for short hair that are fun and different
- Our Top 10 Favorite Short Hairstyles
Was this article of assistance? The following two tabs alter the content of the section below.