
Buns
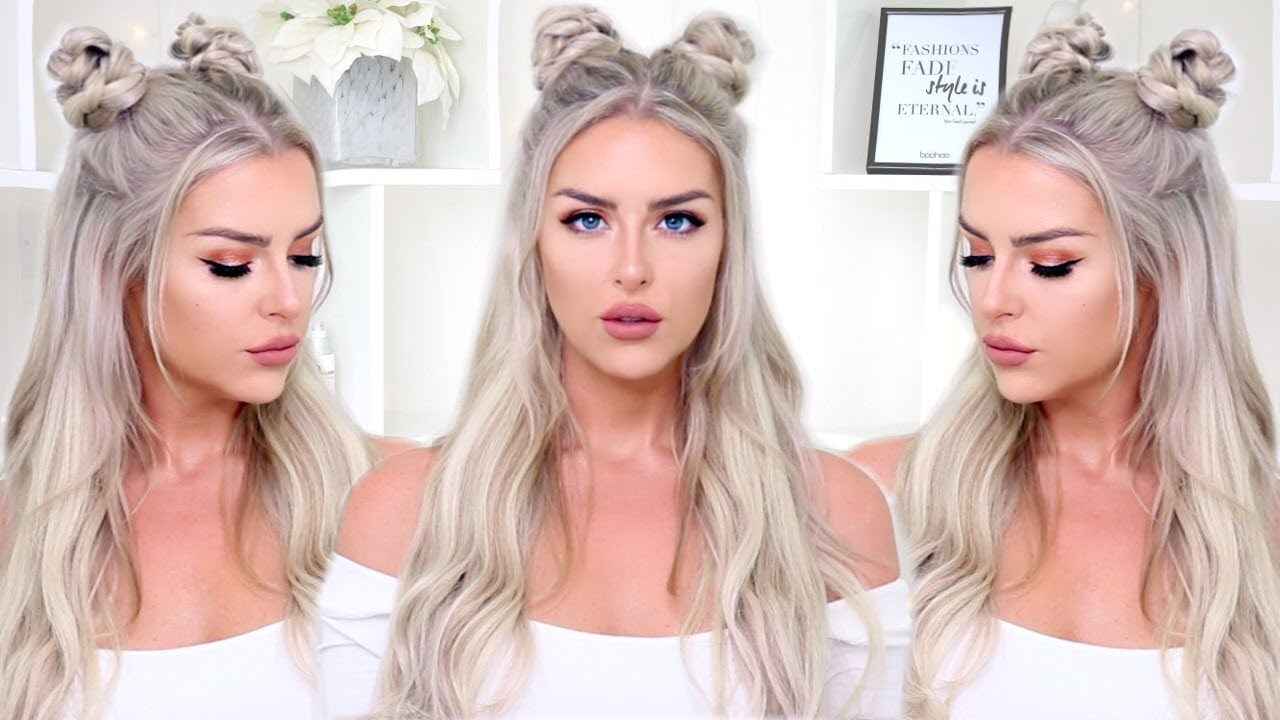
How To Do Half Up Half Down Space Buns
Jan
How to Do Space Buns
Documentation Download Documentation Download Documentation The ultimate updo if you’re searching for something a little more out of this world than a ponytail or a top knot, space buns are the way to go. Space buns are casual, fun, and fashionable, and they look excellent whether you’re attending a music festival or watching Star Wars with your buddies. Seeing as it appears that space buns will not be departing our planet anytime soon, we’ve put together this guide to walk you through the process of making space buns from scratch.
Don’t be concerned; making space buns isn’t rocket science at all.
- Using a comb, brush your hair and part it down the center. Comb your hair until it’s smooth and free of knots or tangles, then style it as desired. And make a center part for your hair, use the handle of a rat-tail comb to run it down the middle of your head from your forehead to your nape
- 2 Make two pigtails in a row. Choose whether you want them to be high on the top of your head or low on each side of your nape—experiment to find out what works best for you. Smooth down the hair that will be pulled into the pigtails so that they are smooth and neat when they are finished. Hair ties in the color of your hair should be used to secure the pigtails.
- Using a comb, comb your hair into a middle parting. Remove any knots or tangles from your hair by comb it until it is smooth. Create a part that runs down the middle of your head, from your forehead to your nape, using the handle of a rat-tail comb. 2 Make two pigtails in a contrasting color. Choose whether you want them to be high on the top of your head or low on each side of your nape—experiment to find out what you enjoy most in this situation! Maintain a smooth and even texture in your hair when it is pulled into pigtails. Hair ties in the color of your hair should be used to secure the pigtails
- 3 Tease your pigtails if you want to add additional volume to your look. Start by lifting up your first pigtail and combing it a few times, starting at the tips and working your way down to the end of the hair tie. This should be done with the second pigtail as well. If you have thin hair, this is a fantastic idea since it will make your hair look thicker and result in larger space buns at the end of the day.
- If you like, you may wrap three-combhair extensions around the base of your pigtails as an alternative option. This will assist you in getting a bit greater volume
- 4Make your initial pigtail into a rope by twisting it over itself. Take one of your pigtails and twist it away from your face, forming a rope around your neck. The tighter you twist the rope, the sleeker and smaller your bun will come out
- 5Circle the rope into a bun and secure it with a hair band to keep it from falling down. Wrap the rope around the base of the pigtail to secure it in place. To avoid damaging your face, wrap the scarf away from you rather than towards it. Tuck the end of your hair into the bun, and then wrap another hair tie around the base of the bun
- 5 To make the second bun, repeat the procedure. Twist the second pigtail into a rope, then wrap it into a bun to finish it off. Secure the bun with a hair tie after tucking the ends of the rope under it 7 Make any necessary adjustments to your buns. Here’s where you may let your imagination run wild. Using your fingers, gently tug on the outside edges of the buns to loosen the strands if you want them to be messier or more voluminous. To add even more volume to your buns, gently tug on the hair that is being pulled into them to loosen it up. Consider the hair on the top of your head and the sides of your head
- If you accidentally left strands out of your buns, straightening them with a flat iron may be an option. Allowing them to have a wispier appearance by bending the iron towards your face rather than straight down
- 8Spray the space buns with hairspray to hold them in place. If your buns are feeling a little loose, use bobby pins to hold them in place. You can use as many bobby pins as you need. To finish your look, spritz it with hairspray and let it to dry.
- 1Brush your hair and then make a center part with it. Make sure your hair is lovely and silky by combing it. The handle of a rat-tail comb may be used to create a center part in the midst of your hairstyle. Begin at the top of your head and work your way down to the nape of your neck. Using your left half of your hair, drape it over your left shoulder, and your right half over your right shoulder
- 2 Pull one-half of your hair up into a loose bun to keep it off of your face and out of your way. Take the right part of your hair and bind it up with a hair tie to keep it in place. You can wear your hair in a loose bun or even pigtails. This is irrelevant
- The aim is to keep this part of your hair out of your way while you work on the other half. 3 On the left side of your head, pull your hair into a half-up ponytail. Create a horizontal portion on the left side of your head, about at the level of your eyebrows. Make a center part in the rear of your head, beginning at the hairline and finishing at the center part in the front of your head. Organize the hair above the part into a high ponytail and tie it off with a hair knot.
- If you want to wear your ponytail on the top-side of your head, rather than the back-center of your head, do so like a dog ear.
- 4If wanted, tease your ponytail a little. Because you will be dealing with less hair than you would while constructing a standard space bun, it would be a good idea to tease your ponytail a bit before you start working. Backcomb your ponytail towards the hair knot with a brush after lifting strands of hair from your ponytail
- 5 Twist the ponytail into a bun and bind it with a hair tie to finish the look. To begin, twist the ponytail away from your face to form a rope with your hair. After that, coil the rope around the base of the ponytail to form a bun with the hair. Tuck the ends of the rope beneath the bun and secure it with a hair tie at the base
- If you twist the space bun tightly enough, it will become smaller and sleeker in appearance.
- 6Untie the temporary bun from the other side and repeat the process on the opposite side. Return your attention to the right side of your head and remove the loose, temporary bun you formed previously. Create a second half-up ponytail, tease it, and then wrap it into a bun for another look. Another hair tie should be used to secure the bun. 7 If you like, you can tease the remainder of your hair. You are not have to do this, but it is a fantastic way to complete the vintage 90s style in your wardrobe. Alternative: If your buns are beautiful and smooth, you may straighten the remainder of your hair instead.
- Even more volume may be achieved by loosening the hair that is being pulled into the buns. During this stage, you should concentrate on the sides and top of your head
- It is fine if the section in the back-center of your head disappears. You don’t require it any more
- Finish by misting the space buns with hairspray after you’ve made any last adjustments. If your buns are feeling a little loose, use bobby pins to bind them to your hair. Once you’re satisfied with the overall appearance, softly spritz your hair with hairspray to finish it off. Allow the hairspray to dry completely before heading out
- Using a comb, brush your hair and part it down the center. Make sure your hair is lovely and silky by brushing it out. With the handle of a rat-tail comb, part your hair along the center from your forehead to your nape
- 2 Pull your hair into two pigtails and knot them together using hair ties to finish the look. Here’s where you may let your imagination run wild. It’s possible to wear two high pigtails at the crown of your head, or two low pigtails at the base of your neck. In order to get a Princess Leia-inspired style, you can even put the pigtails on the sides of your head, just over your ears.
- If you’re looking for something a little more complicated, consider half-up pigtails.
- 3 Braid the pigtails and bind them with clear hair elastics to complete the look. The initial pigtail should be divided into three equal sections. Cross the left and right sections over the central strand to form the braid. Once you’ve used up all of your hair, bind the braid with a clear hair elastic wrapped around the end of it. Repeat this procedure with the other pigtail as well.
- Instead, a 2-strand rope braid can be used to create a more distinctive design. This method is very effective for natural hair.
- 4 If desired, pull on the outside loops of the braids to make them appear more volumized. You are not need to do this, but it is a fantastic technique to add volume to your hair, especially if it is really thin in the first place. Gently tug on the outer loops of the braid starting at the bottom and working your way up till the top
- Repeat the same with the other braid
- If you used a 2-strand rope braid, you may skip this step. It is important not to pull too hard or the braid will come undone.
- 5 Tie the braids into buns and fasten them with hair ties to keep them in place. Pick up the left braid and wrap it around the hair tie to form a bun on the top of your head. Tuck the braid’s end beneath the bun, and then wrap another hair tie around the bun’s base. Repeat with the other braid. Then repeat the process for the other braid.
- If you want to make a regular bun, do not twist the braids into a rope like you would for that.
- 6 Make any necessary adjustments to your hair, then spritz it with hairspray. If your buns are feeling a little loose, pin them down along the side borders to the rest of your hair, using as many bobby pins as necessary. As soon as you are satisfied with the appearance of your space buns, spritz them with hairspray and allow the hairspray to dry
- Straightening the remainder of your hair for a smoother look is recommended if you wore braided half-up buns.
Create a new question
- QuestionWhat should I do if I have really curly hair? Straightening procedures that do not require heat are available (check out How toStraighten Your Hair Without Heat). In fact, I believe that messier, curlier buns look better than perfectly straight ones. I’ve seen folks with really curly hair pull it off without having to straighten their hair beforehand. In the event that it is really difficult to create an even part or to get the hair to twist, dry the hair rather than leaving it moist. Question How can I accomplish this with hair that is prone to tangling? There are a plethora of solutions available to help you untangle your hair. Aside than that, I recommend moving extremely slowly and gently, combing your hair and untangling any tangles as you go
- Question Is it possible to braid the pigtail instead of twisting it? Certainly, braid the ponytails, then wrap them around like buns and put them in place with bobby pins
- Question What is the best way to get my hair straight without brushing it too hard? Mackenzie RomeroAnswer from the Community You may always use a straightener, but be sure to maintain the heat on a low setting. It is not required to be perfectly straight. If it doesn’t function on low, try increasing the volume one notch. Question What is the best way to make bigger buns? Making the buns looser will make them look larger, and this is something you can do
- Question Is it still possible for me to do it if I have really long hair? EmmaLee HudginsAnswer from the Community Yes, it is possible. They may appear larger, though, depending on how tightly you twist or braid your hair
- Question What can I do to make them seem more even? Make sure your middle parting is equal and straight. As a last suggestion, I’d suggest utilizing a large number of bobby pins and beginning by placing them in pigtails. Question Is it possible to accomplish this with short hair? It is recommended to use low buns instead of high buns if the length of your hair is insufficient to reach high up onto your head
- Question How can I make them even and ensure that they don’t wriggle around? Use bobby pins to keep them from wriggling, and if you don’t have any bobby pins, use more hair ties to keep them in place. Take your hair and equally divide it down the center, using the middle hair line, to get an even distribution. Question Is it still possible to do space buns if my hair is barely up to my shoulders? A half-up, half-down style, as seen in part 2, should be doable with your current amount of hair.
More information on the replies Inquire about something There are 200 characters remaining. Include your email address so that you may be notified when this question has been resolved. Submit
VideoRead Video Transcript
- Make the space buns as clean and elegant as you like, or as loose and sloppy as you want
- The choice is yours. Make some streaks in your hair with hair chalk before you begin to give it a more vivid appearance.
Thank you for submitting a suggestion for consideration!
Things You’ll Need
- Hairbrush, rat-tail comb, four hair ties, Bobby pins, hairspray
- Hairbrush, rat-tail comb, four hair ties, Bobby pins, hairspray
- Hairbrush, rat-tail comb, 4 hair ties, 2 clear hair elastics, Bobby pins, hairspray, and a hair tie holder
About This Article
Summary of the ArticleXTo style your hair into space buns, part your hair down the center. Then, using hair ties, knot each part of your hair into a pigtail on the other side. Twist one of the pigtails with both hands to make it a little more secure. You will achieve smaller and firmer space buns if you twist your hair in a tighter manner. Continue wrapping the twisted hair around the base of the pigtail many times until you have around 4 inches (10 cm) of hair remaining. Put the end of your pigtail below the bun you’ve just created, and secure the bun by putting a bobby pin in the end of your hair where it tucks under the bun and through the bun.
Finally, spritz your space buns with hairspray to ensure that they stay in place throughout the day.
Did you find this overview to be helpful?
Did this article help you?
Buns from outer space! These buns have been popping up all over the place recently, and I thought it was about time I shared my take on them with you. Or put a spin on them.? haha! Of course, I enlisted the assistance of my little gal buddy Sav in the production of this movie, and I hope you enjoy it! My approach is somewhat different from most people’s, but I’ve discovered that it is the most consistent way for me to achieve consistent-looking buns. messy buns are amazing, however I have a hard time getting symmetrical messy buns, which is vital when the buns are on the top of the head and adjacent to one other!
- If you remember, I got platinum about a month ago and none of my Laced Hair Extensions matched my new hue, and Lacy had just sold out of all the Platinum shades during their Black Friday sale.
- They’re just stunning!
- Christina Kreitel, my hairdresser, toned them to match my blonde hair and then gave them a root, which I just like!
- And a heartfelt thank you from the bottom of my heart!
- With the internet, you can never be sure how anything will be accepted by the public.
- Our excitement for keeping up with the vlogs is greater than ever!
Then, on Monday, Savy’s very first YouTube video was released, which you may view here. You may see many more photographs of this haircut by visiting this link. Now, let’s get back to the space buns. Here are the step-by-step instructions, followed by a video demonstration.
- 1. Make a center part with your hair
- 2. 2. Use hairspray to smooth up any flyaways. 3. If you require single wefts, clip them in place. 4. Tie a portion of hair into a knot for the knot
- 5. Place two fingers in front of the area where you want the bun to be
- And Sixth, pull your hair forward and around your index and middle fingers. 7. Rotate your wrist in a 360-degree circle
- With your middle and index fingers, catch the tail and pull it almost completely through, as seen in picture 8. 9. Using two bobby pins, bind the bun so that the bobby pins cross each other in the middle. In order to ensure that the knot has adequate volume or that the detail is moving in the appropriate direction, I play with it for a second before I secure it. 10. If there is a little bump or bubble, a second bobby pin can be used to secure it in place. 11. Repeat the process on the opposite side.
To make things easier for you, we’ve put up a video to accompany the text instructions. Please enjoy! Aside from the fact that the ending is amusing, I have no clue where Savy gets his ideas. There’s also a step-by-step graphic for you to refer to in case you get stuck! Please feel free to pin this hairdo to one of your beauty boards if you so choose! Thank you so much, beauties! I adore each and every one of you and can’t wait to see you again! xo
40 Space Bun Hairstyles That Ooze Sassiness
Women’s hairstyling trends in recent years have included space buns, which are definitely a show stopper. ‘Space bun’ is defined as a ‘hairstyle sported by Princess Leia in the Star Wars film A New Hope’ according to the urban dictionary. This wonderful haircut is also worn and admired by many Hollywood celebrities, whom we will not mention here. It has that ’90s feel to it (think Gwen Stefani and Björk), and it has made the most beautiful comeback in recent memory. Piggytail buns are a lot of fun to wear since they are simple and completely effortless.
Where Does the Name Space Buns Come from?
The spacebun hairstyle has a long history, even if you don’t believe it yourself! We now have one of the most popular haircuts in the world, thanks to the Star Wars saga and Princess Leia’s signature look. Carrie Fisher ignored her mother’s warnings not to take parts that required her to wear unusual haircuts, despite the fact that she had been warned. We have the advantage of having to contribute something. However, in a recent interview, George Lucas admitted that he had a difficult time coming up with a distinctive haircut for Princess Leia to wear in the film series.
Lucas stated that he drew influence from ancient Mexican literature and history.
She embodies the traditional revolutionary appearance that George Lucas envisioned for Princess Leia.
Several years later, fan investigations revealed that the hairdo may potentially be associated with the Native American Hopi tribe.
How to Do Space Buns
You may obtain a fantastic haircut that will allow you to travel into space in a matter of minutes by following a few simple steps. You’ll need bobby pins (which we always seem to misplace), hairbands, and a brush for this. If you want your buns to linger longer, you may spray them with hairspray as well. Do you think you’ve got it all? Let’s get this party started!
- 1st step: Comb through your hair, making sure to brush it all the way down to the ends
- Second step: Step 2 – At this point, you can separate your hair. If you want to make your buns appear even more fascinating, part your hair in a zig-zag pattern. Normally, ladies part their hair in the middle. It is entirely up to you
- To make side ponytails, use your brush to separate the two sections of your hair that are separated by your brush. Make sure your ponytails are positioned high on your head, in the centre of your face
- Step 4 – Tease your ponytails with a brush if you want to add additional volume to them. Fifth, twist and coil your hair into a string, and then wrap it around your head in a bun
- And To complete the appearance, secure your hair with an extra set of elastics and a few bobby pins that are fastened under the elastics.
Watch the following video to learn how to create a DIY space bun hairstyle in a quick and simple manner.
How to Style Braided Space Buns
Braids are a stylish enhancement to the traditional space bun. There are no rules about whether you use fishnets or traditional ones; nonetheless, they will unquestionably make your haircut more fascinating.
Whether you choose a top knot or wish to braid your hair in the back, the results will be spectacular! We have to agree that this is a more difficult hairstyle to do, but once you’ve tried it, you won’t be able to take it off.
- Step 1: Create a central parting in your hair and divide it into two equal halves. Step 2 – Begin braiding your right side of the head by taking a section of your hair and dividing it into two halves
- 3rd step: you should tear off a little section of hair from the outside of your left hand
- Fourth, cross this hair across and incorporate it into the right-hand part. This process should be repeated once again, but using the left-hand hair section
- Step 6 – Take a portion of loose hair and cross it over your shoulders. It should be placed in the right-hand portion of your hair. 7. Repeat the previous steps on the opposite side of your hair, until you reach the middle of your head, then stop. The eighth step is to stop adding loose hair and just finish the fishtail braid once you reach the center of your head
- To finish, tie your hair into two ponytails on either side of your head. To give the braids more volume, you will need to incorporate some of your loose hair into them. Make two buns with your hair by wrapping them over your shoulders. The final step is to leave your braids down or utilize them to conceal the elastic band
Watch the video below to learn how to create and style a braided space bun hairstyle.
Best Hairstyles with Space Buns to Try
Having discovered where the name of this hairstyle originates, as well as the secrets to making it appear absolutely stunning, it is now time to be inspired. Here are some of the most beautiful space bun hairstyles you should attempt right away!
1. Voluminous Braids
This braided hairstyle will give you the right combination of volume and chicness. You can easily make braids if you follow the instructions in this article. Half-up space buns are a great way to make your hair seem more voluminous. Isn’t it simple and stylish?
2. Rainbow Ends
It is imperative that you get this hairstyle right now if you are a lover of pastel balayage for hair! A rainbow end, a double bun, and some short braids will be all that you need to make a grand entrance.
3. Simple yet Beautiful Buns
It goes without saying that this is the perfect hairstyle for you if you want something that is both simple to construct and stunningly attractive in appearance. Half-up, half-down space buns are a great option for everyday use.
4. ReverseBraided Space Buns
Perhaps you were unaware of the fact that space bun hairdos are a fantastic alternative for all of those sporty people out there. In addition to keeping your hair in order, this inverted down French braidsbun hairstyle will also make you appear trendy, whether you are heading to the gym or going for a run.
5. Lilac Buns
If you want to try something new and different, you should absolutely experiment with violet hair to the extreme. We are confident that it will generate a great deal of good feedback. Purple is stunning, but when styled in braids and space buns, it becomes even more fashionable!
6. Space Buns with Bangs
Space buns are no longer exclusively for youngsters, thanks to the addition of elegant long bangs that conceal the earlobes. Secure them slightly over your ears, and don’t be afraid to leave a few free tendrils here and there.
7. Space Buns for Thin Hair
A side bang is the perfect form of fringe to go with braided space buns if you have thicker hair. These are tightly twisted in order to achieve a tiny form.
8. Micro Box Braided Space Buns
Micro braids are a popular hairstyle for many Black women who are transitioning from their natural hair to a more polished look. In the interim, experiment with different colors such as purple and blonde, and then twist your hair into enormous space buns.
9. Red Space Buns
Bright red hair may be used to lend a flash of electrifying color to long, straight hair. Creating two ponytails and wrapping the hair around the base of the bun takes only a few minutes and takes no time at all!
10. Vintage Space Buns Style
An updated version of Princess Leia’s classic bun hairdo is seen here. Unlike the others, these ones are gigantic in size and fan out behind the ears. Combine with a deep, black lip color for the maximum statement-making effect.
11. Space Buns with Flowers
Besides long black hair, braids, and buns, is there anything more you could possibly need to make this pigtail bun hairstyle seem absolutely stunning? Yes, you absolutely do! Using flowers as a hair decoration will never go out of style.
12.Pastel PinkHighlights
Dark roots and accents in purple and pastelpink hues are really stunning together.
Two buns are added to the equation to create a unique and wearable adolescent hairstyle that is great for everyday use.
13. Festival Ready Buns
Although pastel green hair dye may not be the most appropriate color for everyday or business wear, it is ideal for music festivals. You will be the main attraction at any occasion if you have long hair with space buns on top and a little glitter in your hair.
14. SequinedUpdo with Braids
Do not be afraid to go overboard with the sequins if you are attending Coachella or another music event. They are more than welcome to do so! You may separate your hair in the center and create two Dutch braids, which you can then twist into a space bun and decorate with a lot of glitter. Don’t you think this is a perfect style with a bohemian vibe?
15. Chic Low Buns
These gorgeous low buns are a sophisticated and stylish take on the traditional top bun. You can construct these very quickly and simply by braiding two strands of hair and wrapping them into two low buns.
16. Loose andLong Hair Bun
To get the ultimate boho look, braid only pieces of your hair while creating two small buns on the top of your head. This hairdo is ideal for summertime wear, music festivals, and just about every occasion in your life.
17. Holographic Hair
If you use a hairspray that contains light-changing sequins, you can get the ultimate galaxy look. Parties, night outs, and music festivals like as Coachella are all excellent occasions for this hairstyle with space bun.
18. Zig-Zag Sequins and Buns
When styling your hair, instead of splitting it along the center, sling sections of it in opposite directions to create a zig-zag pattern. Don’t be afraid to sprinkle some glitter in the centre of your space buns once you’ve finished them with braids.
19.Curly Hair Buns
Anyone who has curly hair would never have believed that space buns could look this good. We haven’t been informed, to put it mildly. If, on the other hand, you are having trouble shaping your curls, simply pull them into buns and don’t bother about it.
20. Glitter on your Hair
If glittering your face isn’t enough for you, try putting it in your hair as well. You will be the light of the entire universe! Parties and festival season are ideal occasions for this half-up, half-down hairdo.
21. Buns onShort Hair
For those of the females who believed it was impossible for them to create a bun hairdo, you were completely incorrect. When you have short hair, this is how a space bun appears — it’s fantastic!
22.Short Curly Hair
In addition, how adorable do these half-space buns look on wavy hair? If you have a hairdo like this, give it a shot — you won’t be disappointed with the results!
23.Wedding Appropriate Buns
Pigtail buns may not seem like a hairdo that would be ideal for a wedding, but that is not fully accurate either. As you can see, these buns would look stunning on your wedding day, especially when decorated with white fresh flowers and stylish waves.
24. Cute Double Buns
Space buns are a popular hairdo for traveling, according to many female travelers. Because the hairstyle is so convenient, you can even do it while on the move.
25. SideCornrow Braids
For this hairstyle to work, you will only need three small classic braids and two buns, which will take care of everything. It will give a surprising twist to your everyday looks and make them more interesting.
26.Waterfall Braid
For this hairstyle to work, you will just need three little traditional braids and two buns, which is all you will need.
With it, you may add a surprising touch to your usual ensembles.
27. Bun Cuffs
Adding bohemian bun cuffs to your buns will make them even more eye-catching. Everyone who sees you will be taken aback by the tassels!
28.Teal Blue Hairstyle
Deep blue dye with a bright accent is perfect for rebellious young ladies! You shouldn’t be afraid to put a little glitter in the centre of your head and wear your hair in space buns.
29. Boho Vibes Buns
You might be surprised to learn that tattoos are no longer restricted to the face and torso. Summer tattoos in gold and turquoise tones look fantastic on your hair! It is possible to get the ultimate bohemian beach style with a space bun and double French braids.
30. Ribbon Ties in your Hair
If you’re attending a black-tie event, try to emulate this look. When it comes to styling and making your buns seem even more professional, ribbons are essential.
31. Curly Space Buns
A half-up space bun hairstyle is the ideal approach to show off your curls while yet maintaining a fashionable appearance. Make a central part before making these little space buns for a sleek symmetrical appearance.
32. Space Buns for Asian Women
Put your natural Asian straight hair up into these lovely braided space buns instead of leaving it flat and limp as you normally would. A few hairs around the face help to lighten the overall look.
33. Twisted Space Buns
Begin by rolling the hair from either side of your head into two low space buns with a twist. Secure with a hair tie, then wind the hair around the base of the ponytail to finish it off.
34. Space Buns for Round Faces
You might not believe that calling attention to your round face is a good thing, but there are some hairstyles, such as space buns, that are incredibly attractive on round faces. Before constructing the buns on top of the head, you only need to do a center part in your hair.
35. Space Buns for Thick Hair
Space buns are a terrific way to draw attention to your thick hair and make it stand out. Instead of firmly looping the hair around the base of a ponytail, attempt to let it a little free to create the jumbo shape to give it more volume.
36. Space Buns on Long Hair
Extremely long hair that is almost waist-length should be flaunted and celebrated. Alternatively, little space buns can be worn at the top for a beautiful half updo look.
37. Space Buns for Little Girls
Much if you’re used to merely giving your little daughter a ponytail or low braids for school days, she’ll appreciate it even more if you offer her two high space buns instead.
38. Space Buns with Crochet Braids
If you have natural black hair, there is no reason why you couldn’t appear beautiful while still preserving it: create a half updo with two little space buns and you can sport this playful micro-braided style.
39. Bow Space Buns
It’s possible that you’ll need to follow a bow hair guide to get this space bun style, but the end result will be well worth it. Two long tendrils should be left to frame your face.
40. Dreadlock Space Buns
Two high space buns that are enormous in form are a terrific go-to hairstyle for ladies who have thick dreadlocks and want to keep their look simple and stylish.
FAQs
Q. Is it possible to do space buns on thin hair? Ans:Of course it is possible! Despite the fact that you won’t be able to achieve much volume or texture, your space buns can nonetheless look fantastic. Making them look a little unkempt can give the impression of more volume to others around you. The key to making your buns appear voluminous is to avoid pulling them into a ponytail. Dry shampoo should be used immediately after you have divided your hair into two equal sections. Brush your hair and then twist the section you want to construct a cord with until you have a cord.
- If you want even more volume, tease all of your hair before you begin twisting it up at the ends.
- Ans:Ballet buns are for females who prefer to seem polished and quite sophisticated in their appearance.
- Space buns, on the other hand, may be both unkempt and well polished.
- Q.
- Ans:Since Ariana Grande debuted her two buns, many fans have speculated whether or not the ponytail period has come to an end completely.
- Ariana has had half-updos as well as the classic double bun hairstyles in her career.
- She flaunted it on the runway and in public.
- Our message is directed at her!
- Regardless of whether it is summer or winter, there is always someone who adores to wear them.
Space buns can be braided or conventional in style; the choice is entirely up to you. We can only say that they may be both casual and elegant at the same time, as well as quirky and elegant. There aren’t many haircuts that are as functional as this one.
5 Ways To Do Space Buns at Home With Inspo Looks
In the 1990s, space buns were a tremendously fashionable hairstyle that has just re-emerged in popularity. The hairstyle is characterized by two buns that are worn on the top of the head, with popular variations including braided buns and half-up, half-down versions of the style. Space buns, which are beloved by celebrities like as Miley Cyrus and Ariana Grande, are the perfect way to infuse a little carefree fun into your look, whether you’re traveling to a summer festival or one more party before the year is up.
Which tutorial are you going to choose?
’90s Space Buns
Are you prepared to learn how to make space buns? Begin by taking a comb and creating a zig-zag parting from the front of your hair all the way down to the nape of your neck with it. Step No. 2
Create 2 high ponytails.
Make two high ponytails and secure them with a small hair tie to complete the look. Make sure to leave a few strands of hair free around your face, as this will give you a more face-flattering appearance. Step number three.
Create a small braid in each ponytail.
Take a little bit of hair from the underside of one of your ponytails and twist it into your space buns to give them a more distinctive and textured look. Braid this piece into a typical 3-strand braid all the way down to the ends – don’t worry about fastening it now; we’ll take care of that later on. Step number four.
Plump up the volume.
Then, using your hands, gently tease your hair back towards the roots, scrunching the substance into your hair. Adding this will give your space buns the additional texture and attitude they require! Step number five.
Wrap your hair into space buns.
Gather the ends of each ponytail together and twist them together to make a bun shape, being care to leave the braided area of your hair untangled for the time being. Using bobby pins, pin your buns into the position you want them to be in. Step 6: Organize your thoughts and feelings about the situation.
Wrap the plaits around the buns.
Wrap your braids around your freshly formed buns, then secure your style with bobby pins and clear hair elastics to keep your appearance in place. Step 7 – Organize your time and resources.
Set your style.
Wrap your braids around your freshly formed buns, then secure your look with bobby pins and clear hair elastics to ensure it remains in place all day. Step 7 – Organize your time and resources.
Final look.
The result? Fabulous space buns fit for a party in only minutes! Though it’s not necessary, curling or crimping the front sections of your hair may elevate your style to a whole new level, and it’s definitely something to experiment with!
Low Space Buns
The result? Fabulous party-worthy space buns in just a few minutes! Though it’s not necessary, curling or crimping the front sections of your hair may elevate your style to a whole new level, and it’s definitely something to experiment with.
Tease and Twist Your Pigtail.
It’s now time to get down to business! Take your first ponytail and gently twist it all the way down to the end of your hair. Repeat with your second ponytail. Step number three.
Create a Bun.
To make a bun form, begin by wrapping your hair around the base of the ponytail and continuing to wrap until you have a bun shape.
Once you’ve achieved the desired shape, pin it in place with as many bobby pins as necessary to keep the style in place. Step number four.
Create Your Second Bun.
After you’ve teased and twisted your initial ponytail, wrap your hair around the base of the ponytail and continue to wrap until you’ve made a bun shape with your hair. Once you’ve achieved the desired form, pin it down with as many bobby pins as necessary to keep the style in place. 4) The fourth step.
And There You Have It!
Double low buns that will be the talk of the party at your next gathering!
Braided Space Buns
Looking for another really adorable method to style your hair? Look no further. Then these braided space buns could just be the answer to all of your hair prayers. These retro-looking double buns, which are inspired by the ’90s, are as at home on lazy, casual weekends as they are for the forthcoming party season, which is fast approaching.
Braided Half-Up, Half-Down Space Buns
Is it necessary to have a hairstyle that can survive any event and last you throughout the season? If this is the case, the half-up, half-down space buns hairstyle is a great option. Check out the video below to see what occurred when vloggerN1kk1sSecr3t demonstrated how to get this amazing half-up hybrid style, and then give it a shot yourself!
Classic Half-Up, Half-Down Space Buns
In case you’re a complete novice to the world of style, we’ve got you covered. A more straightforward variant of N1kk1sSecr3braided t’s ‘do, this hairstyle can be achieved with any type of hair, including straight, wavy, and curly hair. Decide how you want your completed style to appear first, and then either straighten or curl your mane to prepare it, or accept your natural texture — it’s entirely up to you! When you know how to do it, half-up space buns are simple and enjoyable to create. Verity is to be credited.
- Instructions for making half-space buns: To begin, separate your hair along the middle with the use of a comb.
- This ponytail should be positioned in the centre of the top of your head, if possible.
- When you are finished with one ponytail at a time, take the tail and wrap it around the base to make a space bun.
- 5.
- Now, go ahead and flaunt your wacky buns to the world!
Space Buns Inspiration
Now that you’ve mastered the fundamentals of this look, it’s time to discover all of the various wonderful ways you can wear it.
Glittery Zig-Zag Space Buns
Having learned the fundamentals of this style, it’s time to discover all of the fantastic ways you can dress it up or down.
Half-Up, Half-Down Glitter Space Buns For Short Hair
Glitter space buns that are half-up and half-down. Photograph courtesy of Instagram.com/populationsalon In the case of short hair, a half-up, half-down style is ideal for achieving space buns for short hair.
Your fringe should be left untouched, and you should collect the remaining top part of your hair into two small buns. Before you venture out to the fields, sprinkling some glitter and donning your favorite pair of sunglasses will set the tone for some serious glam. Credit:@populationsalon
Voluminous Afro Space Buns
Afro space buns with a lot of volume. Photograph courtesy of Instagram.com/futura cacheada Do you have afro or curly hair? You’re in luck: when arranged into large buns, these hair types appear really attractive and fashionable. Because, if you ask us, larger is always preferable to smaller! Credit:@futura cacheada
Sleek Glittery Space Buns
Glittery space buns, to be precise. Photograph courtesy of Instagram.com/hairbyjaxx If you’re anything like us, and you’re infatuated with all things glitter, then why not go all out with the dazzle and cover your whole head with it? Don’t forget to create two messy buns to round off the ensemble. You’ll be ready to hit the dance floor in no time! Credit:@hairbyjaxx
Rainbow Half-Up, Half-Down Space Buns
Half-up, half-down space buns in a rainbow of colors. Photograph courtesy of Instagram.com/nealmhair Everything just looks so much better on people with multi-colored hair, don’t you think? What better way to show off your ombre locks than with a lovely half-up, half-down space bun? You’ll be sure to turn heads everywhere you go with this outfit! Credit:@nealmhair
Starry Space Buns
Space buns with a nebula on top. Photograph courtesy of Instagram.com/ nicquelxoxo Do you have a glimmer in your eye? Consider using moon or star-shaped sequins into your space buns hairdo for a look that is truly out of this world! You could even finish off the appearance by spritzing your buns with a contrasting colored hairspray (we recommend a blue, green or purple hue to tie in with the galaxy theme). Credit:@ nicquelxoxo
Ombre Space Buns
Ombre space buns in a variety of colors. Photograph courtesy of Instagram.com/prettyinpattern If you’re not a fan of all the glitter, don’t worry: regularombrespace buns are still very much in style. Space buns that are both sloppy and refined in appearance look great with ombre hair. Experiment with different bun sizes to find out which one fits best with your hairstyle! Credit:@prettyinpattern
Sign up to our newsletter and get exclusive hair care tips and tricks from the experts at All Things Hair.
How to do space buns is made simple with this lesson on how to do double buns (hint: it works even for short hair!). Because I am an Amazon Associate, I receive money when people make eligible purchases. As a result, this post may include affiliate links, which means that if you make a qualifying purchase after clicking on one of these links, I will get a small compensation at no additional cost to you. In my opinion, understanding how to do space buns is a must-have talent whether you’re seeking for the ultimate festival hairdo or just a charming and easy everyday appearance.
Simply follow the step-by-step space buns guide provided below to learn how to get this hairstyle at home.
How to Do Space Buns | Easy Double Buns Tutorial (Products)
How to do space buns is made simple with this lesson on how to do double buns (hint: it works for short hair too!). When you make a purchase through Amazon, I get a commission. This post may include affiliate links, which means that if you make a qualifying purchase after clicking on one of these links, I will receive a small compensation at no extra cost to you. When it comes to creating the perfect festival hairstyle or simply creating a nice and simple everyday appearance, understanding how to construct space buns is a crucial skill in my opinion.
Stylish and entertaining, these adorable double buns are not nearly as difficult to do as you may imagine. To learn how to perfect this hairstyle at home, simply follow the basic space buns lesson provided below.
Anti-Residue Shampoo
Although you are not need to use shampoo for this guide, I like to include a brief mention of my favorite anti-residue shampoo in all of my hair instructions to keep things simple. I have thin hair that is easily burdened down by hair products, which makes it difficult for me to style. It goes without saying that volume is an important component of a decent hairstyle, and this is hard to produce when your hair is soaked with residue from hairsprays, dry shampoo, detanglers, and other styling products.
If you have thin hair, I strongly recommend that you select a decent anti-residue shampoo to assist you improve the general quality and texture of your hair.
A Good Hair Brush
A nice hair brush will come in handy for this technique, as will some hairspray. The use of this product will be necessary throughout your style process in order to separate your hair and smooth out any lumps. I swear by this brush since it’s the only one I’ve discovered that doesn’t completely rip out my hair when I’m brushing it.
Related: How to Do a Messy Bun With Thin Hair
I don’t consider no-crease hair ties to be an absolute must in this technique, but I do highly recommend them (particularly if you have thin or fine hair). Because they don’t slip as much as conventional hair ties, I’ve found that no crease hair ties are the most effective when trying to create space buns. There’s nothing more stressful than spending hours perfecting your hairdo only to have it start to fall out minutes after you’ve finished.
Bobby Pins
Bobby pins will also be required for this look to keep the buns in place (I likethese blonde ones).
Other Products
Hairspray and Shine Spray are recommended (optional, but I use this to finish off all my styles)
1. Start With Clean, Dry Hair
How to achieve space buns begins with clean, dry hair, which is the first stage in the process. For my space buns, I pre-curled my hair since it adds more volume to my hair and I thought it would look better that way given my hair’s structure. Additionally, you’ll want to begin this space buns lesson by splitting your hair in the center (or as near to the centre as you can get it, because this is something I usually struggle with!).
2. Start Your First Space Bun
Begin by sectioning out hair on one side of your part to form the base of your first space bun. Because this article will show you how to achieve half up half down double buns, you’ll want to section off the top layer of your hair and leave the bottom layer of your hair down.
3. Twist The Hair
Taking a segment of hair and twisting it before fastening it with a hair tie with ano wrinkle is my preferred method.
4. Secure With a Hair Tie
After that, tie that portion of hair back with a hair tie (again, I find that no crease hair ties work best for keeping the buns stable and preventing slippage).
5. Wrap the HairSecure With Bobby Pins
Wrap the ponytail around the hair tie and secure it in place.
In order to make the bun seem solid, you’ll want to wrap the hair pretty firmly around the bun and pin it down in various places until it feels secure.
6. Adjust the Bun
The final and most difficult stage in learning how to make space buns is perhaps the most difficult. You will now need to tweak the bun you just created by gently pushing it at the sides until it is exactly as you want it. Step 3: The fact that my space buns aren’t as big and fluffy as other people’s demonstrates that if you have thick and/or long hair, you will be able to pull the buns and control them far more easily.
Related: The Best Hair Mask for Oily Hair (Easy, 3 Ingredients)
This is the final and most difficult phase in learning how to make space buns. You will now need to tweak the bun you just produced by gently pushing it at the sides until it is exactly as you want it. Step 3: The fact that my space buns aren’t as big and fluffy as other people’s demonstrates that if you have thick and/or long hair, you will be able to pull the buns and control them far more easily.
8. Finish Off With Hairspray
Following your satisfaction with the way your space buns appear, you can finish the design by softly spraying the buns in hair spray to further secure them. This shine spray is also a favorite of mine to use to finish off all of my hairstyles. In general, knowing how to make space buns isn’t all that difficult to master. There are a plethora of unique variants you can create with this haircut, including adding glitter, temporary hair colour, and other embellishments. Alternatively, you may go for a more straightforward style for a fun everyday appearance.
If you have any questions at all, please do not hesitate to approach me on Instagram, and I would be pleased to assist you.
Related: Aloe Vera Hair Mask — The Best DIY Aloe Hair Mask for Hair Growth
Aren’t space buns just the cutest thing ever? If you look around on the internet, it appears that space bun hairstyles are popular. Whether you are searching for sloppy space buns, braided space buns, low space buns, or half-up space buns, we will provide you with the necessary information in this post. Continue reading to find out how to make space buns the simplest way.
What are space buns?
Isn’t it beautiful how space buns look? Taking a glance around the internet, it appears that space bun hairstyles are becoming increasingly popular. If you are searching for sloppy space buns, braided space buns, low space buns or half-up space buns, we will give you the lowdown on how to do it all in this post! Wait till the end to see how to make space buns the simple way!
(Example of two buns on the top of the head aka “space buns.”)
Space buns can be styled in the same way as sloppy buns. Alternatively, you may do ballerina buns. You may even want to experiment with braided buns. There’s a hairdo for every occasion, even formal occasions. What I like about the space bun hairstyle is that it is easygoing and enjoyable. It’s something I can’t seem to get enough of. Check out these simple step-by-step instructions on how to create beautiful space buns for your hair if you’re interested in doing the same with your hair.
But first and foremost, here’s what you’ll need to get things started. Items needed for the space bun are a hairbrush, clear and stretchy elastics, bobby pins, and hairspray.
Space Buns Step By Step Instructions
You’ll need to prepare your hair for space buns before you can start styling it in them. First and foremost, brush your hair. This will assist you in keeping your hair free of knots and tangles after washing it.
2. Split your hair.
Now that you’ve finished cleaning your teeth, let’s go on to the next stage. Using a comb, separate your hair into two portions. In an ideal situation, you would split it along the center, resulting in two equal portions. Because I’m a stickler for perfection, I recommend separating your hair as straight and evenly as you possibly can. To create the portion, a pick or a small comb might be used. Make use of a mirror to double-check the accuracy of your space buns component. It is important to take your time with this stage since uneven volumes of hair can ruin your entire space bun hair style.
3. Add the ponytails.
Let’s go on to the following stage now that you’ve completed the brushing. Make a v-shaped part in your hair. In an ideal situation, you would split it down the middle, resulting in two equally divided groups. Given that I’m a stickler for perfection, I recommend that you divide your hair as straight and evenly as possible. To create the portion, use a pick or a small comb. To ensure that your space buns are perfectly precise, examine them using a mirror. It is important to take your time with this stage since uneven quantities of hair can ruin your complete space bun hair style.
4. Start working on the space buns.
It’s time to put the finishing touches on your ponytails by creating your space buns. Wrap the length of your hair around the base of your ponytail; this will serve as the focal point of your space buns. Next, use bobby pins to hold the freshly created buns in place while they dry. I would recommend that you use bobby pins that are the same color as your hair (or accessories, if there are any). This will allow you to get a seamless appearance. If you need assistance with this stage, you may view this video instruction on space buns.
5. Seal it with your spray.
You don’t want all of your hard work to go to waste once you’ve finished both sides, do you? Now that you have your space buns in position, the following step is to secure them. Make use of hairspray to get this look. After you’ve finished styling your adorable space buns, spritz them with hair spray.
Space Bun Hairstyle Ideas
Are you looking for additional space bun designs? Here are some fashionable suggestions for you to consider!
1. Space buns with braids
Do you want to learn how to create space buns with braids? Braided space buns elevate your look to a higher level of sophistication.
2. Half up space buns
Half-up space buns are a delightful variation on the classic. When you desire the comfort of letting your hair down but also want the trendy look of space buns, they are the perfect solution for you!
3. Messy Space Buns
What female doesn’t like a messed-up hairstyle? Messy space buns, on the other hand? That’s even better! Messy space buns are a great casual hairstyle for any occasion and can be worn at any time of year.
4. Space Buns For Short Hair
Interested in learning how to achieve space buns on short hair?
This video is for you if you have hair that is at least shoulder length or longer.
5. Curly Hair Space Buns
Space buns may be worn by curly females as well! Your curls will give your space buns an extra layer of volume and elegance.
6. Low Space Buns
When most people think of space buns, they see them as being high on the head, yet low space buns are also quite popular. Follow along with this technique to achieve a fashionable low space buns appearance.
Space Bun Inspiration
Are you looking for some creative space bun ideas? Listed below are some other space bun ideas that you will adore!
1. Half Up Pink Space Buns
We can’t get enough of these adorable pink space buns that are half up.
2. Braided Pink + Rainbow Space Buns
What do you get when you combine a rainbow and space buns? Talk about a match made in heaven with these couple!
3. Edgy Purple Space Buns
Totally punk, these chaotic space buns with a flash of purple are perfect for a night out.
4. Space buns on natural hair with gold accents
Make your space buns more interesting by adding some unique decorations like these!
5. Low space buns with braids
This is a style that I’m really enamored with. Everything about these space buns is wonderful, from the braids to the buns to the buns themselves!
6. Space buns for kids
Can you believe how cute these space buns on this tiny child are? Space buns are a truly unique and entertaining mommy and me look.
With space buns, boring hair is a thing of the past.
Do you want to infuse a sense of playfulness and carefreeness into your personal style? Then you should try space buns! They were huge in the 1990s and are now making a resurgence in the 2000s. Are you looking for additional fashionable hairstyles?
- In 2021, you may experiment with 20 different fun rainbow hair color ideas. Try these 30 rose gold hairstyles for a fresh look in 2021. 50 Stunning Long Layered Hairstyles for the Year 2021
- How to Curl Your Hair With a Curling Wand: Tips and Tricks You Should Know
- Nine of the best dreadlock shampoos to use in 2021