
Buns
How To Draw Anime Buns
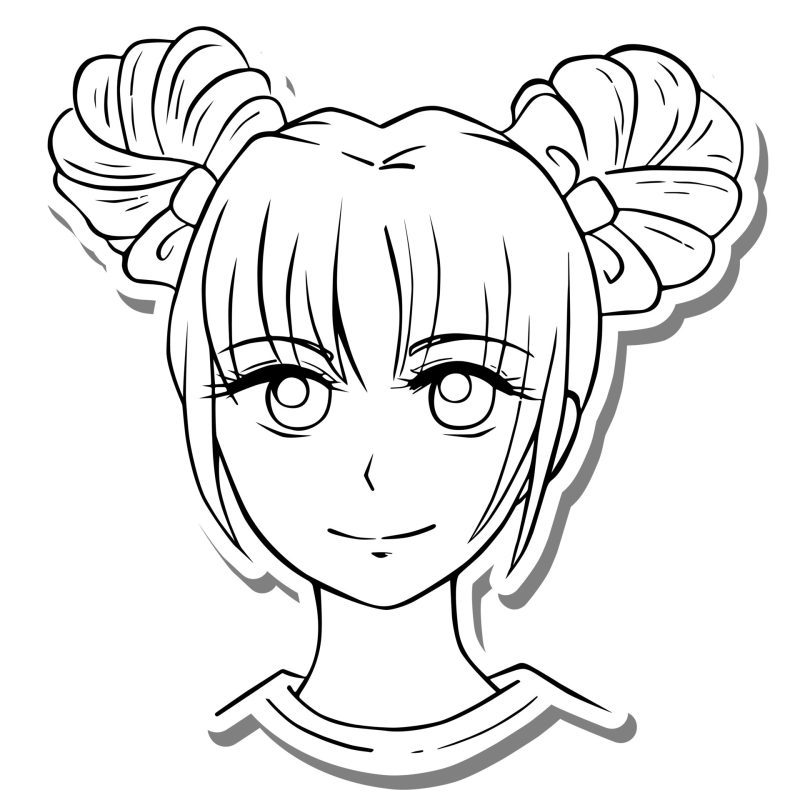
Jan
How to Draw Anime Hair
Documentation Download Documentation Download Documentation This video will teach you how to draw the hair of both male and female anime characters. Anime hair is what distinguishes and enhances the attractiveness of anime heroes – just as it is with real humans, it is the crowning glory. Let’s get this party started!
- Read More About ItRead More About It Drawing male and female anime hair is demonstrated in this lesson. A distinctive and gorgeous feature of anime heroes, just as it is in real life, is their hair. It serves as the crowning beauty in both worlds. Countdown to the start of the game
- 1Draw an outline of the head with a pencil
- This will serve as a guide for drawing the hair. 2Draw an outline of the body with a pencil
- This will serve as a guide for drawing the hair. Drawing the hairline you desire for your female character is step 2 of the process. 3 Create a mental image of the hairdo you want by using your imagination. The hair on the majority of female characters is often longer
- 4Adjust the first design you envisioned to include more detailed lines to make the hair appear more lifelike
- In Step 5, trace around your created hair shape with a black marker, and then delete all extraneous lines and curves from your outline
- After you have sketched your chosen hairdo, you may now add more elements to your design, such as eyes and other features. 7Adjust the hue to your liking. This section contains samples of the most frequently used anime hairstyles for female characters. Advertisement
- 1Draw an outline of the head with a pencil
- This will serve as a guide for drawing the hair. 2Draw an outline of the body with a pencil
- This will serve as a guide for drawing the hair. 2. Draw the sort of hairline you want your male character to have on his head. 3Construct a rudimentary outline of short, spikey hair in your mind’s eye using your imagination. It is possible to create zigzag lines along the length of your head or sharp angles for your hair
- 4Adjust the first design you envisioned to include more detailed lines to make the hair appear more lifelike
- In Step 5, trace around your created hair shape with a black marker, and then delete all extraneous lines and curves from your outline
- After you have sketched your chosen hairdo, you may now add more elements to your design, such as eyes and other features. 7Adjust the hue to your liking. Advertisement
- 1- Draw an outline of the head with a pencil
- This will just serve as a reference for drawing the hair. 2- Draw the eyes and mouth with a pencil. 2Draw a line through the hairline. 3Consider the lengthy hairstyle you desire and the direction in which you want the hair strands to flow. Create a basic hairdo by drawing long, slanted, and curved lines in the direction you want it
- 4Adjust the first design you envisioned to include more detailed lines to make the hair appear more lifelike
- 7Once you have created your chosen hairstyle, you may now add more features to your drawing, such as the eyes, eyebrows, and so on
- 8Once you have drawn your preferred hairstyle, you can now delete all extraneous lines and curves from your outline
- 7Adjust the hue to your liking. Advertisement
- To begin, make up a rough sketch of a man’s head to use as a framework for the hair
- Simple curves or strokes should be used to draw the hair, and it should be drawn all the way up to the shoulders. Short straight lines and curve lines are used to create the hair details in step three. 4Trace the lines with a pen and delete those that aren’t essential. Make the face more detailed by adding details. 5Make any necessary adjustments and color to your taste! Advertisement
- 1Draw a sketch of a woman’s head to serve as a framework for the hair
- 2Draw the hair in rounded curves that extend along the framework to the neck
- 3Draw the hair in rounded curves that extend along the framework to the neck
- 4Draw the hair in rounded curves that extend along the framework to the neck
- 5Draw the hair in rounded curves that extend along the framework to the neck
- 6Draw the hair in rounded curves that extend along the Refine the hair using basic curves and strokes around the perimeter of it. 4. Draw the facial features, especially the eyes, in great detail. 5Trace the picture using a pen and remove any extraneous lines
- 6Color the drawing whatever you choose! Advertisement
Create a new question
- Question Is it possible to have hair that appears to be demonic in appearance? You may also utilize the shadow of the hair to fall over the eyes, giving it a melancholy appearance, as seen in the photo. Spiked hair may have a sinister appearance on occasion. A person with slicked-back, oily hair might give the appearance of being greasy on the inside as well as out. Take inspiration from cartoon characters and movie villains to figure out what may work. Question What is the purpose of drawing the head? It is not strictly essential, but just sketching hair floating in the air is a picture that is not often depicted in art books. In order to gain an understanding of how hair, face, eyes, and other features function together, it is recommended that you sketch with your head even when learning how to draw hair. This will ensure that your “actual” drawings have a realistic and pleasing appearance. What are some of the most common mistakes people make when it comes to their hair? It is entirely up to you how you want your hair to appear
- There is no right or wrong way to do it. One thing to keep an eye out for is making the hair excessively flat
- Try to make it seem as natural as possible. Human hair has a lot of volume. Question What is the best way to tell if your hair is flowing properly? When I draw the hair, it appears to be blowing in one direction at first, but then other strands appear to be blowing in the opposite direction. GlitterGurl2334 Answer from the Community Place yourself near a mirror, grab your blow dryer or fan, and put it through its paces. Take note of the way your hair is blowing. If you have short hair, enlist the assistance of a friend or family member
- Question How can I learn to draw a female sobbing with hair flying in the wind? What resources do you recommend? sayyida rania is a fictional character created by Sayyida Rania. Answer from the Community The girl’s tears might potentially be carried away by the wind if the hair is pulled backwards
- Question Is it necessary for the hair to be flowing in a specific direction? You have complete control over how your hair will flow. Take inspiration from the characters in anime and manga. Question What exactly is the significance of the hairline? It’s only the beginning of the hairline. Unless you’re sketching a character who has bangs and their hairline is hidden from view, you don’t necessary have to draw it – but drawing it and then erasing it may help you get a better sense of the proportions of their face
- Question How can you go from having spike hair to having curly hair? Because of the crisp lines that distinguish anime from other forms of art, switching from one genre to another would be extremely difficult. I think it would be preferable to get rid of the spiky hair and start again with curly hair. Question How do you get a really precise lighting/shine effect on the hair in your drawing? sayyida raniaAnswer from the Community To add extra features to the hair, use a pointed pencil to make lighter strokes over it. Question What is the best way to draw shiny hair? Make use of a mirror and examine your hair in direct sunlight. Look at your hair to see where the shine is. Experiment with recreating that in your art
Question Is it possible to have hair that appears to be evil? In order to create a dismal appearance, you might allow your hair to fall over your eyes and cast shadows over your eyes. Some people think spiked hair is wicked. Slicked-back, oily hair might create the appearance that one is greasy both in character and in hair, and this can be misleading. Take inspiration from cartoon characters and movie villains for what may work; Question The reason for drawing the head is unclear to me. Despite the fact that it is not strictly essential, drawing hair floating in the air on its own is an image that is not often drawn.
- This will ensure that your “actual” drawings have a realistic and pleasing conclusion.
- There aren’t any rules when it comes to how your hair should appear; there is no right or wrong.
- There is a lot of body in human hair.
- GlitterGurl2334 An Answer from the Community To try it out, stand near a mirror and use a blow dryer or a fan.
- Question: If you have short hair, you might ask a friend or family member to stand in; May you tell me how I can learn to draw a girl sobbing and hair flowing in the wind?
- You have complete control over the way your hair flows.
- Question When it comes to the hairline, how important is it?
- Sketching a character’s hairline is not required if they have bangs and their hairline cannot be seen; nonetheless, drawing the hairline and erasing it may assist you in getting a better understanding of the proportions of their face.
- Because of the clear lines that distinguish anime from other media, it would be difficult to transition from one to the other.
- Community Answer by sayyida rania To add more features to the hair, use a pointed pencil to make lighter strokes on it.
- Observe your hair with a strong light while looking in a mirror.
Look at your hair and see where the shine is. Put that into your art and see what happens;
Things You’ll Need
- Paper
- A pencil
- A pencil sharpener
- An eraser
- And a ruler. Brush
- Colored pencils or crayons
- Markers
- Watercolors
- A felt tip pen or Copic markers
- A reference image
About This Article
Summary of the ArticleXTo draw anime hair, begin by sketching the contour of the head and the line of the hairline. Following that, sketch the general outline of your chosen hairdo, paying close attention to the direction in which the hair strands will flow. After that, add details to make the hair more lifelike, and highlight the outlines by tracing over them with a black marker to make them stand out. Finalize the look by coloring your hair as you like! Continue reading for more information, including how to create manga hair.
The writers of this page have together authored a page that has been read 1,120,092 times.
Did this article help you?
Step-by-step instructions are provided for drawing a Manga Woman with a messy bun hairdo in this free online painting class. All of the drawing tutorials on How2DrawManga.com are excellent drawing tutorials that are suitable for both beginners and expert artists. The online courses are simple to follow; they teach you how to draw the fundamentals while also showing you how to create manga step by step in a step by step format. For this lesson, we’ll be utilizing theBasic Woman Head / Facetemplate that we made in a previous article to demonstrate how to design this messy bun hairdo.
- The new lines in each step are highlighted in red, so you’ll know precisely what to draw next when you get to that phase.
- Introduction: Begin with a pencil sketch to get your ideas flowing.
- Every step should be sketched out loosely at first to make it easier to remove mistakes if you make a mistake.
- This is a large clump of hair that portrays a large clump of hair.
- The top of the form should protrude outward from the body.
- Then, drawing another lengthy cluster of hair on the girl’s left side of her head, create another large, curved shape to represent the hair.
- The tips of the hair are represented as thin, pointed forms at the bottom of this shape’s bottom.
These designs are mostly composed of curving, vertical lines that come together at the bottom to produce pointed points.
The forms in the center should be large, while the ones on the sides should be slightly smaller.
Step 4:Draw a curved line over the top border of the manga woman’s head to represent the top of her hair, which has been pushed back somewhat.
Avoid drawing the line too high above the head, as this can cause the hair to become overly poofy.
Step 5:Draw a succession of sharp shapes on the left side of the head to represent the tips of the hair that are coming out of the untidy bun.
To add diversity to the forms, experiment with varied lengths and widths.
Curve these lines to produce a curled chunk of hair, and point the bottom tips of the hair to make it more sharp.
It is not necessary to have a flawless semi-circle for a messy bun; after all, it is a sloppy bun.
Make the bun as big or as tiny as you’d like depending on your preference.
These lines will assist you in determining which direction the hair strands are flowing across the form of the bun’s shape.
Simply sketch a few hair strands to add a little additional detail.
Curve the lines to correspond to the contour of the bangs and the top of the head of hair, if necessary.
Step 9: Using a pen or marker, trace over the lines to ensure that your drawing is permanent.
In order to make the brows seem over the hair, you may either draw them over it or leave off anything that is behind the hair as seen in the image.
Depending on how transparent the hair is, some manga artists draw the eyebrows over it, while others don’t draw them at all.
After the ink has dried, use an eraser to remove any remaining pencil marks.
Although this image was colored digitally, the same effect may be achieved using color pencils, markers, or crayons!
Light brown should be used for highlights, while dark brown should be used for shadows.
To make the sketching easier, paint the entire head of hair in a single brown hue without adding highlights or shadows.
Because manga characters are typically brightly colored, you can pick any color you wish for the hair, including green, pink, and purple.
Apply a little of pink to the apples of the cheeks for blush and to the corners of the lips for lipstick.
Draw a dark blue line across the top of the irises and gradually add light blue to the bottom.
You may also use a single color for the iris if you want a more straightforward drawing.
When coloring the irises, make sure not to color over the little highlight rings inside the eyes.
That’s all there is to it! Continue to practice until you get the desired hairstyle. It is important to draw it again and over again in different colors until you become proficient. Make a note of this page to come back to for more hairstyle inspiration.
How To Draw A Bun for Beginners – Hair Drawing Tutorial
Step-by-step instructions on how to draw a Manga Woman with a messy bun hairdo are provided in this free art tutorial on YouTube. All of the drawing instructions on How2DrawManga.com are excellent drawing tutorials that are suitable for both beginners and more advanced artists. It is simple to follow the online lessons, which both teach you how to draw the fundamentals of manga while also showing you how to draw the manga in detail. As we learned in a previous lesson, we will be employing theBasic Woman Head / Facetemplate in order to demonstrate how to design this messy bun hairdo.
- You’ll know precisely what to draw next since the new lines in each stage are highlighted in red.
- Introduce yourself by drawing a rough sketch using a pencil.
- Beginning with a light drawing for each phase, you’ll be able to easily erase any mistakes afterwards.
- A large clump of hair is represented by this.
- Shape should have a bulge at the top that extends outward.
- Second, draw a large, curved form for another cluster of hair down the left side of the girl’s head.
- The tips of the hair are represented as thin, pointed forms at the bottom of this shape’s bottom.
In essence, these designs are composed of curving, vertical lines that come together at the bottom to produce pointed points.
Asymmetry should be avoided, with forms in the center being larger than those on the sides.
The top of the manga woman’s hair is pushed back in a curved line along the top edge of her skull, as seen in Step 4.
Avoid drawing the line too high above the head, as this may cause the hair to become excessively poofy.
Using the left side of the head, create a sequence of sharp shapes to represent the tips of the hair that are emerging from the untidy bun.
To provide variation to the forms, use a range of lengths and widths.
Finished!
(See illustration) 6:Draw a large, curved form for the bun of the manga woman’s hair on top of her head (see illustration).
Draw inward curves on the sides of the object to make it a little more wavy.
Step 7:Attract a number of small, curving lines inside the contour of the woman’s bun to draw attention to the structure of the shape.
Don’t use too many lines to cover over the entire bun!
Using a small, curved line across the contour of the hair, add a little more complexity to the hair strands.
Keep these lines to a minimum, a couple at a time, for added visual interest and organization.
To prevent mishaps, ink gently and carefully.
Everybody has their own sense of style.
You have the last say.
Drawing is completed by coloring it in!
Make your hair a dark brown color to match your outfit.
First, color with a gentle hand, then gradually mix the colors together.
Any other hue you choose is also OK.
For the skin, use peach.
Light brown can be used to create a shadow beneath the chin.
(See illustration.) A more rounded appearance is achieved by employing two colors.
In addition, you can select any color you’d like for the pupils of the eyes.
Yes, that is all there is to it. Continue to practice until you have the desired hairstyle in place. Draw it again and over again, using different colors, and you’ll become better at it eventually. Make a note of this page for future hairdo inspiration.
List of materials
- The following materials are required: HB pencils, 2B pencils, drawing paper, Kneaded Eraser, reference image
Instructions: How to draw hair in a bun
The first thing you should do is go to the Internet and look for a decent reference image to work from. On Instagram and Unsplash.com, you may see a variety of hairstyles that are wrapped into a bun. If you have long hair, you may simply wrap it up in a bun and take a picture from the side to show off your new look. You are fully prepared to begin. On a piece of paper, sketch the outline of the head and the hairstyle. Note: Take care not to apply too much pressure on the drawing, as these are simply guidelines that should be unnoticeable once the final product is completed.
2. Identify the different components of the bun
The bun is frequently drawn in two independent pieces, as shown in the illustration. The hair that is near to the head, which has been pushed together, as well as the hair that is in the bun itself, are both included.
3. Draw the hair flow
Following that, you may designate the direction of the hair flow to aid in shading the contour of each strand. You have the option of doing this in stages (like we do) or all at once. There are pros and downsides to both approaches, so the decision is entirely up to you.
3. Shade individual strands of the bun
Now go ahead and tint the hair you just drawn. After specifying how and where the light should hit the hair, you can begin producing the reflections in different hues of gray.
4. Repeat steps 3 and 4
Shade the hair you just drew out with a contrasting color. Before making the reflections in various shades of gray, specify where the light source should strike the hair.
5. Finalize the details
View our article on how to draw hair to learn how minor modifications may make your hair appear more natural in your drawing. In order to make the bun appear more genuine, draw several individual hairs into it. In addition, a few gentle strokes with the kneaded eraser across the previously hatched backdrop might accentuate this look, bringing some lighter hair to the front.
6. Repeat the same procedure with the other area
Continue on to the next section of the map. To get a more genuine look, draw the flow of the hair, shade the individual strands, strengthen the contrasts, and lastly make a few modifications to enhance the naturalistic quality
7. How to draw a bun: Harmonize all parts of the hairdo
The final step is to thoroughly inspect all of the bun’s components once again. If you detect any uneven transitions or other flaws in the hairstyle, you may make any necessary alterations in this phase. If the hairstyle looks good as a whole, you won’t need to make any other adjustments to the bun.
How to draw a messy bun: Minor Adjustments
If you want to learn how to draw a messy bun, you shouldn’t worry about being too precise with the contour of your bun. Allow a few strands to fall to the sides or a few single hairs to stand apart from the rest of the hair. It is not necessary to have a flawless bun wrapper to make a good bun. This implies that the hair strands might move in a variety of ways and that the hairstyle as a whole may not be as consistent as desired, but rather unkempt.
Sign Up to Our Newsletter
Every week, you will be alerted about great deals!
How to Draw Braids: 3 Different Styles
Eliana Ribeiro contributed to this article.
When I was studying on my master’s degree in education, I began painting as a hobby. I enjoy incorporating art into whatever I’m teaching as a method to calm the mind and encourage more creative thinking in my students.
Table of Contents:
- The Art of Making Braids with Colored Pencils
- How to Draw a Braid Step by Step
- Recommendations
Drawing Braids with Colored Pencils
Giving characters in your artwork different hairstyles expresses their individuality, and painting hairstyles is a pleasant activity to undertake as well. Braids have always been popular, and although they appear to be difficult to draw, they aren’t at all if you break them down step by step, as I explain in this tutorial. Colored pencils, in my opinion, are the ideal media to use for sketching braids. Their ability to get realistic results when drawing hair is enhanced by their ability to produce deep shadows and depth via the use of layering techniques.
These pencils’ densely pigmented cores allowed me to produce bright highlights, halftones, dark shadows, and all the variations of color that can be seen in actual hair, thanks to their great saturation.
Step-by-Step Braid Drawing
Each of these three sketches begins with a quick sketch of the subject’s head and the positioning of her braids. It is recommended that you use a H or HB pencil to do this drawing since these pencils have firm lead and will produce a faint line. You’ll find that using this grade of pencil makes it easier to remove the first outlines before you begin adding color to your drawing without ruining the paper. You should go through the directions completely before beginning your drawing so that you are fully prepared for each subsequent stage.
Side Braid with Ponytail
Draw a rough outline of the head, which will be drawn in a 34 position from the rear of the drawing. Draw a circle around the ear.
Step 2
Now draw the contour of the hair and give it some volume. Also, make certain that the ponytail is visible. Draw a rough shape of a part on the side that will serve as the braiding section.
Step 3
Make huge strands of hair out of your hair. After that, draw a thin line through the centre of the braid part to define it. This is the orientation of the braid.
Step 4
Draw a zigzag line on top of the faint line in the braid portion to give it more definition and depth. The core of the braid is represented by this symbol.
Step 5
Draw your braid in the manner seen in the illustration. As a starting point for sketching the different pieces of braid, I utilized the basic zigzag line that I had sketched previously as a reference point. Smooth lines that follow the natural curvature of the skull were employed to create them. After that, tuck in any stray strands that fall behind the ears. Draw the strands of hair together to form a tail. Now that the details are in place, remove the original outlines of the drawing to ready it for coloring.
Step 6
Put the color into the hair by first producing a light general tone with A004 Lemon and then coloring it. Fill up the whole hair area with this product. TIP: When adding the first layer of color, avoid applying too much pressure to the pencil to prevent it from breaking. This layer should be extremely light because you will be leaving some of it undisturbed in order to generate highlights in the hair later.
Step 7
In order to create a darker layer of color to the roots, scrunchy, and places under the hair and braid, apply a little amount of pressure to the color pencil while keeping in mind where the light would naturally fall on the hair.
These are the locations where little to no light would fall, and where shadows would be present, for example.
Step 8
A036 Cocoa can be used to create the appearance of sprouting roots.
Step 9
After that, apply some subtle shadows on the ponytail. To draw these features, use a well-sharpened pencil and be sure to align your lines with the direction of the hairline and the form of the head as closely as possible.
Step 10
It’s time to apply darker shadows with A012 Noir to the picture in order to boost the contrast. This is what will give your braid a lifelike appearance.
Side Braid with Bun
Simple shapes should be used to create the head and the bun. Section off the area where your braid will be placed. You may control the thickness, location, and direction of your braid by varying the width and direction of your lines.
Step 2
To indicate where the hair is separated, make an indentation at the top of the head with a pencil. Lines should be drawn following the natural curve of the head to illustrate how the hair is moving away from the part. Following that, draw a line in the middle of the braid portion to function as an auxiliary line, following the curvature of the section. Lines can also be used to designate the direction in which the strands of hair in the bun will be worn.
Step 3
In the center of the section that will form your braid, draw a zigzag line over the first line you made.
Step 4
Begin by sketching the portions of hair that will be braided together. For this, start with the zigzag line as a starting point and create continuous lines that bend in the same way as a braid would be formed.
Step 5
Make a sloppy bun by pulling long and loose strands of hair from the braid and the bun and wrapping them around the bun. Drawing lines in the lower region under the braid to indicate hair should be done in accordance with the contour of the head. Remove the basic outlines of the braid and it is now ready to be colored.
Step 6
Choose a color for your hair that you prefer, and then lightly push the pencil across the whole surface of it to apply a light tone to the entire surface of it.
Step 7
After that, apply a bit more pressure to produce a mid-tone under the bun and throughout the hair and braid, in areas where only a little light would shine through. Allow lots of light tone to peek through, as these are the highlights that receive the greatest illumination.
Step 8
It’s time to increase the amount of contrast in the drawing in order to bring attention to the shadowy parts and to give it more depth. Lines should be drawn in the direction of hair development, using A012 Noir as a marker. The closer together you position these lines, the darker they will seem to be combined together.
Step 9
In order to bring more attention to the darkened parts and give the painting more depth, more contrast must be used. Lines should be drawn in the direction of hair development, using A012 Noir as a pencil. It will seem darker the closer together you position these lines on the page.
Double Braid with Buns
Simply outline the head and the two buns with simple shapes, being sure to keep the two buns as near together as possible. A line should be drawn from the top of the head down, between the buns, to mark the place where a part should be in the hair. Following that, create two parts where the braids will be, ending with the buns in the middle.
Because the face is slightly bent to the left, the braid area on that side will be somewhat broader than the braid part on the right. TIP: To make your drawing more realistic, be sure to follow the contour of the head while inserting the hair part and the first braid parts.
Step 2
Drawing a continuous line between the two braid portions, following the curved direction of the outline, will provide a seamless transition.
Step 3
Place zigzag lines over the central line that was drawn initially. Lines should be drawn between strands of hair to indicate the direction they are moving in.
Step 4
Following that, sketch the individual hair pieces that will be braided together. Make use of the zigzag lines to aid you in the positioning of these components. Keep in mind that actual braids are made up of thick, curved sections of hair that are twisted together. Make smaller sections at the top of the head and progressively increase the size of the portions as they come closer to the buns on either side.
Step 5
It’s time to draw the contours of the visible areas of the face. Draw the rear of the ear with only a few lines to make it look more realistic. Remove all of the original lines from the drawing in order to prepare it for colour.
Step 6
To color in the hair, I used the color A073 Blood Orange. Once again, I begin by applying mild pressure to the pencil to give the hair the lightest possible shade.
Step 7
As a further step, I used a bit more pressure to the brush to create a layer of deeper color, blending in a mid-tone to imply the different shades of light shining on the strands. In particular, this is necessary around the braid’s parts and beneath the buns.
Step 8
For the deepest contrast and to produce the shadows that would give this image its true appearance, I utilized A048 Sienna Brown and A012 Noir as my primary colors. With the same color and a well-sharpened pencil, I added further details, such as the single hairs escaping from the braids, to complete the picture.
Step 9
To finish the picture, I highlighted the neck and shoulders with a black pen to complete it.
Recommendations
- Utilize a variety of values within the same hue to add volume to the hair. Make a start with the lightest colours and work your way up to the deeper ones over time. Darker tones should be used around the hair roots and on the face. Orient all of the lines so that they point in the same direction as the hair is growing. While working on the last phases of the design, add a few single hairs as details to make the drawing appear more genuine. Colored pencils may be used to combine colors and create stunning gradients by laying one color on top of another and blending them together. Important to remember while drawing with a pencil is not to apply too much pressure on the pencil, nor should you attempt to use more than 2-3 layers at a time. It is critical that you follow these directions to the letter and produce the greatest drawing of braids possible. If you omit any steps, you will not get the most out of them.
A person’s hairdo, like the color of their eyes or the shape of their nose, helps to distinguish them from others. If you were inspired by these small lessons, I hope you would take a deeper look at hairstyles in general, especially braids, and have fun incorporating them into your artwork. And, now that you’ve mastered the fundamentals of drawing braids with colored pencils, I’m confident that you’ll want to continue to use colored pencils to add braids and other creative hairstyles to all of the characters and people in your artwork!
Other posts you may enjoy:
- 3 Hairstyles You’ll Have a Hard Time Drawing
- How to Draw a Face in Six Steps
- How to Use Watercolor Pencils
- How to Draw a Face in Six Steps
Get Tutorials Delivered Right to Your Inbox
Subscribe to get it delivered directly to your email.
Shop Set for your creation
ARTEZA makes every effort to ensure that our website is accessible to all visitors. As a result, we acknowledge that accessibility and usability may not always be attainable in all areas of the website. ARTEZA undertakes accessibility assessments of its website and fixes any issues that are discovered as a result of these audits. Please keep in mind that our efforts are ongoing. Do you have comments or require assistance? We would appreciate hearing from you on the usability of this website. Contact us by phone at (888) 905-0706 or by email at [email protected] if you have particular questions or feedback concerning the accessibility of this site, or if you require assistance with any of its specialized features.
In the event that an alternate format is available, we will make every effort to accommodate your needs. We encourage your questions and comments concerning this accessibility statement, as well as suggestions for how we might make our website more accessible.
48+ Anime Hair Girl Drawing
How to draw anime, how to draw anime eyes, how to draw anime hair, how to draw anime girl face, how to draw face anime, how to draw anime basic, how to draw sketch anime, how to draw anime style, how to draw anime character, how to draw anime character. 48+ Drawing of an Anime Hair Girl- Assumption: Taking care of oneself is only done by women and men who have already begun to transform their lives. One area of the body most may be the focus of men and women in keeping her look is the hair. Without the assistance of hair products, the hairstyle will not be able to stand on its own for very long.
- Anime Hair Girl Drawing must also capture the attention of both ladies and men who are interested in hairdo girls.
- When getting a haircut, it is very crucial to choose the hairstyle that you want to have done.
- YouTube has a little tutorial on how to draw female manga anime hair.
- How to Draw Three Different Manga Girl Hairstyles YouTube A female character’s hairstyles from anime and manga are illustrated in this lesson, which includes twelve step-by-step illustrations of typical anime and manga hairstyles for female characters.
- Learn how to draw anime hair with these step-by-step instructions.
- What is Anime and Manga Hair and How to Draw It Female AnimeOutline This article contains a collection of the greatest Anime Girl Hair Drawing 33 images.
- How to draw an anime girl with long hair.
YouTube (
YouTube Sisters should be pinned.
Step by Step Instructions on How to Draw a Beautiful Anime Girl How to DrawMangaShort Hair in Three Different Ways YouTube.
Step-by-step instructions on how to draw anime hair (with pictures).
Weheartit.com is the source of this information.
YouTube (
johnnydrawsmanga.blogspot.com is the source of this image.
design.tutsplus.com is the source of this information.
ExploreDrawingsanimehairstyles.
wikiHow teaches you how to draw an anime girl in four different ways.
YouTube (
ayametakame.deviantart.com is the source of this image.
johnnydrawsmanga.blogspot.com is the source of this image.
My Everyday Blogs From Katie (
How to DrawMangaUp Hairstyles in Three Easy Steps YouTube.
The Easiest Hairstyle AnimeHairstyles has the easiest hairstyle.
AnimeHair is an anime blog.
lasgominola.blogspot.com is the source.
YouTube (
YouTube (
www.wikihow.com is the source of this information.
YouTube (
YouTube (
The following is the source: animedotnet.blogspot.com How to DrawMangaLong Hair in Three Different Ways YouTube.
a basic illustration of a curly-haired girl with the anime character.
NCH85 on DeviantArt has a simple lesson on animehair that you may follow.
How to Draw a Manga Anime Girl with Curly Hair (with Pictures) YouTube.
LONG HAIRED DRAWINGOF IS A ANIMAL GIRLFRIEND YouTube.
AnimeHaare is created using wikiHow.
www.pinterest.com is the source of this information.
Hair in the Anime Style. The image comes from the site animestylebymissadeanime.blogspot.com. How to draw a ponytail girlMLT with manga hair on YouTube. YouTube (
How To Draw Anime Girl Hair Bun
Page 281 of 27 pages 243 Free Manga Girl Png Cliparts to Download and Print Tahmini Teslimat Zamani is an Iranian actress. Tutorial For Making Adorable Anime Space Buns For Curly Hair Mood Drawings on Display at the Student Show Shoujoromance courtesy of Tumblr Pinterest for Anime 3 See more about Girl on We Heart It. 93 images about hair on We Heart It Wallpaper Characters from Anime Girls’ Origins Women Drawing of an Anime Hair Bun Wallpaper Murasaki Shikibu Fate Grand Order Fate Grand Order Murasaki Shikibu Fate Grand Order Fate Grand Order Uploaded by Goldsickle on Deviantart.com.
- Animeoutline Uploaded Photos and Videos of Hair Buns on Instagram.
- Otablog Haziran 2012 (Haziran 2012) オタブログ What Is the Best Way to Draw Anime Buns in 2019?
- Hair Buns Bun Spacebuns Hair Buns Bun Spacebuns Pastelaesthetic Hair in Pastel Colors Anime Girl Buns Drawing Gigantesdescalzos Com Anime Girl Buns Drawing Wallpaper Chiyoko Sonoda is a Japanese actress.
- The Message in an Email Hair Bun Covers are a type of hairstyle that is worn in a bun.
- Lolita Egl is a steampunk artist.
- Pictures Of Hair Buns Stock Photos Vectors Shutterstock – An Asian woman boxer with bun hair competes in the year 2019.
- Step 12: How to Draw a Girl’s Hairstyle Draw Anime with a Pin Mukta’s Simple Drawing Youtube Image of How to Draw Anime Hair 23 in High Resolution Bun Bun Art Tumblr is a tumblr dedicated to bun bun art.
- Drawing of a Young Girl with a BunD Aaaah, yeaaah, yeaaah Polyvore This image was uploaded by OmiHair Bun Doodle In Biro by Haloanime97 on DeviantArt.
- Personal Use Is Completely Free Like Bun B Tumblr, you can find royalty-free hair buns stock images, photos, and vectors.
35+ Anime Girl Bun, Great Ideas!
Fantastic Anime Girl Bun Ideas for 35+ Anime Girls! Take inspiration from these beautiful hairstyles! These hairstyles for girls for men and women may be formal for work or edgy for a night on the town. These styles are fresh and modern, and they are appropriate for a professional setting. To make hairdo girl enjoyable, a professional haircut and styling product are all that are required. These hairstyles for girls are minimal maintenance, yet they may be trimmed and styled in a variety of styles, including fashionable, modern, and classic.
- Are you tired with your current hairstyle?
- There are a few hairstyles that are projected to be popular in the next year, 2019.
- Anyone interested in giving it a shot?
- about it.
- www.pinterest.com is the source of this information.
- Please be aware that cookies are essential for the proper operation and enhancement of our services, as well as for advertising reasons on our website.
- You should examine your privacy settings if you are not happy with us using this information.
- List of the Top 10 Anime Girl Hairstyles What exactly is Anime Planet?
- Make a list of everything you’ve seen thus far.
- YouTube (With her hair in a bun, anime girl womens flower hat hairgrip party cocktail top with rose dot veiling hair clip lace cap wedding hairpins m mism girl womens presents us Free delivery on 244 pieces Continually on the lookout for new methods to degrade their naturally beautiful appearance, western girls have begun to color their hair at alarming rates.
- www.zerochan.net is the source of this information.
- Stuff for Artists to Draw Consider the sort of hairstyle you desire and the direction in which you want the hair strands to flow.
- Stacie Love’s artwork may be seen on DeviantArt.
- 14th of April, 2020, Anime Girl with Her Hair in a Bun Hair drawing instruction with SPACE BUNS and DOUBLE BUNS The name of the pencil Pencil DOMS ZOOM ULTIMATE DARK ULTIMATE DARK Subscribe to my YouTube channel to see more drawing tutorials.
- elcajondecosasperdidas.blogspot.com is the source of this information.
- MyAnimeList netUntitled picture 2601491 by marky on Favim com.
- favim.com is the source of this information.
Pinterest (French website) is the source of this information.
4 Ways to Draw an Anime Girl wikiHowtumblr nb76f63IBa1tyibdo1 500png 500 500 image 2070802.
How to Draw an Anime Girl Hair Bun42 best Manga Pencil Drawings images on Pinterest Manga Anime Girl Hair Bun www.pinterest.com is the source of this information.
Zerochan Kakumeiki Valvrave 1521717 Kakumeiki Valvrave 1521717 Kakumeiki Valvrave 1521717 Kakumeiki Valvrave 1521717 Zerochan www.zerochan.net is the source of this information.
Nardack 164911 Zerochan is a fictional character created by Nardack in the year 164911.
www.zerochan.net is the source of this information. BayneezOne’s Sakura and Hinata can be found on DeviantArt. bayneezone.deviantart.com is the source of this image. mangtumblr Pesquisa Google Manga mangaAnimes mangaAnimes mangaAnimes manga www.pinterest.com is the source of this information.
How to draw anime-styled portraits! by MistedSky
Hello! Come along with me as I demonstrate how to create some anime or manga themed portraits in this lesson! Please keep in mind that I am mostly a female portrait artist (at least for now;u;)
Anatomy
The loomis head method, which is widely used for drawing beautiful and anatomically perfect faces, will be demonstrated. An explanation of how to utilize the Loomis head approach is provided in detail below. This approach is intended to serve as a starting point for a normal head and not as a definitive guideline for varied head shapes and sizes! First and foremost, this technique proposes that a head may be divided into three sections: the distance between the brow, the tip of the nose, and the chin are all equal in distance between them.
- Please keep in mind that the top part of the head is not a perfect round, but rather a circle with its sides cut off.
- Observed from various perspectives, the loomis head incorporates foreshadowing, which means that facial characteristics such as the eyes and ears wrap around the whole head.
- One eye length scale has been included to demonstrate that the distance between the eyes equals the length of an eyeball.
- The ears get lower than the eyes as the head tilts up, and as the head tilts down, the ears become higher than the eyes as the head tilts down, for example.
- In actuality, a female’s ribcage is somewhat smaller and shorter in length than a male’s ribcage, despite the fact that the two are depicted in the same diagram.
- On YouTube, Proko provides anatomy films, and I believe his clavicle (collar bone) and neck muscle (trapezium, sternocleidomastoids) videos are particularly useful for portraiture.
- It’s simpler to recall the general appearance of an ear if you break it down into three sections: Pink represents the outer region of the ear.
- Tragus, which is a little patch of skin in front of the ear canal, is yellow and green.
- The following is a basic step-by-step approach for sketching and coloring an ear in a single sitting.
- I recommend Pinterest instructional pictures and YouTube videos for instructions on the eyes, nose, mouth, eyebrows, and other facial features.
Studying the facial structure and proportions of attractive girls and boys on Pinterest may also assist you in developing your own ideal aesthetic of attractive features.
Hair
If you’re thinking about your hair, I propose envisioning it as flat strands that twist and turn in three-dimensional space. This is clearly more of a simplification than a realistic picture, but it is what I use when sketching in the anime style. However, this is beneficial in creating hair forms that appear realistic!;) In addition, I envision the rear layer of hair to be mainly in shade (pink). In terms of creating the actual hair in general, I recommend first sketching big groupings of hair and then breaking the groups into tiny hair strands later on, as seen in the illustration below.
- After learning about hair strands twisting and joining together in 3D space, we can draw arrows that indicate the direction in which hair flows (down) from the roots.
- Keep in mind that the head is primarily circular, albeit it is slightly flat at the top plane!
- Men’s hairstyles may range from short spiky hair to long wavy hair, bowl cuts to man buns, and there are many different alternatives when it comes to sketching them!
- After sketching and coloring the hair, I prefer to add a few single hair strands at random at the very end to finish it off.
- Based on who you want to draw (a family member, an original character, or an existing figure), I recommend searching on Pinterest for unusual and beautiful haircuts.
Facial expressions
Although I don’t usually draw strong face emotions, here is a rough approximation of one that I did recently. Lifting of the brows and lower eyelids is typically associated with a pleasant or smiling feeling (1). The converse is true for angry or sad emotions, which frequently requires the lowering of the brows and even the protrusion of muscles between the brows in order to convey additional rage! (2). For more elegant or casual photographs, I like to use neutral emotions such as curiosity or interest, which are more appropriate for me.
Take note of the body language and form language, such as the rising of the shoulders (which indicates joy) and the arms being closer together (which indicates sadness) (scared or nervous).
Poses and props
Figures carrying something in their hands are featured in portraits. Flowers or accessories as props for feminine figures or characters help to create a more graceful posture, which I find pleasing to the eye. Here are several instances of postures using various objects, such as single flower stalks and beverages. Even in the absence of props, the hands and arms play a crucial part in establishing expressive stances that represent specific moods in half-body or full-figure portraits. Figures in portraits who are gazing away from the ‘camera’ By pulling the subject’s attention away from you, they may become even more elegant, since it will appear as if you are invading or catching an unplanned or more spontaneous beauty or charm!
Take note (in pink) that our bodies automatically maintain a healthy equilibrium.
Figures in portraits who are staring at the ‘camera’ Because we are placing the subject with their back to the camera while yet keeping their attention on the ‘camera,’ we are able to portray the figure as being intrigued, interested, or focused on ‘us,’ resulting in a more immediately appealing portrait work.
Through the use of the knees and legs, it is possible to portray even more diverse stances in full body portraiture.
Composition
Using the Rule of Thirds When face features or body parts are placed where the lines of the rule of thirds intersect, more attention will be drawn to those places and less focus will be drawn to areas that are not on the lines. As a result, aligning the eyes with the first horizontal line of the rule of thirds can enhance the quality of a portrait photograph. In addition, just placing a figure off-center on one of the vertical lines might draw more attention to her and increase her prominence.
- Remember that this is not a definitive ‘rule,’ but rather a beginning point for further investigation.
- Allow for some empty space in front of the subject so that the subject can gaze into the frame rather than immediately out of the frame while looking into the frame.
- When the spectator looks inside the frame, you don’t want them to feel tight or crammed in any way.
- When it comes to portrait layout, I feel that discreetly inserting triangular gaps between the subject and the background or within the figure results in a coherent and beautiful composition.
- But, as I already stated, do it for a good purpose.
Painting portrait demonstration
Make a rough drawing first (for me, my first sketch will be my final line art). For sketching, I use dae pen 4, which can be downloaded from this website. As for today’s bust up portrait, I chose to just go with a standard school girl in an anime influenced / semi-realistic approach! Then, using a solid opacity pen or brush, fill in the gaps between the base colors. So, I used the default ‘Oil Paint’ brush with 70 volume of paint and 70 density of paint to create a more watercoloury and sketchy portrait.
For greater ease, separate layers for the skin, hair, shirt, bow, and straps should be used!:3 Aside from that, I also locked transparent pixels and went over the line art layer with a soft airbrush of a brighter red color compared to the original dark brown color around the skin, hair, and inner corners of the eyes to give the lines a bit of a spark, and I also locked transparent pixels on the background layer.
Utilize a combination of the soft airbrush (for soft shadow edges that are facing in the direction of the light) and the default oil paint brush (for hard shadow edges that are facing in the opposite direction of the light) with the intention of creating a brighter ambient light source from above.
- In order to create the appearance of subsurface dispersion, paint some rich pink and blue colors around and inside the boundaries of the dull grey shadows.
- First, I like to use a bright color such as hot pink, followed by the genuine near-white hue for the highlight, which I find most effective.
- In addition to adding some lovely blush with the same soft airbrush, I used the gradient tool (located below the fill bucket tool) to make a basic white to purple gradient for the backdrop of the image.
- Everything has been completed— Making a layer and activating the’multiply’ layer mode before filling the layer with any color you like is optional, however it will result in a more interesting lighting situation overall.
- This is going to be the primary shadow value.
Despite the fact that this approach appears to be relatively straightforward, it delivers an excellent outcome for adding a little more toughness to the finished photo!
Thank you!
Thank you so much for taking the time to read this far! I hope this suggestion has been of assistance to you in any manner. Now, please keep an eye on me as I study male anatomy. The procrastinator begins to procrastinate. Users who were interested in this post
22+ Bun Hair Tutorial Drawing
Farjana Drawing, Farjana Drawing Academy, Farjana Drawing, Farjana Drawing, Drawings for 22+ Bun Hair Tutorials – Hairstyles The bun will continue to be trendy as a hairstyle in the coming year. Do you want to attempt drawing a bun hair tutorial? Nonetheless, a bit of his hair will be shorter in 2019, falling between the ear and the shoulder, and the points of his hair will be sharper than usual in 2019. This hairstyle is perfect for every face shape; all that is required is to change the length or shortness of the hair.
We will provide a debate about hairstyle bun, which is, of course, a very fascinating thing to listen to, since it will make it easier for you to create hairstyle bun more charming as a result of what we say.
You may learn how to draw a messy bun by watching this YouTube video.
Tutorial on How to Draw Detailed instructions on how to sketch and color Messy Bun Hair.
We will reduce the framework and gradually increase the complexity, starting with simple rules and progressing through shading.
Be sure to visit the site for all of your drawing requirements.
March 2020: How to Style Your Hair in a Bun This article will show you how to style your hair in a sloppy bun.
When it comes to gener, try to keep within the HB 2B range.
YouTube 07 06 2020 (Saturday, June 6th) The steps of drawing a female with a messy bun hair are shown below.
Drawing instruction on the 7th of June Landscape that is straightforward Tame lapse drawing STARFIRECOPIC MARKER coloring tutorial STARFIRECOPIC MARKER coloring tutorial STARFIRECOPIC MARKER coloring tutorial tame lapse 5th of April, 2020 Make a realistic hairstyle, a sloppy bun, or a hairdo.
Tutorial on How to Draw Learn how to sketch and color Festive Hair for your next party.
You must not only concentrate on the details, but you must also work on giving depth to the picture in order to successfully draw hair.
Drawings in the Arts Drawing Inspiration Drawing Techniques Drawing of Anime Hair Drawing of Anime Hair Anime Bodies are a type of body that appears in anime.
Good day, I was wondering if you would be interested in creating a lesson on how to draw or color noses.
Draw Alongside Me How to design a realistic hair bun with a pencil.
How to Draw a Bun in Your Hair: A Simple Tutorial for Beginners You must see it for yourself.
Craftsy.com is the source of this information.
Image courtesy of zomgo3o.deviantart.com The steps of drawing a female with a messy bun hair are shown below.
Doovi (www.doovi.com) is the source.
www.deviantart.com is the source of this image.
design.tutsplus.com is the source of this information.
is the source. Learn how to make a messy bun step-by-step with HairPeople for FREE. www.dragoart.com is the source of this image. LightJames deviantart is the sole source for hair tutorials. www.pinterest.es is the source of this information.