
Food
How To Grill Hot Dog Buns
Jan
Toast Your Buns
Labor Day, the season’s final celebration of warm-weather get-togethers and sunny cookouts, is just around the horizon. Is it your intention to provide hot dogs, hamburgers, vegetarian burgers, and perhaps even a crab roll or two? You’d best have a strategy for toasting those buns, then. After all, who would want to snuggle with their dog in a warm, toasty bun instead of a mushy piece of bread right from the bag? After going through all the difficulty of locating the proper charcoal, preparing an abundanceof potatoes, cabbage, and slaw, and prepping an abundance of toppings for the dogs and burgers, don’t forget about this final, crucial step.
Grill ‘Em
Make some beautiful burnt action with those buns by throwing them on the grill! Do it at the last minute – when your burgers or dogs are almost done, toss the buns onto the grill for approximately 1 minute per side, or until they are slightly browned.
Bake Them
Toss some toasted taste into the oven When something else is baking in the oven, or if your grill is on the smaller side and you want to devote it to your primary meaty attraction, turn to the oven for a quick and easy way to toast flavor. Gently toast the buns in a 350°F oven for approximately 5 minutes, or until they are warmed through and faintly crispy. Place the buns in a good basket with a towel over them or cover them in tinfoil after toasting to prevent them from being too crunchy or hard.
In a Pan
Do you only require a few buns? (Perhaps for one of our brown butter crab buns or two hot dogs for a couple?) Then, instead of using the oven or the grill, just toast the buns in a sauté pan over medium low heat until lightly toasted. Even more taste may be achieved by spreading 2 tablespoons of butter on the cut edges of the bun first, followed by toasting the bun cut side down until golden brown, thereby making a buttery, toasted basket for your dog.
How To Toast Hot Dog Buns
It’s time for the annual family BBQ. The sun is shining, the grill is sizzling, and the kids are having the best time of their lives on the playground. Despite the fact that they are not the only ones, because you own the grill. It’s more than simply a kitchen gadget you picked up on the cheap at the department store; it’s a key aspect of the cooking process. The grill serves as an extension of your personality. Control, freedom, and power are all represented by a grill in many forms. Simply put: no one else can prepare a hot dog quite like you do, and that includes me.
- You can’t quite put your finger on it, but your neck tightens and your eyes dart about.
- Something isn’t quite right.
- In a split second, your breathing becomes shallow, and you close your eyes to protect yourself.
- Every aspect of your flawless BBQ has been spoiled because you failed to toast the buns to perfection.
It’s all over the place. Of course, this does not have to be the case for you. When you have our instructions in hand, you’ll be toasting buns to perfection and your hot dogs will be the talk of the entire country. Let’s get this party started! We’ll be doing the following today:
- There will be a large family cookout this weekend. The sun is bright, the grill is sizzling, and the kids are having the best time of their lives at the barbecue. They are not the only ones, though, because you are the one who owns the barbecue grill. It’s more than simply a kitchen gadget you picked up on the cheap at the department store
- It’s a crucial aspect of the cooking experience. It is important to remember that the grill is an extension of your own body. Control, freedom, and power are all represented by the barbecue grill. Simply put: no one else can prepare a hot dog quite as you do, and I appreciate that. Although your scrumptious frankfurters are being served, an unusual feeling permeates the air. However, your throat tightens, and your sight wanders in different directions. Nothing but raised eyebrows from those who have served you are visible in your immediate vicinity. The situation is not normal at this time. Hot dog buns were left untoasted since you failed to toast them first. It just takes a split second for your breathing to become shallow, and you close your eyes tighter. It’s impossible to believe. Because you didn’t toast your buns to a golden brown, your beautiful BBQ has been wrecked. Everywhere you look, there’s evidence of it. Then then, this does not necessarily have to be you. With this instructions in hand, you’ll be toasting buns to perfection in no time, and your hot dogs will be the talk of the entire country. Let’s get this party started. We’ll be doing the following today.
Please feel free to skip ahead to the area that best matches your requirements and interests.
Toasting Hot Dog Buns on the Stove
It might be difficult to toast buns on the stovetop without breaking the joint between the two parts of the bun, but here’s all you need to do:
- Cut the middle of the bun slightly deeper than you would normally do so that the interior is completely visible
- Heat a skillet over medium-high heat in a stovetop pan until hot. Allow for a few minutes for it to get up to temperature before continuing. 1 tablespoon of olive oil should be brushed over the entire bun to give it a more flavorful finish. Toss the buns into the pan with the split side facing up. Keep an eye on the buns as they are being toasted until they are slightly browned
Pro-Tip: Try to keep the buns as near to the sides of the skillet as possible during cooking. Despite the fact that the middle of the skillet is the hottest area, the additional heat will increase the likelihood of the bun being burned. Pro-Tip2: You might want to think about covering the outside of the bun in aluminum foil. This will function as a heat barrier, reducing the likelihood of the bun being burned during baking.
Toasting Hot Dog Buns in the Oven
Tips: Try to keep the buns as near as possible to the skillet’s edge. The middle of the skillet is the hottest spot, but as the temperature rises, there is a larger chance of the bun being burned. Pro-Tip2: Consider covering the outside of the bun with aluminum foil to keep it from sticking together while baking. A heat barrier will be created, reducing the likelihood of the bun being burned.
- Allow 5-10 minutes for the oven to get up to temperature while it is set to broiling. Meanwhile, place a baking sheet on a baking pan that is large enough to accommodate all of your buns. The buns should be cut a little deeper than normal so that they may be placed flat-side down on the baking sheet that has been prepared. To enhance the flavor of the buns, brush them with 1 tablespoon of olive oil. Make sure you put the buns on a rack in the centre of the oven so that they bake evenly. Leave them in the broiler for 5 minutes (but keep an eye on them because they may burn easily)
- Removing the buns from the oven and poking them with a fork to ensure they are crisped to your liking
Toasting Hot Dog Buns in the Toaster Oven
The good news is that toasting buns in a toaster oven is nearly identical to toasting them in a conventional oven. Here’s how it works:
- Set the toaster oven to broil and give it 5-10 minutes to achieve the desired temperature. Place a baking sheet on a baking pan large enough to contain all of your buns — and which is also large enough to fit into the toaster oven, of course — while the toaster oven is heating up. Cut the buns a little deeper than usual so that they may be placed cut-side down on the baking sheet
- Positioning the buns in the center of the toaster oven will aid in the baking of the buns evenly. Allow for 5 minutes on the broiler (but keep an eye on them because they burn easily)
- After removing the buns from the oven, probe them with a fork to ensure that they have crisped to your liking
In no time, you’ll be a pro at baking buns if you follow the procedures outlined above, regardless of the strategy you choose to choose. Are you also preparing some delectable hamburger buns? We’ve also got you covered in this regard.
Hamburger Buns101 — Hot Dog’s Best Friend
Imagine being informed that you could substitute hamburger buns for all of the stages listed above as well? Yes, this is correct! Just omit the step where you would normally cut the buns deeper than you would normally do, and your burger patty will be juicy and soft as you cruise down the road to your picnic destination. You may also prepare the hamburger buns at the same time as your hot dog buns. The only change is that instead of cutting the hot dog buns along the middle or laying them flat to conserve space, you will fold them instead.
With that said, let’s move on from hamburger buns and return to hot dog buns instead.
Frequently Asked Questions
We’ll be answering the following questions today:
- Are hot dog buns good for you? Is it possible to freeze hot dog buns? What is the process of making hot dog buns? What are the finest hot dog bun substitutes available
Are Hot Dog Buns Healthy?
A hot dog bun’s nutritional value is determined by how the bun is baked (or which brand you choose when buying from a supermarket). As a result, hot dog buns can contain a lot of salt, which can lead to high blood pressure. However, this does not necessarily imply that all hot dog buns are harmful in any way. In reality, the most reliable approach to determine if a bun is healthy or not is to examine the packing label when the bun is purchased.
Take, for example, Udi’s Classic Hot Dog Buns, which are available in a variety of flavors. This is a healthier alternative to the traditional bun. An solitary bun has the following ingredients:
Due to the fact that it is gluten-free and beneficial to your overall digestion, this is a fantastic healthy bun alternative. However, if you wish to include gluten in your diet, organic whole grains and whole wheat are two options to explore. Both are also extremely beneficial to your health. Is a Hot Dog Worth the Calories It Contains?
Can Hot Dog Buns Be Frozen?
Absolutely! Despite the fact that hot dog buns don’t have the longest shelf life, there’s nothing wrong with placing them in the freezer for a few minutes to give them a little more shelf life. When possible, freeze the hot dog buns in their packing before opening them; however, if you have already opened the container, or if you have cooked the hot dog buns yourself, make sure to wrap each bun separately in aluminum foil before freezing them. Once frozen, the buns should be consumed within 3-4 months.
(And For How Long) is a related article.
How Are Hot Dog Buns Made?
What a great question! Marcus Leshock was fortunate enough to have the opportunity to work in Steve Rosen’s Bakery in Chicago, and he graciously shared his experience with us. It’s an intriguing concept: Related: The Real Process of Making Hot Dogs
What Are the Best Hot Dog Bun Alternatives?
However, just because you don’t care for the bun, doesn’t mean you can’t enjoy your hot dogs. Pretzels are a favorite of ours as well, and pretzel dogs are a delicious alternative to hot dogs. How to manufacture them is as follows:
Become the Master of the Bun Today
According to America, this is the best hot dog topping. But What Is the Position of the Other Parties? Discovering how to correctly toast hot dog buns is only the beginning of a beautiful hot dog adventure; here at The Hot Dog, we want to be there to accompany you every step of the way. Take a look at some of our favorite recipes, or if you’re anxious to learn everything there is to know about dogs, then read some of our amazing articles right away. We are looking forward to seeing you there!
Posted by Marco Verch, a professional photographer, under a Creative Commons license.
More from Recipes
Any moment is a good time for a hot dog! And what better way to start your day than with a hearty, traditional breakfast.
3 Keto Hot Dog Recipes (and Facts) You Should Know
To follow the typical ketogenic diet, you must consume less than 30 grams of net carbohydrates per day. Hot dogs are a staple of.
How to Make the Perfect Chicago Dog at Home
Chicago. In addition to films, music, poetry, and wonderful meals that induce a sense of belonging, the windy city has inspired a variety of other artistic endeavors. There are several brands in Chicago.
Editor Picks
Hot dogs have been a favorite of Americans for decades, and today’s hot dogs provide a wide array of toppings and fillings to suit every taste and budget. When it comes to hot dog buns, however, consumers are sometimes limited to a single option: a soft bread roll that lacks the complimentary taste and strength to endure a dog that has been liberally adorned with additional toppings.
One solution to this problem is to toast your hot dog buns, which improves both the taste and the longevity of the hot dog roll. Toasting hot dog buns may be accomplished in a variety of ways.
Grill the Buns
Given the fact that you are almost certainly already using a grill for the hot dogs, grilling your hot dog bun is the most practical method of toasting it. All that is required initially is to simply heat a tablespoon of butter, either in the microwave or on the stovetop, and then apply the melted butter to the inside of the bun with a pastry brush. After that, lay the hot dog bun, with the inside facing up, on the grill next to your hot dogs to finish cooking. The bun should be grilled on the inside for roughly 1 minute, or until it develops a few lovely grill marks on the interior of the bun.
Tip
As a general rule, when using a grill with two sides that heat up independently, it is advisable to arrange the buns on their own side, away from the hot dogs, and to cook them at a lower temperature. In the event that you’ve slightly over-toasted your hot dog bun on the grill, you may scrape off any excess grill char with a butter knife before savoring your creation.
Use a Broiler
If you don’t have access to a grill, you can always broil your hot dog bun to get a similar result. First, brush the interior of the hot dog bun with a tablespoon of melted butter, then lay the hot dog bun on a baking sheet with the inside of the bun facing up. Repeat with the remaining hot dog buns. Place the baking sheet on the top rack of your oven and turn on the broiler setting to 500 degrees Fahrenheit to begin cooking. 1 minute or until the interior of the bun is golden brown and somewhat crunchy, depending on how large your buns are.
Use a Toaster Oven
When using a toaster oven, you may toast your hot dog bun instead of using a broiler or grill to achieve the same results. Simply apply a tablespoon of melted butter on the interior of your hot dog bun and toast it in the toaster oven for 2 to 3 minutes on the “toast” setting, with the inside of the bun facing upward. The disadvantage of utilizing a toaster oven, on the other hand, is that you run the danger of drying out your hot dog buns. While a grill or broiler only heats one side of a hot dog bun at a time, a toaster oven heats the bun from all angles, potentially drying out the hot dog bun.
Use a Toaster
It is possible to toast your hot dog bun without the use of a broiler or grill if you have a toaster oven. Simply apply a tablespoon of melted butter on the interior of the hot dog bun and toast it for 2 to 3 minutes on the “toast” setting in your toaster oven, with the inside of the bun facing up, until golden brown.
The disadvantage of using a toaster oven, on the other hand, is that the hot dog buns may become dry. While a grill or broiler only heats one side of a hot dog bun at a time, a toaster oven heats the bun from all angles, potentially drying up the hot dog bun completely.
Warning
If you do opt to toast your hot dog bun in a toaster, make sure that you do not butter the bun before placing it in the toaster to prevent it from burning. This has the potential to create a major fire danger. As an alternative, after the hot dog bun has been removed from the toaster, add softened or melted butter onto it.
To Butter the Bun or Not
It has been advised in most of the toasting ways that you brush the interior of your buns with a tablespoon of melted butter before toasting them. It is not only beneficial to add butter to your hot dog buns in order to improve their flavor, but it will also assist the hot dog bun in producing a lovely golden color across both the interior and outside of the bun. A protective layer of butter on the bun can help to prevent the bread from collecting any extra moisture from the hot dog or any additional toppings, allowing the bun to remain crisp rather than soggy during the cooking process.
To Toast Both Sides or Not
The good news is that you can toast both sides of your hot dog bun. The bad news is that toasting both sides increases the likelihood of drying out your hot dog buns. Toasted buns are delicious because they have a golden, crispy texture that improves the flavor and durability of the buns. Toasted buns are less delicious because they have an extra layer of brown crust.
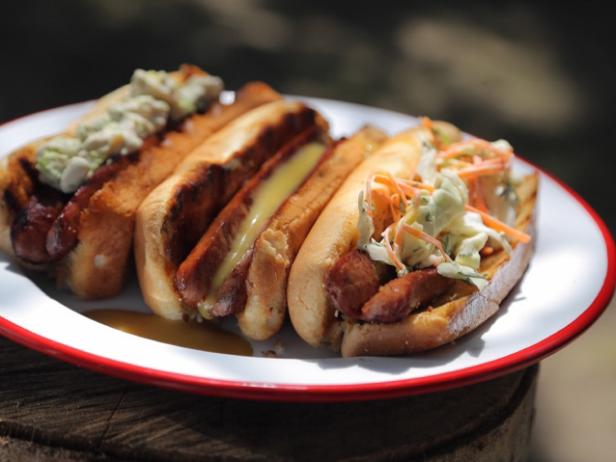
Suggested Ways to Enjoy Your Hot Dog
- You may also try topping your hot dog West Coast-style, which includes chile, cheese, and onions for a spiced-up variety with a little heat
- Or you can have a traditional hot dog with ketchup and mustard. Authentic Chicago hot dogs should be topped with mustard, relish, peppers, tomato slices, and raw onions to get the whole experience. For a Southern-style hot dog, simply top your hot dog with coleslaw and you’re good to go. For the classic method to garnish your hot dog, New York-style, with steamed onions and deli-style, yellow mustard, there’s always the tried-and-true original way to do it.
How To Grill Hot Dogs Perfectly
All hot dog purists and frankfurter devotees are invited to attend! Finally, it’s your turn to shine! It is estimated that Americans will consume 7 billion hot dogs over the period between Memorial Day and Labor Day, according to the National Hot Dog and Sausage Council. Yes, you read that correctly. Billion, with a “b” at the end. And now, we’re going to assist you in taking the first step toward becoming a grilling prodigy. Take a breath of the truly smokin’ BBQs that surround you, and you’ll see—or should we say smell—that the title is yours to keep if you work hard enough for it.
Those blunders have been exaggerated.
Step 1: Prep Your Grill
Regardless of whether you’re using a gas or charcoal grill, the first step in grilling the ideal beef frank is to make sure your grill is ready to get to work immediately after setting it up. Check to see sure it’s clear of leftovers from the previous season’s fare—and if it isn’t, get a grill brush and get to work cleaning it. (You could also use a wad of aluminum foil instead of a towel.) As soon as you’ve wiped the slate clean, you’ll want to make sure you have enough of propane or charcoal on available.
It’s time to get to work!
Step 2: Spray the Grates
Apply nonstick grill spray on the grates before turning on the heat. PAM ®Grilling is an example of such a product.
Treat it like you would any other cooking surface, wiping it down with a couple of short blasts of water. You’ll have a harder time getting your franks to stick to the grill surface, which will make them simpler to turn—and your grill will be easier to clean. winning
Pro Tip
Making Glazed Frank Kabobs is a simple process. Grill spray your skewers before adding your juicy franks, sweet corn, red onion, and bell peppers to the tops of the skewers. This will make it easier to consume your kabobs.
Step 3: Bring the Heat
Your grill, like a well-trained athlete, requires a proper warm-up period before it can perform at its best level. Preheat the grill before putting the franks on it to cook. Preheat the gas for 10 to 15 minutes on high for best results. Preheat a charcoal grill until the coals are covered with a layer of white ash, about 15 minutes. Cooking time for standard beef franks is approximately 15 minutes. Cooking time for beef franks with lower fat content is approximately 15 minutes for medium-low.
Step 4: Keep it Moving
Using grill tongs, put the beef franks perpendicular to the grill grates over indirect heat (or a spot near to/not directly over the flames) until they are browned on both sides. Make a roll with your beef frank and broil each side until the frank’s ends begin to break. Because the outside conditions, grill type, and grill size all influence how long it takes to cook the ideal frank, there is no magic time for grilling the perfect frank. That is why you should cook normal beef franks for 5 to 7 minutes, jumbo beef franks for 7 to 10 minutes, and quarter-pound beef franks for 15 minutes while cooking regular beef franks.
Step 5: Seal in the Flavor
Sear your dogs over direct heat (or directly over the flames) for a quick sear that seals in the flavor and produces those delicious grill marks. Take the dogs off the grill.
Step 6: Toast Your Buns
Use a pastry brush to apply melted butter onto the inside of your hot dog buns two to three minutes before your beef franks are finished cooking. Place your bun face down on the grill, over indirect heat and perpendicular to the grill grates, and cook for about 5 minutes per side. For 1 minute, toast the bread. Make careful to take the bun out of your mouth as soon as your minute is over. If you leave the bun on the grill for an extended period of time, the bread will get dry.
Pro Tip
Using melted garlic butter on your hot dog bun will enhance the flavor of your hot dog.
Step 7: Dress Up Your Dog
When your franks come out of the grill, they’ll appear to be completely bare. Add some delectable toppings to make them more appealing. While your grill is heating up, you may prepare a tray of Hunt’s ®100 percent natural ketchup, Gulden’s ®bold yellow mustard, relish, and chopped onion for your burgers and dogs.
Pro Tip
When your franks come out of the grill, they will appear to be completely bare. Add some yummy toppings to make them even more appealing to your taste buds! Meanwhile, while the grill is heating up, you may prepare your tray ofHunt’s ®100 percent natural ketchup, Gulden’s ®bold yellow mustard, relish, and chopped onion.
Step 8: Relish the Dog Days of Summer
Using a bun, put your nicely cooked beef hot dog on it, and then top it with whatever toppings you like. You’re now ready to sit back and enjoy a 100 percent beef frank—as well as a peaceful day.
Warm Your Buns: The Art Of Preparing Hot Dog Buns
Buns can be handled in a number of different ways.
Hot dog establishments all around the country steam them, while many others toast them on a griddle. You make the decision.
Steaming your buns
Hard buns are something I only eat at my health club. Heating the buns warms and softens them, but steaming them for an extended period of time makes them mushy and sticky. There are various methods for steaming buns at home, including: 1) Bring a little amount of water to a boil in a double boiler or Chinese bamboo steamer, and then place the buns in for around 20 seconds. That is all they require. 2nd, dampen a sheet of paper towel by sprinkling water on it softly until about 20 percent of its surface area is wet.
If the bread is frozen, microwave it for 30 seconds to thaw it out.
3) Bring a large saucepan of water to a boil.
If you’re dealing filthy water dogs, this is the quickest and most straightforward way.
Toasting your buns
Because I grill the majority of my franks, I toast the buns right next to the meat on the grill to keep them warm. My method is to just open them up and place them on the grates. They can burn in as short as 30 seconds, depending on how hot the grill is, so don’t leave your buns alone while you’re cooking them. Keep an eye on them on a regular basis. It is typically possible to scrape away the char with a serrated knife if they become a bit too dark around the edges. Alternatively, you may brush a little butter or oil over the cut face of the buns before grilling them if you really want to go all out.
How To Toast Buns – The Best Way
*Some of the links in this post may be affiliate links. For further information, please check mydisclosure. Your buns will be crunchy on the exterior, yet soft and warm on the inside if you toast them properly. Even though you may toast practically any sort of bread, you must be aware of the finest methods for getting them precisely toasted! Some techniques of toasting buns are more effective than others; thus, what is the most effective method of toasting buns perfectly? To toast buns, there are a variety of ways available, including broiling, grilling, toasting in a toaster, and baking.
Listed here are all of the numerous methods you may toast buns at home, along with instructions on how to achieve the best results!
The Best Way To Toast Buns
Here are some of our favorite methods for making buns that are warm and toasty, ready to be topped with burgers, cheese, and more!
Broiling Buns
To toast buns, the best method is to place them in the broiler.
It is possible to achieve the perfect toasted and slightly browned outside while maintaining a warm and soft within by following these instructions. Here’s how to make the ideal toasted buns under the broiler:
- Set the broiler function on your oven or toaster oven and let it to heat up completely. If you have a choice between several broiling settings, use the highest level. Preferably, you should let at least 10 minutes before putting your buns in the oven. Preheat the broiler to its highest setting and place the rack directly under it. If there are numerous rack places available, bump it to the top of the list. Before putting the buns in the oven, cut them in half lengthwise. Place the buns on the tray so that the cut surface of the buns is facing up. This allows the chopped side to be roasted uniformly on both sides
- And Allow the buns to broil for 30 seconds under the broiler in the oven until they are golden brown. Keep an eye on the buns, since they are relatively high on the rack and might burn fast if not watched.
- Although you must wait for the oven to heat up before placing the buns in the oven, it only takes 30 seconds to a minute for the buns to be beautifully golden and crisp on the outside. Besides that, it is the most reliable method of obtaining a well-toasted bun with a warm interior
- In order to broil the buns in the oven, it is necessary to first preheat the oven. Although preheating the oven to broil does not take long, you must still wait around 10 minutes before you can place the buns in the oven
- Otherwise, they will burn. In addition, if you do not keep an eye on the buns, they might burn really rapidly.
Grilling Buns
It will save you time and effort if you have a small grill in your home since it will allow you to toast your buns quickly and easily. Here’s how to grill buns at home using the following method:
- Prior to cooking the buns, cut them in half lengthwise. Place them face down on a preheated grill over direct heat, with the grill lid closed. In the event that you are utilizing a flame grill, attempt to stay away from any locations where there could be a lot of flames. Toss the buns under the grill for up to one minute, depending on how hot it is, or until they are just browned
- Burger or hotdog buns should be grilled at the last minute to ensure that they are done when the rest of the food is.
- Prior to cooking the buns, cut them in half. Preheat a grill to high heat and cook them face down on the grill. In the event that you are utilizing a flame grill, attempt to stay away from any locations where there may be a lot of flames. Cook until the buns are lightly charred, which might take up to a minute depending on how hot your grill is. Grilling hamburger or hotdog buns at the last minute will ensure that they are cooked when the rest of the meal is.
- If you leave the buns on a flame grill for an extended period of time, there is a strong probability that they may burn. Even a few seconds might cause the buns to burn instead of toasting, so you must keep a tight check on them during baking. In addition, it is only convenient to grill the buns if you already have an electric grill set up, or if your outdoor grill is ready to go.
Toasting Buns In The Toaster
Cut the buns in half before toasting them in the toaster to ensure that they are evenly cooked on both sides. The process of toasting a bun in the toaster is quite similar to that of toasting bread in the toaster, therefore there isn’t much difference between the two.
- In order to properly fit the buns inside the toaster, cut them in half lengthwise. Always remember that you cannot add olive oil or butter on the buns before putting them in the toaster since it will generate smoke and may result in a fire danger. Set the toaster to the level of toasting you desire for your buns and allow the buns to toast for the entire cycle. It makes no difference which direction you place the buns in the toaster since they will cook on all sides.
- When it comes to toasting your buns at home, using a toaster is definitely the least time-consuming option. While other methods toast only one side of the bun, this approach provides an excellent, equal toasting on both sides of the bun.
- Due to the fact that each toaster has a varied strength, you must keep an eye on the buns while they toast to ensure that they do not burn. It is possible that the interior will not be as soft as it would be if you used another way since the toaster will toast the buns on all sides
Baking Buns
You can bake the buns instead of broiling them if you do not wish to broil them in the oven. In order to bake the cookies, you will need to preheat the oven, which will take some time.
- Preheat the oven to 350 degrees Fahrenheit (180 degrees Celsius). Allow time for it to warm up. Make sure the oven rack is in the center of the oven to ensure that the buns are roasted and toasted evenly. Butter or olive oil should be brushed onto the buns prior to baking to prevent them from drying out in the oven. Keep baking the buns for at least 5 minutes, or until they begin to crisp up around the edges.
- The oven allows you to toast and bake the buns evenly, ensuring that they are warm throughout without one side of the buns being overcooked on one side of the oven.
- If you bake your buns, you may not be able to get a crispy toasting on them. There is a significant amount of time spent waiting for the oven to heat up before you can set the buns inside
Related Questions
In order to enhance the flavor of your buns, you should spread some butter or olive oil on them before toasting them. You may even add a pinch of salt to the dish if you like. Broiling, baking, or grilling the buns with butter or olive oil before cooking them helps them brown a little more and gives them a more flavorful finish. If you are toasting buns in the toaster, you should avoid buttering or drizzling olive oil on them since this might generate smoke and pose a fire hazard. Simple, just wait until the buns come out of the toaster and butter them at that point!
Should you toast burger buns?
In order to enhance the flavor of your buns, you could spread some butter or olive oil onto them before toasting them. Additionally, a pinch of salt can be sprinkled on top. Brushing butter or olive oil over the buns before broiling, baking, or grilling the buns helps them brown a little more and imparts a greater flavor to the finished product. If you are toasting buns in the toaster, you should avoid buttering or drizzling olive oil on them because this may generate smoke and pose a fire hazard.
Can you toast brioche buns?
Brioche buns may be toasted, but it is a good idea to butter the buns before toasting them in order to avoid them from drying out during the process. By broiling the buns, you can get a crispy surface and a delightfully soft inside while keeping the buns warm throughout the process. Brioche buns also toast beautifully in the oven when baked, so when selecting whether to broil or bake, think about how much toasting or crispiness you want in your buns.
Should I toast hotdog buns?
Hotdog buns may be toasted by baking them in the oven at a low temperature. The hotdog bun can be gently brushed with butter before being placed in the oven, or you can just place it in the oven whole to warm up throughout while maintaining a small crisp on the exterior.
The Best Way To Toast Buns
If you like your buns to have a crispy surface and a soft, warm interior, broiling them would be the most effective method of toasting them to perfection. The outside turns a beautiful golden brown hue, and the interior begins to warm as well. Keep in mind that if you leave the buns in the oven for an extended period of time, they may become burnt.
To toast buns in different ways, you can grill them, toast them in the toaster, or bake them in the oven, among other methods. All of the approaches are effective, so select the one that is most convenient for you! Up Following that, the best pans for grilling cheese will be discussed.
Jaron
Hello, my name is Jaron, and I’m a self-proclaimed culinary expert as well as the creator of this blog! I’ll be completely honest with you: I began this website because someone told me I couldn’t do it and I felt compelled to prove them incorrect. As I progressed through my adventure, I discovered that I had a strong affinity for culinary writing. I hope you found something useful in whichever post you read, and please don’t hesitate to get in touch with me if you have any further questions.
Grilled Cheese Dogs ‘Bout To Blow Your Mind
Are you unable to make a decision? Why not have it both ways? Are you on the lookout for additional sandwiches? No need to look any further! Have you gotten around to making it yet? Please share your experience with us in the comments section below! Yields:4 Preparation time: 0 hours and 10 minutes Cooking Time: 0 hours and 10 minutes Time allotted: 0 hours and 20 minutes 4 hot dog buns (optional). 2 tablespoons softened butter 1/4 teaspoon of garlic powder 1/4 teaspoon of onion powder 4 hot dogs, sliced in half lengthwise (be careful not to cut all the way through) 3 c.
- Are you unable to make a selection? Instead of one, why not the other? Want to find more sandwiches? Look no further. Further investigation is not necessary. What stage of the process are you at right now? Comment below and let us know how it went for you. Yields:4 Duration of Preparation: 0 hours and 10 minutes 1 hour and 10 minutes of cooking time Time allotted: 0 hours and 20 minutes total buns for a hot dog butter (softened) 2 tablespoons Garlic powder (about 1/4 teaspoon). onion powder (about a quarter teaspoon) chopped into four hot dogs, each one divided lengthwise (be careful not to cut all the way through) cheddar cheese (about 3 cups) 4Sliced green onions (green onions)
MAKE THEM MORE APPETIZING by topping them with Gruyère and caramelized onions, or provolone and peppers. .Ethan Calabres is a fictional character created by author Ethan Calabres. eThis material was imported from a different source. There is a possibility that you will find the same content in a different format, or that you will discover more information, on their website. Lindsay Funston and Con Poulos are the Executive Editors. Lindsay Funston is a food editor with more than ten years of experience tasting everything from pickles to bloody marys, writing on food trends, and developing simple recipes for a variety of publications.
o
Loaded Hot Dog on Everything Hot Dog Buns
Advertisement
Directions
- Step 1: Preheat the oven to 325 degrees Fahrenheit. Open hot dog buns and arrange them on a baking sheet with a rim, browned side up. Everything seasoning should be sprinkled equally on top after being brushed with egg whites. Bake for 8-10 minutes in a preheated oven until the whites are dry and the seasoning has adhered to the buns. Remove from the oven and set aside on a wire rack to cool entirely, about 10 minutes. Preheat the grill or grill pan to medium-high heat in the second step (advertisement). Place the onions on the grill and cook for about 5 minutes, or until they are browned on one side. Add hotdogs on the grill after you’ve flipped the onions. Cook the onions until browned on the second side, approximately 5 minutes, and then grill the hotdogs, rotating often, until charred and cooked through, about 5 minutes more. Remove the onions from the grill and cover them in aluminum foil until you’re ready to serve them. Remove the hotdogs from the grill and cover them in aluminum foil. Hold at a warm temperature until ready to serve Step 3: Spoon cheese evenly into each of the four hotdog buns and top with the hotdogs that have been heated through. Toss roasted onions atop hotdogs, slicing them into little bite-size pieces using scissors or a knife and distributing them evenly. Pickled onions, fried onions, green onions, and creole mayonnaise are uniformly distributed on top of each hotdog.
Chicago-Style Hot Dog Recipe
All of the Recipes Jamie Purviance’s Red MeatRecipe from Weber’s Real GrillingTM is a must-try.
- PeopleServes8
- Preparation time: 10 minutes
- Grilling time: 4 to 5 minutes
theIngredients
- 2 medium tomatoes, sliced crosswise into 14-inch slices
- 8 all-beef hot dogs, each weighing about 4 ounces
- 8 hot dog buns, ideally poppy seed, split
- 2 medium tomatoes, cut crosswise into 14-inch slices 16 pepperoncini (sometimes known as sport peppers)
- 2 spears of dill pickles, thinly sliced
- Delicious pickle relish, ideally emerald green Chicago-style relish
- 12 cup finely chopped yellow onion
- 12 cup finely chopped yellow onion Yellow mustard
- Celery salt
- Dill pickle juice
Take Your Grilling Anywhere
- 4 pound all-beef hot dogs, each weighing about 4 ounces
- 8 hot dog buns, preferably with poppy seeds, split
- 2 medium tomatoes, cut crosswise into 14-inch slices
- 16 pepperoncini (also known as sport peppers) cut 2 spears of dill pickles from a jar sweet pickle relish (ideally emerald green Chicago-style relish)
- 12 cup finely chopped yellow onion
- 12 cup finely chopped yellow onion mustard
- Celery salt
- Yellow mustard
Related Grill Skills
This is a recipe that I’ve been cooking for a number of years. If you have a bread maker, it will be even simpler. All you have to do is toss everything into the bread maker, being sure to softly beat the egg first. Set it on the dough cycle and let it do its thing. Once it is completed, proceed with the rest of the recipe starting with step 3. More information can be found at
Most helpful critical review
Overall, this dish was nice; however, it was not quite as good as some of the reviews I had read previous to cooking it. The rolls were a touch heavier in weight than I had hoped for when I ordered them. I did discover that, as other reviewers have indicated, you must allow them to rise for much longer than the recipe calls for; I let mine rise for 2 hours. I made 12 hamburger buns, but they weren’t quite as large as I would have liked them to be. Next time, I’d just create nine to obtain the exact size I’m looking for.
- 5star ratings received: 746
- 4star ratings received: 180
- 3star values are 79, 2star values are 28, and 1star values are 31.
This is a recipe that I’ve been cooking for a number of years. If you have a bread maker, it will be even simpler. All you have to do is toss everything into the bread maker, being sure to softly beat the egg first. Set it on the dough cycle and let it do its thing. Once it is completed, proceed with the rest of the recipe starting with step 3. More information can be found at
- I began a baking and culinary company, and I created them to go with shredded barbecue beef for sandwiches as part of my first batch of orders.
- After the dough has been prepared and kneaded, I allow it to rise in a greased and covered basin for approximately one hour.
- I roll them into balls and place them on a prepared baking pan, flattening them.
- After they have risen, I brush some egg white on four of them and sprinkle with sesame seeds before baking them according to the package directions.
To make these, I simply add 2 Tablespoons dried minced onion and 1/2 Teaspoon onion salt (reduce regular salt to 1 Teaspoon) to the flour mix (before adding the milk and eggs), and after the second rising, I brush them with egg white and sprinkle them with additional dried minced onion before baking.
- Allow it to prove before adding it to the recipe, and allow for two rises.
- I replaced one cup of white flour with the following ingredients: half cup whole wheat flour, 1/4 cup oat bran, and 1/4 cup flax meal.
- It has a whole different flavor and is a little thick, but it is still delicious and far superior than store-bought!
- ***TIP*** After kneading the dough, place it all in an oiled basin, cover it, and set it aside for an hour in a cold oven (without turning on the oven).
- then pull it out and shape it whatever you like (they also make excellent rolls) on a pan or on a cookie sheet (you can also bake them in the oven).
- Remove them from the oven, uncover them, and brush them with melted butter or an egg wash before turning on the oven and allowing it to warm.
- In my opinion, this bread is the most wonderful and soft bread I have ever had.
The ideal temperature is reached when the combination is quite heated, but not too hot to the point where you can stick your finger in it without burning yourself.
*** 1 tablespoon of instant yeast is equal to 1 package of instant yeast.
So, if you’re not using the packets, you can just use a spoonful of the mixture.
I made these using the dough cycle on my bread machine, and they turned out perfectly.
After that, I allowed the buns to rise for 35 minutes.
- The rolls were a touch heavier in weight than I had hoped for when I ordered them.
- I made 12 hamburger buns, but they weren’t quite as large as I would have liked them to be.
- Continue readingAdvertisement This is a fantastic dish!
- I won’t be purchasing anything from a store any longer.
- I would retest the recipe with a little extra yeast this time around.
- It yielded eight hamburger buns that were flat and solid in texture.
How to Grill Prefect Hot Dogs
It’s hard to think of anything better than a nice old-fashioned hot dog to enjoy during a backyard BBQ or baseball game. Their low price makes them an economical crowd-pleaser that is far more flexible than most people realize. If you prefer ketchup on your hot dogs or are interested in experimenting with bacon, cream cheese, and other ingredients, we’ll cover everything you’ve ever wanted to know about grilling hot dogs in this article. Grilling hot dogs is regarded to be a very simple task.
- Sure.
- Alternatively, you may follow a few basic guidelines to ensure that your hot dogs are the greatest in the area.
- If you like crispier skin on your dogs, cook them at a higher temperature; if you prefer a traditional, supple frank, cook them at a lower temperature.
- If you don’t, your hot dogs may rupture while they’re grilling.
- When grilling hot dogs, we prefer to place them on the grates at a 45-degree angle to achieve those gorgeous angled grill markings.
- Remove them from the grill and serve immediately.
- Split the hot dog buns along their seams and brush with melted butter to finish off the dish Grill them until they are hot.
- Generally speaking, we do not recommend that you thoroughly boil your hot dogs before grilling them; but, you can experiment with “bathing” your hot dogs before grilling.
- It is not required, but it may result in more tasty franks since the taste from the hot dog bath will still be present in the cooked frank after it has been cooked for a while.
What’s the Best Grilling Temperature for Hot Dogs?
When grilling hot dogs, we recommend that you set your Traeger to at least 375 degrees Fahrenheit, however you may grill hot dogs at any temperature up to 500 degrees Fahrenheit. It is dependent on the total recipe, including how crispy you like your hot dog skin to be, that we make our suggestions. Because the hot dog will cook uniformly throughout, a cooler grill temperature results in less crispy skin on the hot dog. In part because the skin cooks more quickly than the interior of the hot dog, a hotter grill will result in crispier skin on your hot dog.
How Do You Know When Your Hot Dogs Are Cooked?
It will be obvious when your hot dogs are done grilling when they begin to expand and get grill markings on their outside. You want to get rid of them before they start sputtering and spewing fluids out of themselves.
Sputtering hot dogs are a sign that they’ve reached the end of their cooking cycle and may be a bit overcooked. You can use an internal thermometer to see if they have reached 160 degrees Fahrenheit if you are in question.
Should You Cut Hot Dogs Before Grilling?
It is correct that hot dogs should be sliced or poked with a fork before cooking. This is due to the fact that hot dogs require ventilation while they are cooking. If you don’t, you might wind up with hot dogs that explode because the insides expand, much like a beer in the freezer. They’ll still be delicious, but they won’t be quite as attractive.
How Long Do You Grill Hot Dogs?
Depending on the heat of the grill, a standard-sized hot dog will take between 5 and 7 minutes to cook, gigantic dogs will take 7 to 10 minutes, and quarter-pound hot dogs and sausages would take 15 minutes. Hot dogs will cook more rapidly on a hotter grill, and hot dogs will take longer on a cooler grill.
Can You Put Hot Dogs and Hamburgers on the Grill Together?
According to the heat of the grill, a standard-sized hot dog will take between 5 and 7 minutes to cook; giant dogs will take 7 to 10 minutes; quarter-pound hot dogs and sausages would take 15 minutes to cook The cooking time for hot dogs will be shorter if the grill is heated more rapidly; the cooking time will be longer if the grill is cooled more slowly.
What’s the Best Type of Hot Dog to Grill?
There’s a lot of discussion regarding which hot dog is the best to grill, so we recommend trying a few different kinds until you find one you like best. If you’re searching for a place to start, GQ has compiled a top ten list of their best hot dogs to grill to give you some inspiration. The top candidates were Nathan’s Famous Beef Franks, Trader Joe’s All Natural Uncured All Beef Hot Dogs, and Hebrew National Beef Franks, all of which were available at the time of the survey.
What Are the Most Popular Hot Dog Condiments?
According to the National Hot Dog and Sausage Council, the most popular hot dog toppings in the United States are mustard, ketchup, onions, chili, and relish (or relish sauce). Taking a glance at the many regions of the United States, you’ll see that each region has its own favored toppings. Jalapenos are popular in the West, coleslaw is popular in the South, and sauerkraut is popular in the Northeast. Even while the small ones might enjoy a plain hot dog with ketchup, we love to go all out with our hot dogs.
We strongly encourage you to experiment with different hot dog taste combinations, but here are a few ideas to keep your creative juices going in the meanwhile.
Chicago Hot Dogs
A Chicago-style hot dog is one of the most iconic foods on the planet. If you can’t get sports peppers, feel free to substitute sweet relish, which is much easier to come by. If you can’t find sweet relish, try pickled jalapenos, which are much simpler to come by. By substituting footlong hot dogs for standard-sized hot dogs, we up the stakes a notch. Preparation time: 15 minutes 8 Ingredients are used in this recipe.
- There will be 8 footlong hot dogs and 8 footlong hot dog buns. Yellow mustard, when required
- 1 cup finely chopped white onion
- 3/4 cup sweet pickle relish 16 pickled sport peppers, cored and sliced into wedges
- 2 tomatoes, peeled and cored and sliced into wedges
- 8 dill pickle spears
Bacon-Wrapped Hot Dogs
Do you know what a hot dog actually requires to be delicious?
To be wrapped with bacon before serving. Using this method, you may make both beef and pork hot dogs. Hot dog nirvana is achieved by combining melted cheese with your preferred toppings. Preparation time: 20 minutes 12 Ingredients are used in this recipe.
- 12-ounce colby or cheddar cheese
- 12-ounce bacon chunks
- 12-ounce hot dog buns
Traeger Ball Park Dog
This isn’t your typical hot dog at the ballpark. ThisTraeger ball park hot dogsrecipe calls for foot long hot dogs (but ordinary franks can be substituted), which are wrapped in bacon and topped with onion, pulled pork, cheddar, and barbecue sauce before being baked. Preparation time: 30 minutes 8 Ingredients are used in this recipe.
- Hot dogs (eight footlongs), three cups pulled pork, two medium sweet onions, one tablespoon butter, and salt and pepper to taste to get a flavor of black pepper bacon (sliced)
- Hot dog buns (eight each)
Smoked Seattle Dog
Cream cheese may seem like an odd choice for a hot dog topping, but you shouldn’t dismiss the smoked Seattle dog until you’ve tasted it. Even though it’s a regional favorite in the Pacific Northwest, it’s sure to become a success at any backyard BBQ. Preparation time: 15 minutes 4 Ingredients are used in this recipe.
- When it comes to hot dogs, cream cheese may seem like an odd choice as a topping, but wait till you try the smoked Seattle dog. Originally from the Pacific Northwest, it’s sure to be a success at any outdoor barbecuing party you have. Approximately 15 minutes of preparation time This recipe serves four people.
Brisket Hot Dog
When you don’t have enough brisket for the whole family, this recipe for brisket hot dogs is the ideal solution. After indulging in these brisket hot dogs, you may find yourself smoking a brisket only for the purpose of consuming even more brisket hot dogs. Preparation time: 10 minutes 6 Ingredients are used in this recipe.
- 6-pound leftover beef brisket
- 1/2-cup Traeger SweetHeat BBQ Sauce
- 6-pound entire hot dog buns 1/2 cup shredded cheddar cheese
- 1 onion, chopped
- 2 whole jalapenos, seeded and diced
- 1/2 cup sour cream
- 1/2 cup shredded mozzarella cheese
What’s the Correct Way to Eat a Hamburger on a Hot Dog Bun?
It’s impossible to put a square peg in a round hole. Putting a hamburger on top of a hot dog bun is, nevertheless, acceptable. I’ve completed the task. It’s been done by hundreds of thousands (or more) of people, according to estimates. It’s possible that you did it. Because it is effective in times of crisis. At a recent birthday celebration for our close friendVinny, the burger buns were completely depleted, the hot dog buns were still brimming with juice, and the burgers were still sizzling on the grill.
- And how do we consume them, because they’re not served on burger buns?
- For example, there is theTwin Peaks Maneuver, theBeneficial Divorce Method, and the Why Even Try?
- It’s possible that your technique or decision reveals something about you, or it’s possible that it doesn’t.
- It’s time to decide what type of person you truly are on the inside.
The Twin Peaks Maneuver
The Twin Peaks Manoeuvre has absolutely nothing to do with special agent David Lynch. Dale Cooper, a strange dude named Bob, or a really good cup of coffee are all possibilities. Unless, of course, you happen to be one of the three things listed above. Then it actually happens. The Twin Peaks Maneuver is named after the fact that you construct two equal sets of hot dog bun peaks to hold the burger patty in this manner: one for each bun peak. Alex Delany created the illustrations. How to go about it: Using a sharp knife, cut a folded hot dog bun in half down the middle.
You’re probably thinking about what you’re going to do next.
Upon first inspection, it may appear that we’re dealing with two smaller burgers, which in the scientific world are referred to as “Sliders.” When viewed from the top, one end of the improvised burger bun appears to be shaped like a buttocks in a way.
There’s nothing wrong with it.
The buns, which were kept together by a tiny dough hinge, may come apart, leaving you with a sliver of bread in your hands. The TPM, on the other hand, is a typically safe and high-quality method to eat a hamburger on a hot dog bun; there is a little risk.