
Buns
How To Make 2 Buns In Your Hair
Jan
As we all know, two buns are always preferable to one, which is why today’s DIY hair lesson is a double bun! Despite the fact that this hairstyle is a little more whimsical than others, it is also really utilitarian due to the fact that it is extremely secure. So you could wear it for a casual day with friends or something more active like doing errands, exercising, or playing double dutch with a group of pals. Put yourself in touch with your inner Miley Cyrus with this 5-minute double bun DIY.
How to achieve the look.
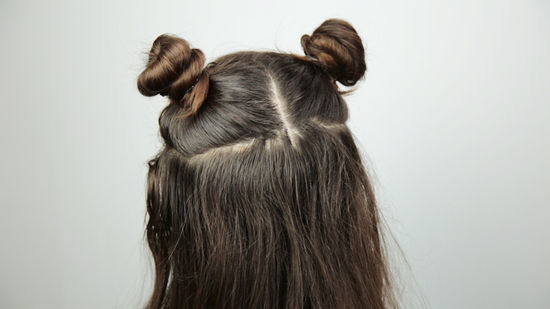
Lightly tease each ponytail and then wrap each pigtail into a bun and fix it in place with bobby pins.
Pull pieces out slightly that appear to be being pulled tightly in the bun and fix them with hair pins to hold them in place in order to make each bun a bit broader.
Amelia Tatnall is a model represented by Rachel Brewer.
For anyone wondering why today’s hair tutorial appears to be familiar, it’s because I gave you a sneak peak at it when I posted thesunny striped DIY nailstutorial a few of weeks ago.
I’d be interested in hearing your thoughts.
How to Do Space Buns
Documentation Download Documentation Download Documentation The ultimate updo if you’re searching for something a little more out of this world than a ponytail or a top knot, space buns are the way to go. Space buns are casual, fun, and fashionable, and they look excellent whether you’re attending a music festival or watching Star Wars with your buddies. Seeing as it appears that space buns will not be departing our planet anytime soon, we’ve put together this guide to walk you through the process of making space buns from scratch.
Don’t be concerned; making space buns isn’t rocket science at all.
- Using a comb, brush your hair and part it down the center. Comb your hair until it’s smooth and free of knots or tangles, then style it as desired. And make a center part for your hair, use the handle of a rat-tail comb to run it down the middle of your head from your forehead to your nape
- 2 Make two pigtails in a row. Choose whether you want them to be high on the top of your head or low on each side of your nape—experiment to find out what works best for you. Smooth down the hair that will be pulled into the pigtails so that they are smooth and neat when they are finished. Hair ties in the color of your hair should be used to secure the pigtails.
- Allow a few strands around your forehead to hang free for a smoother finish.
- 3 Tease your pigtails if you want to add additional volume to your look. Start by lifting up your first pigtail and combing it a few times, starting at the tips and working your way down to the end of the hair tie. This should be done with the second pigtail as well. If you have thin hair, this is a fantastic idea since it will make your hair look thicker and result in larger space buns at the end of the day.
- If you like, you may wrap three-combhair extensions around the base of your pigtails as an alternative option. This will assist you in getting a bit greater volume
- 4Make your initial pigtail into a rope by twisting it over itself. Take one of your pigtails and twist it away from your face, forming a rope around your neck. The tighter you twist the rope, the sleeker and smaller your bun will come out
- 5Circle the rope into a bun and secure it with a hair band to keep it from falling down. Wrap the rope around the base of the pigtail to secure it in place. To avoid damaging your face, wrap the scarf away from you rather than towards it. Tuck the end of your hair into the bun, and then wrap another hair tie around the base of the bun
- 5 To make the second bun, repeat the procedure. Twist the second pigtail into a rope, then wrap it into a bun to finish it off. Secure the bun with a hair tie after tucking the ends of the rope under it 7 Make any necessary adjustments to your buns. Here’s where you may let your imagination run wild. Using your fingers, gently tug on the outside edges of the buns to loosen the strands if you want them to be messier or more voluminous. To add even more volume to your buns, gently tug on the hair that is being pulled into them to loosen it up. Consider the hair on the top of your head and the sides of your head
- If you accidentally left strands out of your buns, straightening them with a flat iron may be an option. Allowing them to have a wispier appearance by bending the iron towards your face rather than straight down
- 8Spray the space buns with hairspray to hold them in place. If your buns are feeling a little loose, use bobby pins to hold them in place. You can use as many bobby pins as you need. To finish your look, spritz it with hairspray and let it to dry.
- 1Brush your hair and then make a center part with it. Make sure your hair is lovely and silky by combing it. The handle of a rat-tail comb may be used to create a center part in the midst of your hairstyle. Begin at the top of your head and work your way down to the nape of your neck. Using your left half of your hair, drape it over your left shoulder, and your right half over your right shoulder
- 2 Pull one-half of your hair up into a loose bun to keep it off of your face and out of your way. Take the right part of your hair and bind it up with a hair tie to keep it in place. You can wear your hair in a loose bun or even pigtails. This is irrelevant
- The aim is to keep this part of your hair out of your way while you work on the other half. 3 On the left side of your head, pull your hair into a half-up ponytail. Create a horizontal portion on the left side of your head, about at the level of your eyebrows. Make a center part in the rear of your head, beginning at the hairline and finishing at the center part in the front of your head. Organize the hair above the part into a high ponytail and tie it off with a hair knot.
- If you want to wear your ponytail on the top-side of your head, rather than the back-center of your head, do so like a dog ear.
- 4If wanted, tease your ponytail a little. Because you will be dealing with less hair than you would while constructing a standard space bun, it would be a good idea to tease your ponytail a bit before you start working. Backcomb your ponytail towards the hair knot with a brush after lifting strands of hair from your ponytail
- 5 Twist the ponytail into a bun and bind it with a hair tie to finish the look. To begin, twist the ponytail away from your face to form a rope with your hair. After that, coil the rope around the base of the ponytail to form a bun with the hair. Tuck the ends of the rope beneath the bun and secure it with a hair tie at the base
- 4If wanted, tease your ponytail a little bit more back. Because you will be dealing with less hair than you would while constructing a standard space bun, it would be a good idea to tease your ponytail a little bit before starting. Backcomb your ponytail towards the hair knot with a brush after lifting strands of hair from it. 5 Twist the ponytail into a bun and fasten it with a hair tie to complete the look. Before anything else, twist the ponytail away from your face to form a rope. Afterwards, coil the rope around the ponytail’s base to form a bun. Tuck the ends of the rope beneath the bun and secure it with a hair tie at the base.
- 6Untie the temporary bun from the other side and repeat the process on the opposite side. Return your attention to the right side of your head and remove the loose, temporary bun you formed previously. Create a second half-up ponytail, tease it, and then wrap it into a bun for another look. Another hair tie should be used to secure the bun. 7 If you like, you can tease the remainder of your hair. You are not have to do this, but it is a fantastic way to complete the vintage 90s style in your wardrobe. Alternative: If your buns are beautiful and smooth, you may straighten the remainder of your hair instead.
- Even more volume may be achieved by loosening the hair that is being pulled into the buns. During this stage, you should concentrate on the sides and top of your head
- It is fine if the section in the back-center of your head disappears. You don’t require it any more
- Finish by misting the space buns with hairspray after you’ve made any last adjustments. If your buns are feeling a little loose, use bobby pins to bind them to your hair. Once you’re satisfied with the overall appearance, softly spritz your hair with hairspray to finish it off. Allow the hairspray to dry completely before heading out
- Using a comb, brush your hair and part it down the center. Make sure your hair is lovely and silky by brushing it out. With the handle of a rat-tail comb, part your hair along the center from your forehead to your nape
- 2 Pull your hair into two pigtails and knot them together using hair ties to finish the look. Here’s where you may let your imagination run wild. It’s possible to wear two high pigtails at the crown of your head, or two low pigtails at the base of your neck. In order to get a Princess Leia-inspired style, you can even put the pigtails on the sides of your head, just over your ears.
- If you’re looking for something a little more complicated, consider half-up pigtails.
- 3 Braid the pigtails and bind them with clear hair elastics to complete the look. The initial pigtail should be divided into three equal sections. Cross the left and right sections over the central strand to form the braid. Once you’ve used up all of your hair, bind the braid with a clear hair elastic wrapped around the end of it. Repeat this procedure with the other pigtail as well.
- Instead, a 2-strand rope braid can be used to create a more distinctive design. This method is very effective for natural hair.
- 4 If desired, pull on the outside loops of the braids to make them appear more volumized. You are not need to do this, but it is a fantastic technique to add volume to your hair, especially if it is really thin in the first place. Gently tug on the outer loops of the braid starting at the bottom and working your way up till the top
- Repeat the same with the other braid
- If you used a 2-strand rope braid, you may skip this step. It is important not to pull too hard or the braid will come undone.
- If you used a two-strand rope braid, you may skip this step. Don’t tug on the braid too hard, or it will break apart.
- If you want to make a regular bun, do not twist the braids into a rope like you would for that.
- 6 Make any necessary adjustments to your hair, then spritz it with hairspray. If your buns are feeling a little loose, pin them down along the side borders to the rest of your hair, using as many bobby pins as necessary. As soon as you are satisfied with the appearance of your space buns, spritz them with hairspray and allow the hairspray to dry
- Straightening the remainder of your hair for a smoother look is recommended if you wore braided half-up buns.
Create a new question
- QuestionWhat should I do if I have really curly hair? Straightening procedures that do not require heat are available (check out How toStraighten Your Hair Without Heat). In fact, I believe that messier, curlier buns look better than perfectly straight ones. I’ve seen folks with really curly hair pull it off without having to straighten their hair beforehand. In the event that it is really difficult to obtain an even part or to get the hair to twist, try drying it rather than getting it wet. How can I accomplish this with hair that is prone to tangling? There are a plethora of solutions available to help you untangle your hair. Aside than that, I recommend moving extremely slowly and gently, combing your hair and untangling any tangles as you go
- Question Is it possible to braid the pigtail instead of twisting it? Certainly, braid the ponytails, then wrap them around like buns and put them in place with bobby pins
- Question What is the best way to get my hair straight without brushing it too hard? Mackenzie RomeroAnswer from the Community You may always use a straightener, but be sure to maintain the heat on a low setting. It is not required to be perfectly straight. Once on low, increase the intensity by one level
- Question everything. What is the best way to make bigger buns? Making the buns looser will make them look larger, and this is something you can do
- Question Is it still possible for me to do it if I have really long hair? EmmaLee HudginsAnswer from the Community Yes, it is possible. They may appear larger, though, depending on how tightly you twist or braid your hair
- Question What can I do to make them seem more even? Answer from the Writersgem Community Make sure your middle parting is equal and straight. Using a large number of bobby pins and beginning with pigtails is also a good idea. Is it possible to accomplish this with short hair? It is recommended to use low buns instead of high buns if the length of your hair is insufficient to reach high up onto your head
- Question How can I make them even and ensure that they don’t wriggle around? Use bobby pins to keep them from wriggling, and if you don’t have any bobby pins, use more hair ties to keep them in place. Take your hair and equally divide it down the center, using the middle hair line, to get an even distribution. Question Is it still possible to do space buns if my hair is barely up to my shoulders? A half-up, half-down style, as seen in part 2, should be doable with your current amount of hair.
More information on the replies Inquire about something There are 200 characters remaining. Include your email address so that you may be notified when this question has been resolved. Submit
VideoRead Video Transcript
- Make the space buns as clean and elegant as you like, or as loose and sloppy as you want
- The choice is yours. Make some streaks in your hair with hair chalk before you begin to give it a more vivid appearance.
Thank you for submitting a suggestion for consideration!
Things You’ll Need
- Hairbrush, rat-tail comb, four hair ties, Bobby pins, hairspray
- Hairbrush, rat-tail comb, four hair ties, Bobby pins, hairspray
- Hairbrush, rat-tail comb, 4 hair ties, 2 clear hair elastics, Bobby pins, hairspray, and a hair tie holder
About This Article
Summary of the ArticleXTo style your hair into space buns, part your hair down the center. Then, using hair ties, knot each part of your hair into a pigtail on the other side. Twist one of the pigtails with both hands to make it a little more secure. You will achieve smaller and firmer space buns if you twist your hair in a tighter manner. Continue wrapping the twisted hair around the base of the pigtail many times until you have around 4 inches (10 cm) of hair remaining. Put the end of your pigtail below the bun you’ve just created, and secure the bun by putting a bobby pin in the end of your hair where it tucks under the bun and through the bun.
Finally, spritz your space buns with hairspray to ensure that they stay in place throughout the day.
Continue reading for more information, including instructions on how to create braided space buns. Did you find this overview to be helpful? The writers of this page have together authored a page that has been read 552,378 times.
Did this article help you?
After all, why limit yourself to one bun when you could have two buns? Space buns are another term for the two bun hairstyle that was made popular by Star Wars heroine Princess Leia (therefore the other common name for the hairstyle: space buns). After then, it became fashionable in the 1990s thanks to celebrities such as the Spice Girls and Gwen Stefani (during herNo Doubtdays). Fast forward to the present day, and this haircut can be found pretty much anywhere—from festivals to your local streets to the red carpet and runway, and everywhere in between.
the festival hair queen!) to demonstrate how to get them.
First, we’ll have a look at what to do.
Divide your hair into two sections.
Begin by dividing your hair (down the center) into two equal portions with a comb or your fingers, then styling them as desired. Next, bind each portion into two low ponytails using hairbands to complete the look. To make your double low buns seem especially smooth and sleek, apply a serum such as theTONI GUY Shine Gloss Serum to help slick down any flyaways and give shine to your hair. Step No. 2
Tease and twist your pigtail.
It’s now time to get down to business! Take your first ponytail and gently twist it all the way down to the end of your hair. Repeat with your second ponytail. Step number three.
Create a bun.
To make a bun form, begin by wrapping your hair around the base of the ponytail and continuing to wrap until you have a bun shape. Once you’ve achieved the desired shape, pin it in place with as many bobby pins as necessary to keep the style in place. Step number four.
Create your second bun.
To construct your second bun, tease and twist your second ponytail like you did with the first. Step number five.
Your two buns hairstyle is complete!
The result is a pair of sparkling double low buns that will steal the show at your next gathering! Suggestions for styling: Worried that your perfectly coiffed buns may come undone? Put some VO5 Ultimate Hold Hairspray on them and they’ll be ready for any party you can throw. In addition to helping to keep your buns in place all day, this fast-drying hairspray will also protect your hair from frizz and humidity. Isn’t that interesting?
Sign up to our newsletter and get exclusive hair care tips and tricks from the experts at All Things Hair.
Articles before and after this one
Hot Right Now
In the 1990s, space buns were a tremendously fashionable hairstyle that has just re-emerged in popularity. The hairstyle is characterized by two buns that are worn on the top of the head, with popular variations including braided buns and half-up, half-down versions of the style. Space buns, which are beloved by celebrities like as Miley Cyrus and Ariana Grande, are the perfect way to infuse a little carefree fun into your look, whether you’re traveling to a summer festival or one more party before the year is up.
Which tutorial are you going to choose?
’90s Space Buns
In the 1990s, space buns were a tremendously popular hairdo, and they have lately re-emerged in fashion. The hairstyle is characterized by two buns that are worn on the top of the head, with popular variations including braided buns and half-up, half-down versions of the look. Space buns, which are popular among celebrities like as Miley Cyrus and Ariana Grande, are the perfect way to add a little carefree fun into your look, whether you’re traveling to a summer festival or one more party before the year is up.
With 5 different ways to arrange space buns, this simple party look is appropriate for any occasion. How will you decide which tutorial to watch?
Create 2 high ponytails.
Make two high ponytails and secure them with a small hair tie to complete the look. Make sure to leave a few strands of hair free around your face, as this will give you a more face-flattering appearance. Step number three.
Create a small braid in each ponytail.
Take a little bit of hair from the underside of one of your ponytails and twist it into your space buns to give them a more distinctive and textured look. Braid this piece into a typical 3-strand braid all the way down to the ends – don’t worry about fastening it now; we’ll take care of that later on. Step number four.
Plump up the volume.
Then, using your hands, gently tease your hair back towards the roots, scrunching the substance into your hair. Adding this will give your space buns the additional texture and attitude they require! Step number five.
Wrap your hair into space buns.
Gather the ends of each ponytail together and twist them together to make a bun shape, being care to leave the braided area of your hair untangled for the time being. Using bobby pins, pin your buns into the position you want them to be in. Step 6: Organize your thoughts and feelings about the situation.
Wrap the plaits around the buns.
Wrap your braids around your freshly formed buns, then secure your style with bobby pins and clear hair elastics to keep your appearance in place. Step 7 – Organize your time and resources.
Set your style.
Applying hairspray all over your crazy space buns will help them stay longer into the night and keep them looking fresh. In this eighth step, you will learn how to use a comma to separate the words “and” and “and not.”
Final look.
The result? Fabulous space buns fit for a party in only minutes! Though it’s not necessary, curling or crimping the front sections of your hair may elevate your style to a whole new level, and it’s definitely something to experiment with!
Low Space Buns
Begin by priming your hair with theVO5 Express Primer Spray, which detangles your locks while also reducing those annoying flyaways and frizz. Separate your hair (down the center) into two equal portions by using a comb or your fingers to divide it evenly. Next, bind each portion into two low ponytails using hairbands to complete the look. Step No. 2
Tease and Twist Your Pigtail.
It’s now time to get down to business! Take your first ponytail and gently twist it all the way down to the end of your hair. Repeat with your second ponytail. Step number three.
Create a Bun.
To make a bun form, begin by wrapping your hair around the base of the ponytail and continuing to wrap until you have a bun shape. Once you’ve achieved the desired shape, pin it in place with as many bobby pins as necessary to keep the style in place. Step number four.
Create Your Second Bun.
To construct your second bun, tease and twist your second ponytail like you did with the first. Step number five.
And There You Have It!
Double low buns that will be the talk of the party at your next gathering!
Braided Space Buns
Looking for another really adorable method to style your hair?
Look no further. Then these braided space buns could just be the answer to all of your hair prayers. These retro-looking double buns, which are inspired by the ’90s, are as at home on lazy, casual weekends as they are for the forthcoming party season, which is fast approaching.
Braided Half-Up, Half-Down Space Buns
Is it necessary to have a hairstyle that can survive any event and last you throughout the season? If this is the case, the half-up, half-down space buns hairstyle is a great option. Check out the video below to see what occurred when vloggerN1kk1sSecr3t demonstrated how to get this amazing half-up hybrid style, and then give it a shot yourself!
Classic Half-Up, Half-Down Space Buns
In case you’re a complete novice to the world of style, we’ve got you covered. A more straightforward variant of N1kk1sSecr3braided t’s ‘do, this hairstyle can be achieved with any type of hair, including straight, wavy, and curly hair. Decide how you want your completed style to appear first, and then either straighten or curl your mane to prepare it, or accept your natural texture — it’s entirely up to you! When you know how to do it, half-up space buns are simple and enjoyable to create. Verity is to be credited.
- Instructions for making half-space buns: To begin, separate your hair along the middle with the use of a comb.
- This ponytail should be positioned in the centre of the top of your head, if possible.
- When you are finished with one ponytail at a time, take the tail and wrap it around the base to make a space bun.
- 5.
- Now, go ahead and flaunt your wacky buns to the world!
Space Buns Inspiration
Now that you’ve mastered the fundamentals of this look, it’s time to discover all of the various wonderful ways you can wear it.
Glittery Zig-Zag Space Buns
Photograph courtesy of Instagram.com/leanneslaterstudios Did you know that glitter and festivals go together like peanut butter and jelly? Adding some glitter and sparkle to your space buns (or any other hairdo for that matter!) is an easy and enjoyable way to dress them up! With her zig-zag split buns and glitter-sprinkled roots, this Instagrammer is giving us some festival hair envy. Follow her on Instagram. Credit:@leanneslaterstudios
Half-Up, Half-Down Glitter Space Buns For Short Hair
Featured image courtesy of Instagram.com/LeanneSlater Studios It’s a well-known fact that glitter and festivals go together. Incorporating some glitter and sparkle into your space buns (or any other hairdo for that matter!) is an easy and enjoyable way to dress them up. With her zig-zag split buns and glitter-sprinkled roots, this Instagrammer is giving us major festival hair envy. Follow her on Instagram. Credit:@leanneslaterstudios
Voluminous Afro Space Buns
Afro space buns with a lot of volume.
Photograph courtesy of Instagram.com/futura cacheada Do you have afro or curly hair? You’re in luck: when arranged into large buns, these hair types appear really attractive and fashionable. Because, if you ask us, larger is always preferable to smaller! Credit:@futura cacheada
Sleek Glittery Space Buns
Glittery space buns, to be precise. Photograph courtesy of Instagram.com/hairbyjaxx If you’re anything like us, and you’re infatuated with all things glitter, then why not go all out with the dazzle and cover your whole head with it? Don’t forget to create two messy buns to round off the ensemble. You’ll be ready to hit the dance floor in no time! Credit:@hairbyjaxx
Rainbow Half-Up, Half-Down Space Buns
Space buns that sparkle. Image courtesy of hairbyjaxx on Instagram. If you’re anything like us, and you’re addicted with all things glitter, then why not be liberal with the glitter and sprinkle it all over your whole scalp? Keep in mind to construct two messy buns to finish the appearance off perfectly. Soon, you’ll be ready to hit the dancefloor! Credit:@hairbyjaxx
Starry Space Buns
Space buns with a nebula on top. Photograph courtesy of Instagram.com/ nicquelxoxo Do you have a glimmer in your eye? Consider using moon or star-shaped sequins into your space buns hairdo for a look that is truly out of this world! You could even finish off the appearance by spritzing your buns with a contrasting colored hairspray (we recommend a blue, green or purple hue to tie in with the galaxy theme). Credit:@ nicquelxoxo
Ombre Space Buns
Ombre space buns in a variety of colors. Photograph courtesy of Instagram.com/prettyinpattern If you’re not a fan of all the glitter, don’t worry: regularombrespace buns are still very much in style. Space buns that are both sloppy and refined in appearance look great with ombre hair. Experiment with different bun sizes to find out which one fits best with your hairstyle! Credit:@prettyinpattern
Sign up to our newsletter and get exclusive hair care tips and tricks from the experts at All Things Hair.
Ombre space buns are a fun way to start your day. The image is courtesy of Instagram.com/prettyinpattern You can still have a trendy ombrespace bun even if you don’t want to go all out with the glitter and glitz. Space buns that are both chaotic and polished-looking look great with ombre hair, and they are easy to do. Experiment with different bun sizes to find out which one works best with your hairstyle. Credit:@prettyinpattern
HOW TO GET A SPACE BUNS HAIRSTYLE
Gather your materials and then begin working on your space bun style. What you’ll need is the following: a brush for your hair Elastics that are transparent Bobby pins are a kind of pin. Advanced Hairstyle from L’Oréal Paris LOCK IT DOWN Controlling the Weather Hairspray How to get the look:
STEP1: BRUSH YOUR HAIR
Start by gathering your ingredients and attempting to recreate the space bun look. You’ll need the following supplies: Blow dryer with a comb Elastics that are visible through the clear. With bobby pins, you may create a professional appearance. Advanced Hairstyle by L’Oréal Paris IT MUST BE SECURE Controlling the weather. Hairspray Obtain the look by visiting the following website:
STEP2: PART YOUR HAIR
By making a center part in your hair, you may divide it into two equal portions. It is critical to ensure that your part is as straight as possible, with the equal amount of hair on either side, since this will make or break your overall space bun appearance!
STEP3: CREATE SOME PONYTAILS
Then, using a center part, separate your hair into two equal portions.
It is critical to ensure that your part is as straight as possible, with the equal amount of hair on both sides, since this will make or break the overall space bun appearance.
STEP4: MAKE YOUR BUNS
To make your space buns, you’ll want to wrap the length of your hair around the base of your ponytail from the front to the back. Hold this freshly created bun in place as you pin it down with bobby pins to finish it off. Make sure to use bobby pins that are the same color as your hair for a seamless appearance! Repeat the process on the opposite side.
STEP5: SEAL THE DEAL
Hairspray should be used to finish the appearance since you don’t want all of your hard work to go to waste. That’s all there is to it, unless you want to go all out and accessorize your space buns for a truly beautiful look. More on it in a moment!
3 WAYS TO MAKE YOUR SPACE BUNS OTHER-WORLDLY
Want to improve the look of your space bun style even further? There are a variety of ways you can make your space buns seem extraterrestrial, and we’ve included three of our favorites below.
OPTION1: ADD COLOR
Surely you agree that such a colorful haircut goes wonderfully with such a joyful color palette? Make your buns pop with a temporary hair color from theL’Oréal Paris Colorista 1-Day Spray or theL’Oréal Paris Colorista Hair Makeup 1-Day Colorlines. Get creative with your hair color! It’s easy to maintain your space buns hairdo with temporary hair colors from both lines because they wash away in only one shampoo. Instead of going full out with color, you may use the wash out hair color to highlight your roots only—this is one of our favorite festival season looks.
OPTION2: ADD GLITTER
Besides being a major hair color trend right now (hello, festival hair), glitter roots are also the perfect technique to help your space buns style seem like it came straight out of the Milky Way. Sprinkle some glitter throughout your roots and finish the look with some hairspray for a quick and easy look.
OPTION3: ADD FUN HAIR TIES
When everything is said and done, there is no easier way to personalize a space buns hairstyle than by using a few colorful hair ties to bring it all together. Remove the transparent elastics from your wardrobe and replace them with cuffs, coils, and bows. After you’ve finished building your space buns, you can dress them up with a colorful accessory such as a hair clip or a flower crown. You have the entire universe of accessorizing at your disposal. Now that you’ve learned how to do space buns, as well as a few tips and tricks for taking your space buns hairdo to the next level, why not learn how to create the ideal makeup look to go with them?
How to do Space Buns!
Buns from outer space! These buns have been popping up all over the place recently, and I thought it was about time I shared my take on them with you. Or put a spin on them.? haha! Of course, I enlisted the assistance of my little gal buddy Sav in the production of this movie, and I hope you enjoy it! My approach is somewhat different from most people’s, but I’ve discovered that it is the most consistent way for me to achieve consistent-looking buns. messy buns are amazing, however I have a hard time getting symmetrical messy buns, which is vital when the buns are on the top of the head and adjacent to one other!
- If you remember, I got platinum about a month ago and none of my Laced Hair Extensions matched my new hue, and Lacy had just sold out of all the Platinum shades during their Black Friday sale.
- They’re just stunning!
- Christina Kreitel, my hairdresser, toned them to match my blonde hair and then gave them a root, which I just like!
- And a heartfelt thank you from the bottom of my heart!
- With the internet, you can never be sure how anything will be accepted by the public.
- Our excitement for keeping up with the vlogs is greater than ever!
Then, on Monday, Savy’s very first YouTube video was released, which you may view here. You may see many more photographs of this haircut by visiting this link. Now, let’s get back to the space buns. Here are the step-by-step instructions, followed by a video demonstration.
- 1. Make a center part with your hair
- 2. 2. Use hairspray to smooth up any flyaways. 3. If you require single wefts, clip them in place. 4. Tie a portion of hair into a knot for the knot
- 5. Place two fingers in front of the area where you want the bun to be
- And Sixth, pull your hair forward and around your index and middle fingers. 7. Rotate your wrist in a 360-degree circle
- With your middle and index fingers, catch the tail and pull it almost completely through, as seen in picture 8. 9. Using two bobby pins, bind the bun so that the bobby pins cross each other in the middle. In order to ensure that the knot has adequate volume or that the detail is moving in the appropriate direction, I play with it for a second before I secure it. 10. If there is a little bump or bubble, a second bobby pin can be used to secure it in place. 11. Repeat the process on the opposite side.
To make things easier for you, we’ve put up a video to accompany the text instructions. Please enjoy! Aside from the fact that the ending is amusing, I have no clue where Savy gets his ideas. There’s also a step-by-step graphic for you to refer to in case you get stuck! Please feel free to pin this hairdo to one of your beauty boards if you so choose! Thank you so much, beauties! I adore each and every one of you and can’t wait to see you again! xo
Space Buns: How To Do Space Buns On Your Hair (for Newbies)
Space buns are the most unique of all the bun hairstyles available. It’s likely that you’ve seen this look on a variety of beauty blogs and social media platforms, particularly on Instagram accounts and Pinterest boards. Many celebrities, including Britney Spears, Gwen Stefani, Ariana Grande, Yara Shahidi, Ciara, and Tracee Ellis Ross, have also had the haircut. The sassy look is quite fashionable right now, and it’s easy to see why. Space buns are sassy and full of attitude, much like their namesake.
This guide will walk you through the process step by step.
What Are Space Buns?
Spacing buns are a straightforward design that consists of two high buns on either side of the head. Space buns are based on a couple of historical sources, which are detailed below. Despite the fact that her space buns hairstyle was located lower on the head than the normal space buns hairstyle, they are quite similar to Princess Leia’s hallmark buns. Squash Blossom Buns, which are worn by Native American Hopi women, are another source of design inspiration. It was customary for a lady to dress in this manner to signal that she was single.
If you leave your hair in its natural curly form, the space buns will seem textured.
How to Do Space Buns
PERFECT DOUBLE BUNS – CURLY HAIR | jasmeannnnnnnnnnnnnnnnnnnnnnnnnnnnnnnnnnnnnnnnnnnnnnnnnnnnnnnnnnnnnnnnnnnnnnnnnnnn There are two primary sorts of space buns, and we’ll go through each of them in a little more detail below. Textured space buns are a great option if you want frizz and structure in your hair. Create sleek space buns, on the other hand, if you like a smoother, more polished appearance. Depending on the ultimate result you want to achieve, the stages you take to make your space buns will differ.
Gather Your Supplies
The worst thing that may happen when executing any style is realizing that you don’t have the proper equipment and resources for the task at hand. Before you begin, you need acquire all of the essential items. These include:
- Detangling Comb: A wide-toothed comb should be used to reduce breakage
- A rat-toothed comb should be used for parting
- Gel: Use an alcohol-free gel that will not cause your hair to become brittle. Use a gentle boar bristle brush to apply the product. Edge Control: Excellent for achieving clean edges. Ties for your hair: We prefer cloth hair ties that do not have a metal clasp to reduce snagging. Holding Spray
- Bobby Pins
- Soft Bristle Toothbrush (if you like placed edges)
- Silk or satin scarf
- Shampoo
- Conditioner
- Moisturizer
- Heat Protectant
- Styler for curl definition (optional)
Prepare Your Natural Hair for Space Buns
It is not possible to get the desired look by doing space buns on dry, unwashed natural hair.
There are a few measures you’ll need to follow in order to prepare your natural hair for your space buns.
Wash Your Hair
For a fresh start, we recommend shampooing your hair with a sulfate-free shampoo to provide a beautiful clean slate. This is because shampoos without sulfates are typically gentle on your hair, which is why we mention “sulfate-free.” If you opt to use a sulfate shampoo, keep in mind that it may cause your hair to become brittle.
Condition
After you’ve washed your hair, condition it, or deep condition it. This step is critical, especially if you intend to keep the style for a few of days. Make use of a moisturizing conditioner or a deep conditioner of your preference. Read this article to learn how to deep condition your hair at home with products you already have.
Moisturize
Consider devoting a few minutes to applying a hair moisturizer to your hair, since hydrated hair behaves better than dry, crispy hair. Don’t miss the moisturizing process if you want your hair to be as supple and cooperative as possible. A moisturizing spray, a moisturizing lotion, or your favorite essential oil might be used to achieve this result. Just make sure you don’t overdo it with the moisturizer, especially if you’re going for a sleek space bun look.
Apply a Styler
For defined curls, add a styler of your choice to your hair and then allow your hair to air dry for several minutes. If you want your space buns to be sleek, you may skip this step.
Stretch Your Hair (only for Sleek Space Buns)
If you want your space buns to be extremely sleek, you’ll need to manage your hair into a more sleek form. This step is optional because space buns do not need to be smooth, but if you want your hair to be sleek, follow the instructions below to learn how to stretch your hair before creating your space bun. In order to expand your hair, you can employ a variety of techniques, which are detailed below:
Stretch with Braids
- Using a comb or your fingers, divide your hair into various portions and pin them up. Hair should be divided into two or more pieces, as a general rule of thumb. However, depending on the thickness of your hair, you may need to divide it into multiple portions. Braid each portion all the way down to the ends of the braid. To prevent braids from unraveling prematurely, secure them with a ponytail holder or rubber band at the end of each row. Allowing your hair to air dry is recommended. Take the braids apart
French braids
- Using a halo parting, divide your hair into two portions. Each part should be French braided. Attempt a minimum of two french braids
- Allowing your hair to air dry is recommended. Take the braids apart
The instructions in this post will walk you through how to put french braids on your hair in depth and step-by-step.
Banding
I STRETCH MY TYPE 4 NATURAL HAIR WITHOUT USING HEAT AND WHILE MAINTAINING LENGTH
- Make two low ponytails on either side of your head, one on each side of your head. Ponytail holders should be used to secure each ponytail. Wrap extra ponytail holders or a wide flexible band around the length of your hair many times until you reach the ends
- Then repeat the process. Allow for total air drying of your hair. Remove the ponytail holders/band from your hair.
Blow Dry
Alternatively, blow drying your hair may be used for a more expedient approach of expanding your hair. We advocate reducing the usage of heat to the greatest extent feasible. You may, however, utilize the “cool” setting on your blow dryer to stretch your hair as it dries to achieve this effect. While blow-drying your hair, spread it out with a brush as you go. If you want to utilize the high heat setting on your blow dryer, make sure to use a heat protectant before doing so.
Straighten Your Hair (only for Sleek Space Buns)
Straightening your hair before creating incredibly sleek space buns is a good idea. Prevent heat damage to your hair by using a heat protectant before straightening your hair. Take the following precautions to reduce the likelihood of heat damage occurring:
- Prepare your hair by detangling it before you begin straightening it. Heat protectant should be applied evenly throughout the hair, making sure that all of the strands are protected
- Using a comb, separate your hair into four portions. Small pieces of hair should be flat ironed from root to tip. Make sure you don’t skip over any sections more than once. Read this article to find out how to flat iron your hair without causing heat harm to it. Repeat the previous process on your whole head of hair
In the event that you do not wish to straighten your hair, go to the following step.
Do the Ponytails
Using a rat tooth comb, create a straight section along the centre of your hair. You are welcome to take your time to ensure that the part is correct. When it comes to the cleanliness of your parts, you don’t have to stress over them. However, you may discover that the style appears better when your parts are straight. Make two ponytails on either side of your head, one on each side of your head. Ideally, ponytails should be worn high and to one side.
Ponytail holders are tied around each ponytail, with care taken not to knot them too tightly. In the event that you tie them excessively tightly, you may suffer from headaches and perhaps lose the hair surrounding your hairline. Tight hairstyles are one of the most common causes of hair loss.
Lay Down Stray Hairs
Space buns can be smooth or textured, but the hair above the ponytail holder (your roots) should be flat and laid regardless of which style you choose. Apply some gel to your roots and brush it through your hair to get a smooth finish. In order to get a smooth bun, make certain that the gel you use will not cause your hair to revert back to its original form. If you want the look of neatly set edges, consider using edge control gel. It should be applied to the hair around your hairline, and your baby hairs should be styled how you desire.
Using this product will offer you greater control over your hairs and will not pull them out.
Use a Scarf to Set Your Roots
You’ve been through a lot in order to bring your hair to this stage. A silk or satin scarf is essential for establishing your roots. Tie the scarf around your hairline; this will help to flatten the roots even further. Leave the scarf on for a few minutes while you proceed to the following phase, when you will construct your space buns hairdo.
Create Your Space Buns
It is likely that the most difficult element of the styling procedure will be creating your space buns. To make your space buns, do the following steps:
- Make a rope out of your loose hair by twisting it around itself many times. Make a circular motion with your hair around the base of your ponytail
- This will secure it. Make use of bobby pins to hold the ends in place
It may take a few tries to get the buns to look round, but once you get the hang of it, they’ll look perfect.
For Short Hair
Using adonut bun maker, which you will wrap your hair around, you may get a fuller look if your hair is short or you want more volume.
Braided Space Buns
You may also build a braided bun to add a little extra flare to your look. Make a three-strand braid from the roots to the ends of your hair, wrap the braid around the base of your ponytail, and fasten with bobby pins.
Freeze the Style in Place
If you choose, you may spritz your hair with a holding spray to keep it in place. It helps the style to endure longer, decreases flyaways, and improves the general stability of the bun by adding more volume to it. Once you’ve removed the silk scarf from your hair, you’re finished.
How to Do Space Buns on Natural Hair
Flourishing Space Buns | Natural Hairstyles
How to Do Space Buns With Straight Hair
The Double Bunsl! Hair Tutorial – Two Bunsl!
Pros and Cons of Space Buns
Space buns exude a sassiness and a sense of playfulness that few other hairstyles can match. While the style is fashionable and attractive, it has both advantages and disadvantages that you should be aware of.
Pros
The following are some of the advantages of space buns:
- Look that is youthful and fun. No one can dispute the sense of wonderment that space buns elicit. It’s simple to accomplish. It will not take much work to repeat the style once or twice after you have done it the first time or two times. Versatility. Space buns can be made in a variety of ways. You may wear them textured, sleek, or even sloppy according on your preference. You may make them as unique as you’d like. Examples include half space buns, low space buns, classic space buns (as seen in this article), high space buns (also featured in this page), and a variety of other shapes and sizes. Your alternatives are only limited by your ability to think creatively. If you want your buns to stand out even more, you can dye your hair a different color. Protective. Despite the fact that space buns are not a long-term style, they offer protective properties due to the fact that they compel you to tuck your ends away.
Cons
- Damage caused by high temperatures. If you’re going to be utilizing heat to straighten your hair throughout the style process, there’s always the possibility of heat damage, also known as Traction alopecia. If you frequently wear your hair in space buns, you may begin to have traction alopecia, which is a loss of hair around the hairline.
Related Articles
- The Different Types of Messy Buns and How to Make Them
- How to Style Bantu Knots on Straight Hair
- Natural Hair Afro Puff Updo
- How to Style Bantu Knots on Straight Hair
Dos and Don’ts of Space Buns
In order to have a pleasant experience with your space buns, make sure you follow the guidelines outlined below.
Dos
- Reduce the amount of heat you utilize. It is possible that heat will be required in the pursuit of flawlessly slim space buns. However, it is advisable to keep the temperature as low as possible. Utilize the “cool” setting on your blow dryer if at all possible
- Take your time while separating your hair. When the section of the bun is straight, space buns appear much nicer. Make your own own style statement. You can add bangs to the style before tying your hair into the two ponytails
- However, this is not necessary.
Don’ts
- Make sure your ponytails are not too tight. Traction alopecia is extremely difficult to treat, thus prevention is essential! Tie your ponytail holders tightly around the root of your ponytails, but avoid wrapping them around too many times at the same time. Space buns should not be done too frequently. We understand what you’re saying. Because space buns are so stunning, you may find yourself tempted to wear them every single day of the week. Having said that, it is recommended that you allow your hair to rest for a week or longer after wearing it in space buns.
After reading this article, you should know everything there is to know about how to make space buns.
10 Cool (and Easy) Buns That Work for Short Hair
As a girl with bob-length hair, I understand the frustration of waking up late and wanting nothing more than to toss your hair up in a messy bun, only to find yourself unable to do so because you don’t have enough hair to do so. Please do not misunderstand me. I really enjoy having short hair. However, the messy-bun existence is one that I occasionally yearn for. There is some bad news, though, in that buns with short hair aren’t nearly as straightforward as they are for people who have 12 inches of hair to play around with.
In fact, it’s more than probable that this will happen.
For all of my short-haired sisters out there, this one is for you.
On the days when you don’t feel like pulling out your curling iron or straightening iron, simply refer to this list for inspiration. Continue reading for a step-by-step approach to successfully pulling off buns for short hair.
Braided Topknot
Getty 1.Distribute a dry texture spray, such as Obrie’sDry Texturizing Spray($22), evenly throughout hair to provide more grip. 2.Pull your hair into a super-high ponytail and tie it with an elastic band. Don’t be concerned about making things seem nice! 3.Pull the ponytail all the way down and secure it with a clear elastic band at the bottom. Using a bobby pin, bind the braid around itself, starting at the base and working your way up the length. 5.After the braid has been coiled all the way up into a bun, fasten it with a couple more bobby pins to finish it off.
7.Spray your hair with a flexible-hold hairspray.
8.
Sporty Space Buns
Getty1.Space buns are all the rage this summer, and now it’s your opportunity to show off your own style. To finish, part your hair down the center and spray all over with Rusk’sTexture Dry Finishing Spray ($25). 2.Pull the hair from either side of your head into a high, tight ponytail on one side. Wrap each ponytail around itself and tie it with a couple of bobby pins to finish the look. 4.The more muddled, the better! Pull each bun outward to add volume, then pull out a few loose strands to frame your face with a few loose strands.
Boho Double Knot
Getty1.Space buns are all the rage this summer, and now it’s your opportunity to show off your own own sense of style. To finish, part your hair down the center and spray all over with Rusk’s Texture Dry Finishing Spray ($25). To create a high, tight ponytail, gather the hair from either side and pull it up into a bun. Using a few bobby pins, coil each ponytail over itself and fasten it. (4) The more muddled, the better! Using your fingers, pull each bun outward to add volume, and pull out a few stray strands to frame your face.
Bedhead Bun
Getty1.Space buns are all the rage this summer, and now it’s your chance to try them out. To finish, part your hair down the center and spray all over with Rusk’sTexture Dry Finishing Spray($25). 2.Put the hair from either side of your head into a high, tight ponytail on one side. 3.Two bobby pins should be used to fix each ponytail. 4.The more muddled the better! Using your fingers, pull each bun outward to add volume, then pull out a few loose strands to frame your face with. 5.Finish with a flexible-hold hair spray, such as DevaCurl’s Flexible-Hold Hair Spray ($25), sprayed all over.
Messy Half-Knot
Getty1.For short-haired girls, this is the ultimate bun to achieve. Begin with strands that have not been washed. It doesn’t matter how filthy the environment is. Using your hair, create two sections on either side of your crown. Keep the components as straight as possible because they will be apparent in the final product. 3.Make a high ponytail out of the hair between the two pieces and place it exactly on top of your head. Make sure not to drag the ponytail through the elastic on the final loop; otherwise, you’ll end up with a loose bun.
4.Tug the bun to make it larger and a little more messed up. Instead of leaving the ends sticking out the bottom of the bun, just wrap them around the base of the bun and pin them in place!
Modern Milkmaid Bun
Getty1. Although this is more of an updo than a classic bun, it still serves the purpose of keeping your hair out of your face in a stylish manner. Begin by splitting your hair down the center and dividing it into two equal parts with your fingers. To give your hair near the crown of your head a little additional volume, back-comb it a few times. 3) Create a French braid on one side of your head, starting near to your face and working your way out to form a braided pigtail. 4. Clear elastic is used to keep it in place.
Using a bobby pin, pin the end of the first French braid behind your head to keep it in place.
7.Spray the braid with a medium-hold hair spray, such as L’Oréal Tecni, to keep it in place.
Classic Ballet Bun
This laidback variation on the traditional ballerina bun is polished and easy, as shown in the image above by Getty1. In order to begin, pull your hair back into a ponytail at the very top of your head. In the event that you have shorter pieces that fall out, pin them up at the back of your head with a bobby pin. Secondly, open the elastic and draw the hair up halfway through to form a loop to give the topknot a larger appearance. 3.Take the excess length that was left over from the loop and coil it around the base of the loop to conceal the elastic band.
Sleek Low Bun
Getty1.A slicked-back hairstyle that screams “cool chick” will have you looking as effortlessly elegant as Rihanna. This is one of the few occasions in which Rihanna wore her natural, blown-out hair without the use of extensions. Before you begin, smooth your hair back into a bun with a boar bristle brush, such as the DenmanBoar Bristle Ceramic Brush ($26). Secondly, let some of your flyaways and sideburns to dangle loosely. Don’t be concerned with everything being in exactly the right position.
3.Pull your hair back into a ponytail with the help of an elastic.
Take a second elastic band and wrap it around your topknot to secure it.
Embellished Top Knot
Getty1. Hair ornaments are timeless and will never go out of style. Furthermore, they quickly transform any bun from plain to badass. Take inspiration from Issa Rae’s Black Panthermoviepremiere performance. Begin by parting your hair into three sections in the center of your head with a rattail comb, such as Krest’sPintail Combs ($5). 2.After that, braid three little cornrows and tie them together at the crown of your head or wherever you want your bun to end up. 3.Put your hair and the ends of your three braids into a ponytail and secure it with an elastic band.
Using circular motions, wrap your braid around the rest of your hair to form a braided topknot.
To keep your braid in place, wrap it with an additional elastic band. 6. Take a bobby pin and put it directly at the front of your bun, using a hair item such as thesebeads($10) to hold it in place. Install gold cuffs throughout your braid to give it a little extra flair.
Backwards Braided Bun
Getty1.If you have piecey bangs and want to style them in a lob or bob, this is the style for you. Allow your bangs to hang loosely in the front and frame your face in the back. Begin by dividing your hair into three medium-sized portions at the back of your head. 2.In the back of your head, braid three medium-sized cornrows, halting at the crown of your head and braiding in the direction of your ponytail. 3.After that, pull your hair into a ponytail. Using a rubber band or a hair tie, pull your braids into a ponytail once you’ve completed braiding them.
Don’t be concerned about further flyaways.
spray of Sexy HairSmooth Sexy Hair SmoothSeal Anti-FrizzShine ($20) to add a modest sheen to your style and to give it a polished finish.