
Pie
How To Make Chelsea Buns
Jan
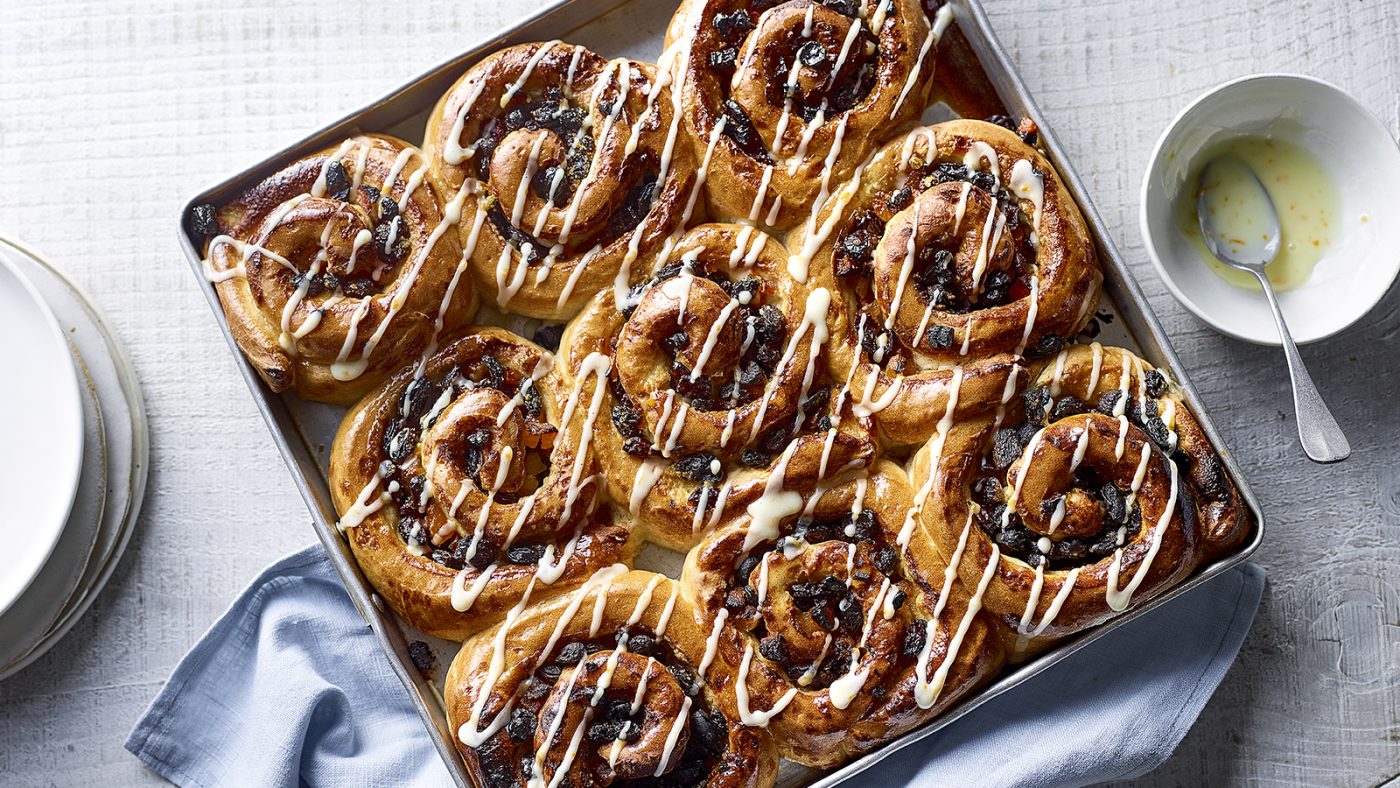
Nothing compares to a warm, sticky Chelsea bun that has just come out of the oven. These are sprinkled with frosting to make them even more decadently sweet.
Ingredients
- Amounts needed: 500g/1lb 2oz strong white flour, plus extra for dusting
- 1 teaspoon salt
- 1 x 7g sachet fast-acting yeast
- 3 cups (300mL/10fl oz) milk
- 40g/112oz unsalted butter (plus a little more for greasing the baking pan)
- 1 free-range egg
- 1 tablespoon vegetable oil for frying
For the filling
- 25g/1oz unsalted butter, melted
- 1 orange, zest only, grated
- 75g/212oz soft brown sugar
- 2 tsp ground cinnamon
- 100g/312oz dried cranberries
- 100g/312oz sultanas
- 100g/312oz dried apricots, chopped
- 25g/1oz unsalted butter, melted
To finish
- 1 heaping tablespoon apricot jam
- 200g/7ozicing sugar, sifted
- 1orange, zest only, grated
- 1orange, juice only, grated
Method
- In a large mixing basin, add the flour and salt and toss until fully incorporated. Toss the yeast and flour together in a large mixing bowl and set aside. In a small saucepan, heat the milk and butter over medium heat until the butter is melted and the liquid is lukewarm. Stir vigorously until all of the ingredients are combined into a soft dough in the bowl after pouring into it and adding the egg Using a lightly floured work surface, transfer the dough and knead it for five minutes, or until it is smooth and elastic. Place the dough in an oiled basin and cover with a moist tea towel, allowing it to rise for one hour or until it has doubled in size
- Remove the dough from the bowl and place it on a lightly floured work surface. Roll out the dough into a rectangle about 30x20cm/12x8in in size
- Brush the dough with melted butter all over the surface. Spread the orange zest evenly over the greased top, followed by the sugar, cinnamon, and dried fruit
- Bake for 30 minutes at 350°F. The long side of the dough rectangle closest to you should be tacked down by pushing it down onto the work surface with your thumb and index finger. Roll the opposite long edge of the dough towards you rather firmly, until the roll is completely enclosed and securely wound around your finger. Using a sharp knife, cut into thick rounds (about 4cm/13.4in in diameter)
- Place the buns, cut side up, in a deep roasting tin or baking tray that has been generously oiled with butter
- Leave approximately 1cm/12in of space between each bun. You want them to be close enough together so that as they rise further and are baked, their sides will come into contact with one another. After that, they may be pushed apart to reveal a nice soft edge. Allow for around 30 minutes of rising time in a warm environment
- Preheat the oven to 190 degrees Celsius/170 degrees Celsius fan/gas 5
- When the buns are finished, place them in the oven and bake for 20-25 minutes, or until they are golden-brown in color. Check the buns after about 15 minutes and cover them with aluminum foil if they are becoming too brown. Remove the buns from the oven and allow them to cool slightly before removing them from the pan and placing them on a cooling rack. Remove from heat and stir in a tiny amount of water until the jam is completely smooth. Allow the buns to cool completely before glazing them with the jam. Combine the icing sugar, orange zest, and two tablespoons water in a mixing bowl. Allow the frosting to harden before serving the buns once they have been allowed to cool.
Classic Chelsea buns recipe
In a large mixing basin, add the flour and salt and whisk until well blended and smooth. Creating a well in the center of the flour and adding in the yeast Using a small saucepan, heat the milk and butter until the butter has melted and the liquid is lukewarm. Stir vigorously until all of the ingredients come together to form a soft dough after pouring into the flour mixture and adding the egg Using a lightly floured work surface, turn the dough out and knead it for five minutes, or until it is smooth and elastic.
- Transfer the dough to a lightly floured work surface and knead it until it is smooth and elastic.
- Using a pastry brush, evenly coat the greased surface with orange zest.
- The long side of the dough rectangle closest to you should be tacked down by pushing it down into the work area with your thumb.
- 4cm/13.4in thick circles should be cut out with a sharp knife.
- If you want them to bake together, you want them to be near enough that as they rise even more and bake, their sides will contact.
- Allow for approximately 30 minutes of rising time in a warm environment; Oven temperature should be set at 190 degrees Celsius (170 degrees Celsius fan)/Gas 5.
- Observe the buns after about 15 minutes, and if they are becoming too brown, cover them with aluminum foil.
- Remove from heat and stir in a splash of water until the jam has melted completely.
- Using two tablespoons of water, combine the icing sugar and orange zest.
Tamsin Burnett-Hall
Tamsin studied the ins and outs of the kitchen from Delia Smith, a legend in the world of cooking. A trusted recipe writer for the magazine for over 25 years, she is currently our Cookery Workflow Editor, managing testing and editing to ensure that every dish tastes delicious, is simple to follow and works without fail.
She also serves on the magazine’s editorial board. Tamsin cooks for her friends and family in her home kitchen, focusing on flavorful, fuss-free dishes that are easy to prepare. Baking is her favorite type of comfort food. Check out even more of Tamsin Burnett-recipes Hall’s on her website.
Tamsin Burnett-Hall
She learnt the ins and outs of the kitchen from Delia Smith, a cooking icon. A trusted recipe writer for the magazine for over 25 years, she is currently our Cookery Workflow Editor, supervising testing and editing to ensure that every dish tastes delicious, is simple to follow and works without fail. She also serves on the magazine’s board of directors. The ultimate type of comfort cooking for Tamsin is baking, which she does in her own home kitchen for friends and family in a fuss-free, flavour-packed manner.
Ingredients
- 50 g of butter 200ml milk, plus any additional that may be required
- 500g strong bread flour, with a little more for dusting
- 500g butter
- 500g sugar
- 500g flour 1 × 7g dry yeast with rapid action
- 50 grams of caster sugar 1 teaspoon of fine sea salt 1 lemon with the zest removed
- 1 big egg, beaten
- 1 large egg, beaten
For the filling
- 2 tablespoons ground cinnamon or mixed spice
- 200 grams currants or mixed dried fruit
- 50 g soft butter, plus extra to grease pan
- 100 g light brown sugar
- 2 tablespoons soft butter, plus extra to grease pan
For the glaze
It’s best if you eat it the same day it’s baked, but it may be frozen.
- In a saucepan, melt the butter for the dough, then take it from the heat and stir in the milk. Using this method, you will be able to remove the cold from the milk without making it excessively hot. Combine the flour, yeast, caster sugar, salt, and lemon zest in a large mixing basin (or the bowl of a stand mixer) until well combined. Make a well in the center of the mixture and pour in the beaten egg and buttered milk. Combine all of the ingredients until you have a soft dough (adding more milk if necessary), then knead by hand for 10 minutes on a floured surface (or 5 minutes on low speed in a stand mixer). Re-place the dough in the basin, cover with plastic wrap, and let it to rise for 2 hours, or until it has doubled in volume. Remove the dough from the bowl and roll it out to approximately 34cm x 48cm on a floured surface. Spread the soft butter on the toast (leave a border along one long edge). Combine the sugar, cinnamon or mixed spices, currants, or dried fruit in a large mixing bowl. Spread the mixture equally over the dough and gently push it in
- Dampen the long border with a small amount of water, then roll up like a Swiss roll towards this side, pressing the seam tight with your fingers. Trim the ends of the roll, and then cut the roll into 12 thick slices. Prepare a 20cm x 30cm baking tray by greasing and lining it with parchment paper. Place the buns in the baking tin approximately 1cm apart. Cover the tray and let aside for approximately 45 minutes to proof. Preheat the oven at 180 degrees Celsius, fan 160 degrees Celsius, gas 4
- The Chelsea buns should be baked for about 25 minutes, or until they are brown and cooked through. In a small saucepan, dissolve the sugar in 3 tablespoons water and bring to a boil for 1 minute, then set aside to cool. The buns should be brushed with the mixture as soon as they are taken out of the oven. If you let the water evaporate completely, you will be left with a sticky coating. Allow them to cool for at least 30 minutes before ripping them apart and eating them.
Dan’s Sticky Spiced Orange Chelsea Buns
Pouring milk into a pot after melting your butter for the dough will make it taste even better! If you do this, you will be able to remove the cold from the milk without it being too heated. Combine the flour, yeast, caster sugar, salt, and lemon zest in a large mixing basin (or the bowl of a stand mixer). A well in the center should be created and filled with an egg and buttery milk. Combine all of the ingredients until you have a soft dough (you may need to add more milk if necessary), then knead by hand for 10 minutes on a floured surface (or 5 minutes on low speed in a stand mixer).
- Soft butter should be used to spread it (leave a border along one long edge).
- Using your fingers, spread the mixture evenly over the dough and gently push it in.
- Trim the ends of the roll, and then cut it into 12 thick slices to serve as appetizers.
- Place the buns in the pan approximately 1cm apart.
- Bake at 180°C (fan 160°C, gas 4) for 30 minutes, or until done.
- Set aside to cool after dissolving the sugar in 3 tablespoons water in a small saucepan over medium heat for 1 minute.
- As the water evaporates, you’ll be left with a sticky film on your hands.
Chelsea buns
- 1 cup (450 g) strong white flour plus a little extra for dusting
- 15 cups warm milk
- 1 egg, beaten
- 50 grams salted butter, melted (plus extra for greasing)
- Oil, for greasing
- 2 x 7-gram packets instant yeast
- 50 grams golden caster sugar
For the filling
- 25g melted butter, with a little more for greasing
- 100g currants
- 50g sultanas, finely chopped
- 2 tsp mixed spice
- 25g caster sugar
For the glaze
- STEP 1: Begin by preparing the dough. In a large mixing basin, whisk together the flour, yeast, caster sugar, and 1 teaspoon sea salt until well combined. Make a well in the center and pour in the heated milk, beaten egg, and melted butter. Stir until everything is completely combined. Using a wooden spoon at first, then your hands, combine all of the ingredients until you have a soft dough. To adjust the consistency, add a little amount of warm water
- If the mixture is too sticky and moist, add a spoonful of flour. STEP 2Dust your work area with flour and tip the mixture onto it
- Begin kneading right away. Continue to knead the dough until it is smooth and elastic in texture. Form the dough into a ball and place it in a clean basin that has been lightly coated with melted butter or olive oil. Cover with cling film and let aside in a warm location for approximately 1 hour, or until the dough has doubled in size
- STEP 3Preheat the oven to 200 degrees Celsius/180 degrees Celsius fan/gas 6 and butter a deep 21 x 21cm square baking pan. Continue kneading the dough on the prepared surface, knocking the air out of it, after you have dusted the work area with a little additional flour. Form the dough into a 20 x 30cm rectangle. The currants and chopped sultanas are sprinkled on top of the dough after it has been lightly smeared with melted butter to fill the buns. In a large mixing bowl, combine the mixed spices and caster sugar
- Then sprinkle the mixture over the dough in a uniform layer. SIXTH STEP: Roll the dough into a tight spiral starting from the longest edge, similar to a Swiss roll, and cut into nine equal-sized swirling buns. Location them in the tin, cut side up, and cover with a clean, moist tea towel. Allow them to prove in a warm place for around 30 minutes, or until they have doubled in size. STEP 5Bake the buns for 10 minutes at 180°C/160°C fan/gas 4 before reducing the temperature to 180°C/160°C fan/gas 4 and baking for a further 10 minutes. To make the glaze, combine the caster sugar and 1 tablespoon water in a small bowl until the sugar is completely dissolved, then brush it all over the buns as soon as they are through baking. Allow approximately 10 minutes of cooling time in the tin before serving. It may be consumed either hot or cold.
Chelsea Buns
TO BEGIN, MAKE THE DOUGH (STEP 1). In a large mixing basin, combine the flour, yeast, caster sugar, and 1 teaspoon sea salt. To make a well in the center, pour in the heated milk, beaten egg, and melted butter. Stir until everything is completely combined. Using a wooden spoon at first, then your hands, combine all of the ingredients until you have a smooth, elastic dough. STEP 2Dust your work area with flour and tip the mixture onto it, starting to knead it. If the dough seems dry, add a little warm water, but if it feels too sticky and moist, add a spoonful of flour.
- Using your hands, form a ball and place it in a clean basin that has been gently oiled with melted butter or vegetable oil.
- Preheat the oven to 200 degrees Celsius (180 degrees Celsius fan)/gas 6 and butter a deep 21 x 21cm square baking dish.
- Form a rectangle measuring 20 x 30cm.
- Prepare a uniform coating of mixed spice and caster sugar by mixing them together in a dish and sprinkling them over the dough; Roll the dough into a tight spiral from the longest edge, similar to a Swiss roll.
- Location them in the tin cut side up and cover with a clean, moist tea towel.
- STEPPING 5Bake the buns for 10 minutes at 180 degrees Celsius/160 degrees Celsius fan/gas 4 before reducing the temperature to 180 degrees Celsius/160 degrees fan/gas 4.
Using a fork, whisk together the caster sugar and 1 tablespoon of water until the sugar is completely dissolved, then brush the glaze over the buns immediately after baking. 10 minutes should be enough time for the cake to cool in the tin. Eaten either hot or cold, this dish is versatile.
Chelsea Buns
STEP 1Begin by preparing the dough. In a large mixing basin, combine the flour, yeast, caster sugar, and 1 teaspoon sea salt until well combined. Make a well in the center and pour in the heated milk, beaten egg, and melted butter. Stir until everything is evenly distributed. Using a wooden spoon at first, then your hands, thoroughly combine the ingredients until you have a soft dough. STEP 2Dust your work area with flour and tip the mixture onto it, kneading the entire time. If the dough seems dry, add a little warm water, but if it feels too sticky and moist, add a spoonful of flour.
- Form the dough into a ball and place it in a clean basin that has been lightly coated with melted butter or oil.
- Preheat the oven to 200 degrees Celsius (180 degrees Celsius fan)/gas 6 and butter a deep 21 x 21cm square baking pan.
- Form the dough into a rectangle about 20 x 30cm.
- In a mixing dish, combine the mixed spices and caster sugar, then sprinkle the mixture over the dough in an equal layer; STEP 4Roll the dough into a tight spiral starting from the longest edge, similar to a Swiss roll, and cut into 9 equal-sized swirling buns.
- Allow them to prove in a warm place for around 30 minutes, or until they have doubled in size; STEP 5Bake the buns for 10 minutes at 180°C/160°C fan/gas 4 before lowering the temperature to 180°C/160°C fan/gas 4 and baking for a further 10 minutes.
- Allow for 10 minutes of cooling time in the baking tray before serving.
Chelsea Buns
Hello, hello! Chelsea Buns are a dish that has been on my site for nearly 5 years now, and I wanted to share it with you in a new photo session. These were one of the first ‘nostalgic re-makes’ that I completed, in which I replicated a baked treat from my own childhood memories. Also, it was from this recipe that I developed my famous brioche foundation recipe that we all know and love today! Chelsea buns vary from cinnamon buns (according to a cursory internet search) in that they feature a fruit filling instead of a cinnamon filling, and the glaze is different as well.
Keep in mind that these are the definitions used in the United Kingdom, and they may differ from those used in the United States.
This Chelsea Bun recipe has long been a personal favorite of mine, and with good reason.
Despite the fact that the buns are incredibly fluffy, they have a gooey center from the custard and little raisins scattered throughout. The frosting is quite simple, but it is absolutely delicious – I absolutely like them, and I hope you enjoy as well!
New Zealand Chelsea Buns
How are you doing? Hello, how are you doing today? Chelsea Buns are a dish that has been on my site for approximately 5 years now, and I wanted to share it with you all in a new photo session. These were one of the first ‘nostalgic re-makes’ that I completed, in which I replicated a baked treat from my youth. Additionally, it was from this recipe that I developed my famous brioche foundation recipe that we all know and love today! Apparently, the only difference between Chelsea buns and cinnamon buns, according to a quick internet search, is that Chelsea buns feature fruit filling and a distinct glaze.
Keep in mind that these are the definitions from the United Kingdom, and they may differ from what individuals in the United States are familiar with.
It’s no coincidence that this Chelsea Bun recipe is one of my favorites.
Despite the fact that the frosting is simple, it is delicious – I am in love with them and hope you are as well!
- Make the brioche dough according per package directions. The custard filling should be prepared first. I nearly always do a cold rise on this since it makes it so much easier to spread out nicely. Custard powder is used in this recipe to give it that extremely nostalgic custard flavor. It takes only a few minutes to prepare the custard, but it must be allowed to cool before being spread over the Chelsea buns. Prepare the buns by assembling them. This recipe is really similar to cinnamon rolls in that you just roll out the dough and cover it with the chilled custard filling when it has cooled. A sprinkling of brown sugar and raisins are then poured on top of the custard before it is rolled into a log
- It’s time to get up. The buns are allowed to rise a second time at room temperature until they are beautiful and fluffy and ready to be baked. Make a cake and ice it. Bake the buns until they are cooked through and golden brown on top, about 20 minutes total. While they are still hot, ice them and set them aside to chill before serving
Can this recipe be made in one day?
Yes, if that is what you want, it is possible. I prefer to put the dough in the fridge for the first rise so that it is simpler to roll out afterwards. This may either be done overnight in the refrigerator or by allowing it to rise for a minimum of 3 hours in the refrigerator. If you choose to conduct the first rise at room temperature, just bear in mind that the dough will be more difficult to roll out while it is warm, so plan accordingly. The entire rolling up procedure will become much more sloppy as a result of this.
If at all possible, try to leave enough time for the cold to increase.
How to tell when Buns are Baked
When it comes to buns and other baked goods, it can be difficult to determine when they are done since the filling might cause the tops to turn brown before they are fully cooked. I prefer to use a thermometer to check the internal temperature of the dough; for enriched dough, the temperature should be approximately 200°f / 95°c. Make certain that you are inserting the thermometer into the dough and not the filling before proceeding. This is simply an extra method of determining if something is finished.
How to make Custard Filling
Custard (also known as pastry cream) isn’t difficult to prepare, but it might be a little frightening at first.
The custard powder and egg yolks used in this Chelsea Bun Filling help to thicken the filling. It has a little thicker consistency than your typical pouring custard. The custard is shaped this way on purpose so that when you spread it over your dough, it doesn’t drip all over your counter top.
What is Custard Powder?
Similarly to quick pudding in the United States, Custard Powder is a powdered milk substitute. It is made with maize starch as a basis, and then it is flavored and thickened with other ingredients. Because the flavor is really nostalgic, I used it in these chelsea buns. You can get it online or in select grocery shops in the United States (it is quite prevalent in New Zealand supermarkets) – I use it to create my Custard Squares as well! If you are unable to locate corn starch, you should be able to substitute it.
- Is it possible to make these without the raisins?
- If you don’t like them, simply leave them out of the recipe.
- Yes, it will function just fine; all you have to do now is activate it.
- What is the best way to fast cool my custard filling?
- This will increase the surface area of the custard, allowing it to cool down much more quickly as a result.
- I used an enamel baker that I received as a gift a few years ago, but a conventional 9″x13″ pan would also work just well!
- Because the custard is really thick (as it is intended to be), don’t be alarmed if it seems lumpy when you spread it out on the baking sheet.
In the oven, everything comes together by itself.
This is something that my children do as well.
The moisture in the custard is responsible for this.
Those holes are perfect for capturing ice as it falls!
Custard makes it a little more difficult to put things together.
Yes, you can find the recipe for my no-mixer brioche right here!
For more New Zealand Recipes, Check Out:
- Similarly to quick pudding in the United States, Custard Powder is a powdered milk product. There are other flavors and thickeners added after the corn starch foundation. The flavor is quite nostalgic, which is why I incorporated it in these chelsea buns to bring back memories. Purchase some online or in select grocery shops in the United States (it is quite widespread in New Zealand supermarkets) – I use it to create my Custard Squares as well! When in doubt, substitute corn starch if you can’t locate it. Despite the fact that I haven’t tried it, it should be OK. Is it possible to exclude the raisins from this recipe. Yes! Leaving them out is quite OK if you don’t like them! Will active dry yeast work in this situation? Yes, it will work just fine
- All you have to do now is turn on the power to the computer. To achieve this, combine the milk, sugar, and yeast in the bowl of your stand mixer and allow it to activate for a few minutes before continuing. Do you have any suggestions for how to fast cool custard filling? Using a sheet pan, you can rapidly cool your custard down when you need it to. In addition to increasing custard surface area, this will also allow the custard to cool down considerably more quickly. Did you use a cast-iron pan? I used an enamel baker that I received as a gift a few years ago, but a conventional 9″x13″ pan would also work fine. After my custard appeared smooth, I attempted to spread it out and noticed that it was lumpy? What happened? You shouldn’t be concerned if the custard appears lumpy because it’s supposed to be that way. The custard is really thick (this is by design). In such case, you’re in fine shape, because the lumps are simply cold particles of custard from the refrigerator. During the baking process, everything falls into place. It’s not clear what caused the enormous holes in the chelsea buns to bake. This is something that my children do as well, You shouldn’t be concerned because this does happen occasionally. The moisture in the custard is responsible for this phenomenon. As a result of the baking process, they appear to have unraveled just a little bit. If you have frosting on your cake, those holes are perfect for it. The reason for such shoddy construction? Custard makes it a little more difficult to put things together. Is it possible to make this dish without the use of a blender? My no-mixer brioche recipe may be found right here. Increasing the amount will not affect its effectiveness
- You will just get a better exercise.
Made this recipe and love it?
You may write a review below if you tried this dish and want to tell me how it turned out. I would much appreciate your feedback! Also, please remember to tag me on Instagram if you manage to make it there!
A note on salt and oven temperature
It is critical to pay attention to the sort of salt that is required for in a particular recipe. Unless otherwise specified, I use Diamond Crystal salt throughout my recipes; if you want to use another type of kosher salt or plain table salt, you will need to modify your measurements proportionately because some salt is’saltier’ than others. Morton’s salt is twice as salty as table salt, therefore you will only need half the amount. The same may be said for conventional table salt. I’m still working on obtaining gram measurements for salt across my recipes, but I’m getting closer to it.
Changing the temperature of your oven when using the fan or convection setting will be necessary. An oven thermometer is a worthwhile purchase since it allows you to confirm that your oven is operating at the proper temperature.
Using the double / triple function in the recipe card
My recipe card has a ‘1X, 2X, and 3X button, which you can use to multiply the recipe by the number of times it has been multiplied. This can be used to multiply a recipe by two or three times. Please keep in mind that this simply doubles the amounts of the items shown in the ingredients list, NOT the quantities listed in the technique. If the procedure of the recipe calls for certain amounts or pan sizes (for example, weigh out 150g brown butter), you will need to scale this figure manually.
It is usually a good idea to thoroughly go over a recipe before doubling it to ensure that everything is correct.
You may find a list of my favorite tools and equipment in my blog article, which you can find here.
Why is this recipe in grams?
I give my baking recipes in grams since it is the most precise method to measure ingredients. Cups are not only wrong, but their volume varies from country to country. I’m not going to be able to supply a universal cup measure that will work for everyone. Posting in pounds, on the other hand, eliminates this problem. For those who would like to have the recipe in cups, you are welcome to convert it yourself using Google; but, please don’t ask me to do it since I am not comfortable offering a recipe using a method that I have not personally tried.
If you would want a recommendation, this is the scale that I use.
Recipe for Chelsea Buns
Chelsea Buns are a brioche bun that is light and fluffy and loaded with raisins. New Zealand is a country in the Pacific Ocean. Chelsea Buns are a favorite childhood treat that are filled with custard and raisins and served warm. They are topped with a basic chelsea bun glaze to give them a classic look. Brioche Dough is a type of bread dough.
- 250g whole milk, lukewarm
- 2 teaspoons (7 grams) quick yeast
- 60 grams sugar
- 560 grams all-purpose flour
- 1 teaspoon (3 grams) salt
- 2 eggs (approximately 100 grams, with the shell), at room temperature
- 1 teaspoon (5 grams) vanilla bean paste
- 120 grams salted butter, at room temperature
250g whole milk, lukewarm; 2 teaspoons (7 grams) instant yeast; 60 grams sugar; 560 grams all-purpose flour; 1 teaspoon (3 grams) salt; 2 eggs (approximately 100 grams, with the shell), at room temperature; 1 teaspoon (5 grams) vanilla bean paste; 120 grams salted butter, at room temperature;
- 112 g sugar, 50 g custard powder, 125 egg yolks, 410 g whole milk, 12 tsp vanilla bean paste, 12 tsp salt, 20 g salted butter, at room temperature
- 315g powdered sugar
- 14 tsp vanilla
- 3 – 4Tbsp whole milk
- 315g powdered sugar
BRIOCHE DOUGH
- The milk, yeast, sugar, flour, salt, eggs, and vanilla should all be mixed together in the bowl of a stand mixer fitted with the dough hook attachment
- To make the dough come together, mix on medium speed for 6-7 minutes until the dough comes together. In small batches, whisk in the butter, waiting until it is nearly completely absorbed before adding the next piece, until all of the butter has been mixed. Continue to mix the dough for another 6-7 minutes, or until it is smooth and elastic. Prepare a medium-sized mixing bowl by lightly greasing it. Toss the dough into a ball and set it aside in a mixing dish. Refrigerate for at least 3 hours, if not overnight, after covering with plastic wrap and let it to rest on the counter for 20 minutes before serving. * (See the recipe notes for instructions on how to complete this in one day.)
CUSTARD FILLING
- In a medium-sized mixing basin, whisk together the sugar and custard powder until well combined. Whisk in the egg yolks until they are well incorporated. Warm the milk, vanilla bean paste, and salt in a medium-sized saucepan until there is movement only around the rims of the liquid – do not raise it to a boil
- Remove from heat. With an electric mixer, whisk in a steady stream half of the hot milk mixture into the egg and custard mixture until the egg yolks are tempering. 30 seconds of vigorous whisking is required. Transfer the milk-yolk mixture back to the saucepan and bring it back to a simmer over a medium flame. Continue to whisk continually until the mixture becomes quite thick. Remove the pan from the heat and whisk in the butter, whisking thoroughly until everything is well incorporated
- Fill an airtight container with a piece of plastic wrap and press it directly against the surface of the product. Put the ingredients in the refrigerator until they are thoroughly cooled, ideally overnight.
DISASSEMBLY AND BAKED GOODS
- Prepare a 9″ x 13″ (23cmx35cm) baking dish by lightly greasing and lining it
- Turn the dough out onto a lightly floured board and knead it until smooth. Using a rolling pin, roll out the dough to a 24″ x 16″ (60cm x 40cm) rectangle. Keep rolling until the dough is no longer opposing your efforts
- If it becomes too stiff, stop and let it rest for approximately 5 minutes before continuing. In a separate bowl, whisk together the cooled custard. Spread the custard evenly over the surface of the dough with an offset spatula once it has been allowed to cool. Brown sugar and raisins should be sprinkled on top. Start at one end of the dough and slowly roll it up until it is securely rolled. Cut the rolls into 12 equal-sized slices and lay them in the baking dish. Place the baking dish in a warm area to rise for 30 minutes or until the rolls are puffy and when softly touched with a finger, an indentation that springs back slightly can be seen on the surface. This should take 45 minutes to an hour, depending on the temperature of your kitchen
- However, the time will vary. Meanwhile, preheat the oven to 350 degrees Fahrenheit / 180 degrees Celsius
- Bake the rolls for 30 to 35 minutes, or until the bread is cooked through and the top is golden. (internal temperature 200 degrees Fahrenheit) If the buns appear to be browning too rapidly after 20 minutes, tent them with aluminum foil. After 30 minutes, check to see if the food is ready. Remove the baking sheet from the oven and set it aside for 10 minutes. While the cookies are cooling, make the frosting by whisking together the powdered sugar, vanilla, and 3 tablespoons of milk in a medium-sized mixing bowl, adding additional milk a teaspoon at a time until you achieve the appropriate consistency. While the buns are still warm, use an offset spatula to spread the glaze over them. Warm or at room temperature are both acceptable serving temperatures. Leftovers are best consumed the day of or the day after baking
- Otherwise, they will go bad.
Notes
The brown sugar in the filling is entirely optional; you may omit it if you like your cookies to be a bit less sweet overall. London chelsea buns, custard bun, new zealand chelsea bun, icing, glaze are some of the terms that come to mind.
Cottage Country Style Chelsea Buns
These sticky Chelsea Buns are a cottage country classic, and they are delicious! This popular Muskoka cottage area recipe is turned into a delightful pull-apart loaf that is also quick and easy to prepare. Chelsea Buns are available in two varieties. There’s the traditional British variety, which consists of sweet rolls with a light sugary glaze and currants strewn across the top and sides. I’m sure they’re delicious, but they aren’t the same as the Chelsea buns I’m used to.
Small bakeries and farmer’s markets all around cottage country in the central Ontario districts of Muskoka, Haliburton, and Kawartha Lakes will have these extra sticky Chelsea Buns on their menus during the summer months. Go to the following page:
- Notes on the ingredients
- Step-by-step photos
- Cook’s notes
- Recipe
- Comments, questions, and reviews
Ingredient Notes
Notes on the ingredients; step-by-step photos; cook’s notes; recipe; comments, questions, and reviews.
Step-by-Step Photos
The following is a pictorial breakdown of some of the stages involved in making these Chelsea Buns. Always refer to the Recipe Card for the most up-to-date and full directions. The sticky topping for these simple Chelsea Buns is made with part of the brown sugar/butter/cinnamon filling mixture left over from the filling. Put some in your loaf pan and mix with a couple of tablespoons of water to make a delicious treat. In addition, you’ll want to put your cherries and pecans in the bottom of the loaf pan before baking it.
Using a measuring tape will assist to ensure that your buns are all the same size at the conclusion of your baking session.
Measure and mark out your dough, then cut it into 8 equal slices (typically approximately 1 1/2 inches wide-ish) with a sharp knife.
Take a look at my circular loaf Muskoka Chelsea Bunsas, which are produced with standard Active Dry yeast and taste delicious.
Cook’s Notes
- A visual breakdown of some of the stages involved in making these Chelsea Buns is provided below the video. Keep the Recipe Card below as a reference for the most up-to-date instructions. The sticky topping for these simple Chelsea Buns is made with leftover brown sugar, butter, and cinnamon filling combination. Using a couple of teaspoons of water, just pour some into a loaf pan and combine. To the bottom of the loaf pan, you’ll also put your cherries and pecans. Inversion will occur after baking, and the cherries and pecans will finish up on top of your loaf, while the sticky mixture will convert into syrup and soak your buns in sticky sweetness. In order to ensure that all of your buns are the same size, a measuring tape may be quite helpful. I like to clip approximately 1/2-inch off both ends of the rolled log of dough because it is generally thin and has little filling to begin with. Measure and mark out the dough, then cut it into 8 equal slices (typically approximately 1 1/2 inches wide-ish) using a sharp knife. Admire Chelsea Buns? We do too. Consider my circular loaf Muskoka Chelsea Buns, which are prepared with standard Active Dry yeast and are a great example of this.
Recipe
- These sticky Chelsea Buns are a cottage country classic, and they are delicious! This popular Muskoka cottage area recipe is turned into a delightful pull-apart loaf that is also quick and easy to prepare
- Preparation time: 20 minutes Cooking Time: 35 minutes Time to get up: 50 minutes Time allotted: 1hr45mins
- 2 1/2 cups all-purpose flour, plus more flour as needed 1/4 cup white granulated sugar
- 1 teaspoon fine salt
- 2 1/4 teaspoon fast or rapid-rise yeast (*see Note below for instructions for using instant or active dry yeast)
- 1/4 cup melted butter 1/2 cup water, 1/4 cup whole milk, 2 tablespoons butter, 1 big egg
Filling:
- 3 cups brown sugar (packed)
- 2 tspcinnamon
- 2/3 cup raisins (optional)
- 6 tablespoons butter (cold, sliced into 6 pieces)
Topping:
- In a large mixing bowl or the bowl of your stand mixer fitted with the kneading hook, combine 2 cups of all-purpose flour, the white sugar, the salt, and the quick-rise yeast until well combined. Heat the water, milk, and 2 tablespoons butter in a small saucepan or in the microwave until the mixture is barely warm to the touch (about 105F). Stir the milk mixture into the dry ingredients, then add the egg and mix until everything is thoroughly blended, scraping down the sides of the bowl as required to ensure that the flour is fully integrated. Start adding additional flour in tiny increments, mixing thoroughly after each addition before continuing. Continue to add flour until you have a wet dough that wraps around the hook of the mixer and completely cleans the bowl of the machine. Transfer the dough to a lightly floured surface and knead it for a few seconds. Form the dough into a ball, wrap it in a clean tea towel, and set it aside for 10 minutes. In the meantime, prepare the filling by mixing together the brown sugar and cinnamon in a medium-sized mixing bowl. 6 tablespoons cold butter, cut into cubes, should be added at this point. Make a crumbly mixture using your hands or a pastry blender by rubbing or cutting the butter into the brown sugar until it is evenly distributed. 1/3 cup of the brown sugar mixture should be placed in the bottom of a buttered 9-inch-by-5-inch loaf pan. Stir in 2 tablespoons water until a sauce is formed (it may be a little lumpy at first, but don’t worry about it). There are butter lumps in the mixture, and they will melt). In a 9 × 14-inch rectangle, arrange the halved cherries and pecans (good side down) on top of the sauce. Let the dough rest for 10 minutes before rolling it out. Spread the remaining brown sugar/cinnamon mixture equally over the dough, and then sprinkle the raisins on top, if using, to finish off the look. Starting with the long side, roll the dough up jelly roll style, being careful not to strain or stretch the dough too much as you roll (aim for a soft push instead of pulling or stretching). When the dough spirals are baked, this stops them from bursting upwards during the baking process). Using your fingers, pinch the seam together and set it seam side down on a cutting board. (*I prefer to take 1/2-inch off each end and then measure the leftover dough, divide by 8, and then delicately mark the dough with the edge of a knife to make 8 uniform slices.) Alternatively, you could wing it, although it never works out well for me when I do so. The slices will be around 1 1/2 inches broad at the widest point. Place the slices in the pan with the cut side facing up. Wrap the pan tightly in plastic wrap and set it aside in a warm location for approximately 40 minutes, or until the dough has doubled in size. Preheat the oven to 350 degrees Fahrenheit. Once the rolls have doubled in size, place a loaf pan on top of a baking sheet (to catch any bubble-overs) and bake for approximately 35 minutes. Examine at the 30 minute mark and cover lightly with aluminum foil if the top is in risk of becoming too brown. Remove the baking sheet from the oven. Allow for a 5-minute resting period in the pan. Cut around the sides with a knife, then invert onto a cooling rack with a piece of parchment paper on top to catch any syrup that may have escaped. Allow the dough to cool almost entirely before taking out the first piece (I know it’s difficult to resist, but remember you can always warm it back up with a few seconds in the microwave later)
- To avoid a gummy dough, allow the dough to cool almost fully before pulling off the first piece.
- When using only active dry yeast or ordinary instant yeast, simply lengthen the initial rise to 30-45 minutes, or until the dough has doubled in size, and then repeat the process. When using active dry yeast, you will need to prove the yeast in water in order for it to become active. Make a proofing bath with 1/4 cup lukewarm water and reduce the amount of water in the recipe (which is added to the milk) to 1/4 cup. Making a round of pull apart buns instead of 8 individual buns is possible by cutting the dough into 12 slices instead of 8 and laying it in a 9-inch round cake pan. These buns keep well in the freezer! Make sure to read the Ingredient and Cook’s Notes sections above the recipe card for further information on how to prepare this dish. Calories:397kcal Carbohydrates:65g Protein:7g Fat:13g 8 g of saturated fat Cholesterol:54mg Sodium:414mg Potassium:129mg Fiber:2g Sugar:33g 396 International Units of Vitamin A Calcium:48mg Iron:2mg Nutritional information is supplied solely for the purpose of general instruction and should not be used to make personal health-related choices. Course SnackCuisineCanadian
- JOIN OUR MAILING LIST FOR UPDATES! Meet the Author (Meet the Author) Hi! I’m Jennifer, and I’ve been a home cook for more than 30 years. I’ve learnt a lot in the course of putting supper on the table for so many years! I aim to share some of what I’ve learned, as well as some of my favorite recipes, in this blog! Most importantly, I appreciate demonstrating to others that cooking at home can be simple and pleasurable by creating recipes that are simple, tasty, and seasonally inspired. More information about me may be found here. Seasons & Suppers considers it an honor to have been included on these outstanding websites. Have you tried this recipe? Please tell me about it in the comments section below! Receiving input on a dish from someone who has tried it is always beneficial to other cooks:) You are not required to provide your complete name, and your email address will never be made public.
Reader Interactions
Chelsea buns are soft, spicy rolls filled with butter, raisins, and currants, which are folded into the centre and coated with a sweet and sticky glaze before being served. They are quite tasty, especially when served with a cup of tea! Those who enjoy British baking will adore this recipe for Chelsea buns, which is simple to make and delicious to eat. Because I am an Amazon Associate, I receive money when people make eligible purchases. It’s very simple to prepare if you use a bread machine or a stand mixer, but you can also make it by hand without putting in a lot of effort.
Is a Chelsea bun the same as a cinnamon roll?
No, Chelsea buns and cinnamon rolls are not the same thing; don’t let anyone fool you into thinking they are. A Chelsea bun and a cinnamon roll may look similar, but there are several differences between them that must be noted.
- Chelsea buns have dried fruit (such as golden raisins and currants) in the centre, whereas cinnamon rolls do not
- Cinnamon rolls are prepared only of cinnamon, whereas Chelsea buns are created with a mixture of spices. With addition to glazed Chelsea buns and cinnamon rolls, both are iced or coated in icing. Compared to Chelsea buns, cinnamon rolls are significantly sweeter, both in the dough as well as in the icing.
If you’d prefer to make cinnamon rolls instead, you can find my recipe for smooth and fluffy cinnamon rolls here. Once again, this is a fantastic recipe from one of my favorite cookbooks, and I am confident that you will be as thrilled with the results as I am with each batch of yeast buns that you bake. They are light, fluffy, and completely delectable, exactly like my cinnamon rolls, and they go perfectly with a cup of tea or coffee (I would suggest tea). In case you’re interested in learning more about the history of Chelsea buns, which originated in London (at the Chelsea Bun House) around the end of the 17th century, you can check out The Londonist’s article.
Keep in mind that you may roll the dough thinner and end up with more “rings,” which will result in a product that is less light and fluffy than these, but I believe that is how they are traditionally produced in England if you’re trying for a more genuine appearance.
Chelsea Buns Recipe
Buns are made using a recipe taken from The Bread and Bread Machine Bible. DOWNLOAD THE COMPLETE PRINTABLE RECIPE BELOW.
Make the Dough
Please select the appropriate steps from the list below depending on whether you want to use a bread machine, a stand mixer, or create the dough from scratch.
-In a Bread Machine
Place the milk and egg in the bread machine container, followed by the flour, salt, sugar, and butter. Bake for 20 minutes. Make a well in the center and put the yeast in the center of it. Set the machine to the “dough” cycle and press “start.” Allow the dough to rise until it is double the size it was when it first started the cycle, then set it aside. Continue to the Make the Filling step further down the page.
-In a Stand Mixer
Add the yeast to the milk and let it sit for a few minutes to activate the yeast. In a separate bowl, whisk together the egg and milk. In a large mixing bowl, combine the flour, salt, sugar, and butter. Slowly pour in the liquid. Turn on the mixer with the dough hook attachment until a smooth dough is created. Cover with plastic wrap and allow to double in size (at room temperature, or in a barely warm oven). Continue to the Make the Filling step further down the page.
-By Hand
Follow the same steps as for the Stand Mixer, but use a Danish dough whisk or a spatula to combine all of the ingredients until they form a sticky dough, rather than the Stand Mixer. Place the dough on a floured surface or counter and knead it until it is smooth and elastic. Place in a floured basin, cover, and allow to rise until doubled in size at room temperature or in a gently heated oven for about an hour.
Make the Filling
While the dough is rising, add all of the ingredients for the filling, except for the butter, in a medium-sized mixing basin and whisk well to blend the ingredients.
Roll Out the Dough and Fill the Chelsea Buns
Gently knead the dough, then roll it out into a 12′′ by 18′′ rectangle. Melted butter should be used to brush on the surface. Spread the filling over the greased dough in an equal layer. Begin rolling the dough up from the longest end of the sheet. When the dough is completely rolled, place it seam side down on a cutting board and cut it into 9 equal slices using a sharp knife. They should have the appearance of this. Place each slice into a 9′′ (23 cm) square baking pan that has been buttered.
Proof and Bake the Buns
Before putting the buns in the oven to prove. Afterwards, let it to rise. Don’t overproof the buns or they won’t come out nicely; this recipe is great for that. When they are ready to bake, they will look like this when they are in the pan. Remove from the oven and set in the centre of a preheated 400 F degree (200 C) oven for 15 to 20 minutes, or until the top is golden brown and the bread is well risen.
Make the Glaze
After you have removed the pan from the oven, you may begin to prepare the glazing.
Glaze the Chelsea Buns and Serve
While the buns are still warm, use a pastry brush to liberally glaze them while they are still in the pan. Allow time for cooling. Turn the dish out onto a board and then serve it. With a cup of tea or coffee, you will undoubtedly get more enjoyment out of them.
Please let me know if you are able to limit yourself to just one, because I am not! They have the potential to be a little too addicting! Wishing you the best of luck! Don’t miss out on another dish by subscribing to my free newsletter today!
Ingredients
- 4 cups (500 g) bread or all-purpose flour
- 1/2 teaspoon salt
- 5 tablespoons sugar
- 2 oz (50 g) excellent quality butter, melted
- 1 teaspoon dry yeast (rapid-rise or standard)
- 8 oz (225 ml) milk (buttermilk can be used)
- 1 beaten egg
Filling
- 1-1/2 cup (100 g) golden raisins (Sultanas)
- 1/2-cup (100 g) raisins
- 1/4-cup (50 g) Zante currants
- 2 tablespoons soft, light brown sugar
- 1 teaspoon mixed spice
- 1 cup (100 g) raisins
- 1 ounce (25 g) melted butter
Glaze
Oven temperature: 400 degrees Fahrenheit (200 degrees Celsius).
Make the Dough
According to whether you want to create the dough in a bread machine, stand mixer, or with your hands, please select one of the ways below.
– In a Bread Machine
- Place the milk and egg in the bread machine container, followed by the flour, salt, sugar, and butter
- Process until the bread is done. Make a well in the center and put the yeast in the center of it. Preparing the dough cycle on the machine is the first step. Allow the dough to rise until it is double the size it was when it first started the cycle, then set it aside. Continue to the Make the Filling step below
- Otherwise, stop here.
– In a Stand Mixer
- Add the yeast to the milk and let it sit for a few minutes to activate the yeast. Combine flour, salt, sugar, and butter in a mixing bowl
- Then add the liquid mixture and stir until well combined. Turn on the mixer with the dough hook attachment until a smooth dough is produced
- Cover with plastic wrap and allow to double in size (at room temperature, or in a barely warm oven). Continue to the Make the Filling step below
- Otherwise, stop here.
– By Hand
- Follow the steps outlined above for the Stand Mixer, but use a Danish dough whisk or spatula to combine all of the ingredients until they create a sticky dough. Place the dough on a floured surface or counter and knead it until it is smooth and elastic
- Place in a floured basin, cover, and allow it rise until doubled in size at room temperature or in a gently heated oven
Make the Filling
- Then, using a Danish dough whisk or a spatula, combine all of the ingredients until it forms a sticky dough, using the same recommendations as for the Stand Mixer above. Make a smooth dough by placing the ingredients on a floured board or counter and kneading until they are smooth. In a floured basin, cover and leave to rise until doubled in size at room temperature or in a gently heated oven for about an hour
Roll Out the Dough and Fill the Chelsea Buns
- Gently knead the dough, then roll it out into a rectangle about 12″ by 18″. Apply a thin layer of melted butter
- Spread the filling over the greased dough in an equal layer. Beginning at the longest end, begin rolling up the dough. When the dough has been smoothed out completely, place it seam side down and cut it into 9 equal slices using a sharp knife
- Place each slice onto a 9″ (23 cm) square baking pan that has been buttered
Proof and Bake the Buns
- Overproofing the buns will result in a less than satisfactory result. When they’re ready to bake, they’ll look somewhat like this in the pan
- Place the loaf in the centre of a preheated oven and bake for 15 to 20 minutes, or until golden brown and fully risen
- Remove from the oven and set aside.
Make the Glaze
- To prepare the glaze, start by removing the baking pan from the oven. Simmer the sugar and water for about 2 minutes, until the sugar dissolves. If you cook it for an extended period of time, it will become overly sticky.
Glaze the Chelsea Buns and Serve
- While the buns are still warm, use a pastry brush to liberally glaze them while they are still in the pan. Allow to cool until it is only slightly warm
- Turn the dish out onto a board and serve it.
Notes
If you overproof the dough either time, the buns will not turn out as well as they should or taste as bad as they should. Keep an eye on that dough, okay? Christina’s Cucina is a participant in the Amazon Services LLC Associates Program, an affiliate advertising program designed to provide a means for sites to earn advertising fees by advertising and linking to Amazon.com. Christina’s Cucina is a participant in the Amazon Services LLC Associates Program, an affiliate advertising program designed to provide a means for sites to earn advertising fees by advertising and linking to Amazon.com.
Chelsea Buns
According to the most recent information released Chelsea Buns are your festive, colorful cinnamon buns, along with all of the delectable toppings such as raisins, walnuts, and cherries, among others. Recipe may be printed by clicking here. Baking bread used to be a source of anxiety and intimidation for me. An issue that requires special attention, a great deal of caution, and a great deal of attentiveness. Baking bread, on the other hand, has become a lovely companion, much like making a new acquaintance and transitioning from an awkward stage of a relationship to a more relaxed and familiar one.
- It’s the type of relationship where I make errors and make blunders.
- Since then, I’ve approached bread-making with less rigor and with a more laid-back attitude toward the process.
- And, like with any friendship, all that is required is that you feel the dough and become one with it.
- These little treats are a delicious and festive twist on the traditional cinnamon roll.
- Whatever it is, it is everything from ordinary and uninteresting.
How to Make Chelsea Buns
One of my favorite dough recipes is this one, which I’ll share with you. It is straightforward, and it is actually an excellent place to begin if you want to learn about and experience dealing with dough.
- In a large mixing basin, whisk together the all-purpose flour, salt, sugar, and active dry yeast until well combined. Leave to one side
- In a microwave-safe dish, heat the milk and butter until the butter melts, about 30 seconds. Combine the ingredients and heat until the temperature reaches 105-115 degrees Fahrenheit. In a large mixing basin, combine the dry ingredients with the butter mixture until well combined. Stir the ingredients together with a wooden spoon. Continue to whisk in the egg until it is well incorporated. At this point, the dough is rather sticky. While stirring, sprinkle a little flour from the reserved 1/2 cup to help with the stickiness of the dough. Continue stirring just until the dough collects in the middle of the basin, about 30 seconds. It’s possible that you won’t need the full 1/2 cup. All that is required is for the dough to collect into a ball while it is still soft and wet.
- Make a little dusting of the remaining flour on your work surface. Rotate and knead the dough for an additional 8 to 12 minutes or until the dough is smooth and has lost a lot of its stickiness. If you follow the directions, you will end up with a dough that is somewhat sticky and stretchy.
How to Knead?
To flatten the dough, use the heels of your palms to push it downwards and away from you, as if you were attempting to flatten it. Fold it over itself and repeat the pressing process a second time, and then fold it one more.
Repetition of the procedure is required. If required, sprinkle a small amount of flour into the dough while you knead it to assist with the stickiness. In order for the dough to be smooth and only slightly sticky, it must be kneaded for a long time.
- Take a tiny amount out to see how it works. Make a tiny square out of the dough by spreading it apart with your fingertips. As you stretch the dough, a transparent film will form in the middle before the dough tears
- This will happen before the dough tears. Form the dough into a ball using your hands. Allow it to rest in a covered dish for 10 minutes before serving.
- Prepare the topping while the dough is resting. Combine the brown sugar, softened butter, and cinnamon in a large mixing bowl until the mixture becomes a thick paste. Half of this mixture should be spread on a 9-inch circular baking sheet
- The remaining half should be topped with cherries all over the surface. Half of the pecans should be distributed equally
- Then, once the dough has rested for a few minutes, gently punch it down and shape it out into a 14 by 8 inch rectangle using a rolling pin
- Spread the remaining brown sugar paste over the dough and sprinkle with the raisins and leftover nuts to finish it off.
- Making a tight log out of the dough, begin by rolling it up one long edge of the rectangle. Cut the log into 11 or 12 pieces using a knife, depending on its size. Place each part, cut side down, on the baking sheet that has been prepared. Allowing the rolls to rise is as follows: Preheat the oven to 200 degrees Fahrenheit. Once the desired temperature has been reached, switch off the oven and carefully set the baking pan in it. Allow the rolls to rise for 60 minutes, or until they have more than doubled in size.
- Remove the risen rolls from the oven and preheat the oven to 350 degrees. The rolls should be baked for 14-18 minutes at 350 degrees Fahrenheit, or until the tops are gently brown. Set aside until they are cold enough to handle, then turn the rolls over onto a serving platter to display the beautiful top
And here it is, at long last! The combination of sweet brown sugar and butter is just nirvana for me. Each bun is a three-in-one delicacy that includes sweetness, decadence, and crunch. All of the unique elements are wrapped together and baked into a soft, delectable loaf of bread. You should give it a go. Next week, I’ll be back with another delectable bread recipe for you to try. Make these incredibly scrumptious Chelsea Buns while you’re waiting. Do you enjoy making bread? Take a look at these:
- Sweet Cheese Rolls
- Japanese Milk Buns
- Coconut Bread
- Coconut Buns with a Milky Sweet Filling
- Austrian Buchteln
- Chocolate Brioche
- Cream Cheese Brioche
- Chocolate Walnut Bread
- Sweet Cheese Rolls
Chelsea Buns
Chelsea Buns are your festive, colorful cinnamon buns, along with all of the delectable toppings such as raisins, walnuts, and cherries, among others. Preparation time: 20 minutes 15 minutes to prepare Dough rise times are measured in minutes. 1hour Time allotted: 35 minutes Servings12bunsCalories320kcal Authorsanna
For the Bread Dough
- This recipe makes beautiful, colorful cinnamon buns with all of the delicious toppings, such as raisins, chopped nuts, and cherries. 20 minutes for preparation Approximately 15 minutes of preparation time The dough’s rise periods are measured in minutes. 1hour 35 minutes total time Servings12bunsCalories320kcal Authorsanna
Filling and Topping
- 1 cup brown sugar, 1/2 cup melted butter, 1/2 teaspoon cinnamon, 1/4 cup cherries, 1/3 cup raisins, 1/4 cup chopped pecans
Make the BreadDough
- In a large mixing basin, whisk together 2 and 1/4 cup all-purpose flour, sugar, salt, and yeast until well combined and foamy. Make a mental note to put it away. In a medium-sized microwave-safe mixing bowl, whisk together the milk, butter, and water. Heat this butter combination in the microwave for a few seconds, just until the it is completely melted. Check the temperature and stir again. It should be between 105 and 115 degrees Fahrenheit. If necessary, reheat the dish. In a large mixing basin, combine the dry ingredients with the milk mixture. To combine the ingredients, use a wooden spoon to gently whisk them together until the dry ingredients are wet. Toss in the egg. To combat the stickiness, gently sprinkle part of the leftover 1/2 cup of flour over the mixture while continuing to stir thoroughly. Once a soft dough has formed and gathered in the center, stop adding flour to the dough mixture. It is possible that you will not use the full 1/2 cup of flour
- Turn the dough out onto a floured, clean surface. Knead the dough for 8-12 minutes, or until it is smooth and able to be stretched thinly. Allow it to rest in a covered dish for 10 minutes
Make the Topping/ Filling
- Combine brown sugar, softened butter, and cinnamon in a mixing bowl until the mixture forms a smooth paste. Half of this mixture should be spread on a 9-inch circular baking sheet. The cherries should be sprinkled on top of the mixture, arranged equally over the surface. Half of the nuts should be sprinkled on top. Remove the pan from the oven and gently press down the dough before rolling it out into a 14 x 8 inch rectangle. Spread the leftover brown sugar paste on top of the dough to seal it in. Sprinkle the raisins and pecans over the top of the cake in an equal layer. Start at one end of the rectangle and roll the dough into a tight log starting at the other end of the rectangle. Make 11 or 12 equal sections out of the logs, and put each chunk, cut side down, on top of the topping in the baking pan. They should be spaced evenly apart. Preheat the oven to 200 degrees Fahrenheit. The oven should be turned off after the desired temperature has been attained. Place the baking pan with the rolls in the oven and let it to rise for 60 minutes there. Remove the rolls from the oven and preheat the oven to 350 degrees. Bake the raised rolls for 14-18 minutes, or until the tops are golden brown, depending on how large they are. Allow the rolls to cool slightly before turning them over on a serving tray to reveal the toppings. Serve
The dough recipe was adapted from Sally’s Baking Addiction.Nutrition FactsChelsea BunsAmount Per Serving(1 bun)Calories320Calories from Fat 117 percent Daily Value*Fat13g20 percent Saturated Fat 7g44 percent Cholesterol43mg14 percent Sodium302mg13 percent Potassium123mg4 percent Carbohydrates47g16 percent Fiber 1g4 percent Sugar 21g23 percent Protein4g8 percent Please provide a link to your Instagram account; I would love to see your work!